봇에 Microsoft Teams 채널을 추가하려면, Microsoft Teams와 Kore.ai 간 연결을 설정하기 위한 Microsoft Bot Framework에 봇을 생성해야 합니다. Microsoft Teams 채널을 봇에 추가하려면 다음 단계를 따르세요.
- Register the Bot – 모든 봇 세부 정보를 추가하고 앱 ID 및 암호를 추가하여 Microsoft 봇 프레임워크에 봇을 생성해야 합니다 봇을 등록하려면, Microsoft Bot Framework 개발자 포털에서 무료 계정을 생성하고 등록해야 합니다.
- Enable Channel– 봇을 등록한 후, 채널을 활성화합니다.
- Publish Channel – 채널이 활성화되고 모든 설정이 검증된 후, 봇을 선택적으로 게시하여 개발자가 사용할 수 있도록 합니다.
Register the Bot with Microsoft Teams channel
To set up Microsoft Teams as a channel, you must register a Bot Channel service in Azure and enable a webhook for the platform to receive messages.
You need an active subscription to Azure services with admin access to subscribe for a new Azure service.
Register a Bot Channel
- Log in to the Microsoft Bot Framework portal.
- On the portal menu, click + New.
- Search and select Bot Channels Registration from the search window.
- Click Create and proceed to the next screen to enter the details.
- Enter all the required details to register the bot channel.
- From the Bot Builder platform, copy the Webhook URL from the Configurations tab of the Channel page for Microsoft Teams and provide it in the Messaging Endpoint field.
App Association
The Bot Channel Regsitration must be associated with a Microsoft App ID and Password. You can choose to go with the default option of Auto-create App Id and password if you want your bot to be available for multiple tenants or users outside of your Azure domain.
Note: You need to select multi tenant option for the Type of App while configuring an Azure bot. Configuration fails if single tenant is selected.
You can also choose to create your own App ID and password and define who is eligible to access your bot. Follow the instructions available here for more details.
- Click Create to complete the registration.
- After successful creation, you are redirected to the Dashboard of your Azure account.
Configure App Id and Password
From your Azure Dashboard, select the resource that you have created in the previous steps. You are redirected to the details page of the new resource that you have created.
- On the left pane, click Settings > Manage next to the Microsoft App ID field.
- Click Generate New Password to create a new password for your app.
- Make a note of the password displayed on the pop-up screen and enter it in the Configurations tab of the MS Team channel enablement page on the bots platform.
- Click Ok to go back to the previous screen.
- Make a note of the App ID and enter in the ‘Configuration’ tab of the MS Team channel enablement page on the bots platform.
- Click the Save option at the end of the page to save your changes.
Enable Microsoft Teams Channel
- On the menu, go to the Channels and select the MS Teams channel.
- You are redirected to the channel information page. Review the information and click Save to complete the channel setup.
Microsoft Teams 채널을 활성화하려면 다음 단계를 따르세요.
- 봇 빌더의 Bots 섹션에서, Microsoft Teams 채널을 추가하려는 봇을 클릭하세요.
- Channels tab,에서, Microsoft Teams 아이콘을 클릭하세요. Microsoft Teams channel 페이지가 표시됩니다.
- Microsoft Teams 채널 페이지의 Configuration 탭으로 이동하여 앱 구성을 업데이트하거나 검토하고 채널을 활성화합니다.
Microsoft Teams 채널 편집
Microsoft Teams 채널을 편집하려면 다음 단계를 따르세요.
- 채널 위로 마우스를 이동하고 클릭하여 수정합니다. 채널 구성에서 필요한 업데이트를 하고 저장합니다.
- 또한 Settings 아이콘을 클릭하여 채널 정보를 사용하지 않거나 삭제할 수도 있습니다.
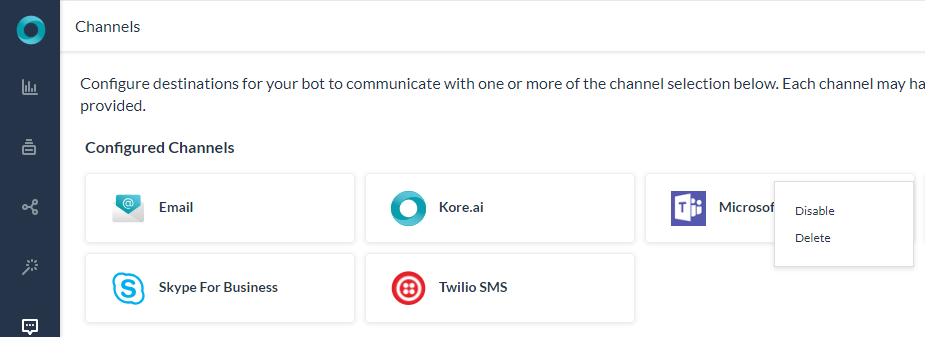 채널을 수정하려면 다음과 같은 명령 중 하나를 선택하세요.
- Disable/Enable – Disable을 클릭하여 봇의 Microsoft Teams 채널 사용을 일시적으로 비활성화하세요. Microsoft Teams 채널 사용을 활성화하려면, Enable을 클릭하세요.
- Delete– Delete를 클릭하세요. Delete Confirmation 대화 상자에서, OK을 클릭하여 봇 채널 설정을 영구적으로 삭제합니다.
On-premise Installation
In a scenario where your platform is on-premise and you want to integrate Microsoft Teams as a bot channel, if your MS teams (SaaS) is on Azure and Kore.ai platform is set up on a different cloud network like Amazon Web Services (AWS) or a physical server on-premise, you need to ensure that a communication is established between the Azure server and Kore.ai platform server. To know more guidelines, go to Using MS Teams cloud service from an on-premise installation.