For better functionality, enhanced performance, ongoing development, and for customers seeking full RAG functionality, we highly recommend upgrading to XO 11 Search AI.
The Answer from Documents feature helps answer end-user queries from unstructured PDF documents without the need to extract individual FAQs and train them. This feature leverages a large language model (LLM) and Generative AI models from OpenAI or Azure OpenAI integration to generate answers by processing uploaded documents and user queries. This is a beta feature and is available in English and non-English languages supported on the XO Platform.
Benefits
- Automatically identify and answer FAQs using PDF documents as a source of knowledge;
- Knowledge extraction and VA training are not required.
Important Considerations
- Answer generation works based on NLU 3.0 and an active integration with OpenAI or Azure OpenAI integration;
- Answer from Documents acts as a fallback when none of the three NLP engines identifies any intent (using Dialog Tasks or Knowledge AI FAQs);
- Answers are delivered using a Standard Response with the answer as a dynamic variable.
Limitations
- You can upload 10 PDF documents, each with a maximum size of 5 MB;
- Some requests may get rejected, or responses may delay based on OpenAI or Azure OpenAI service availability;
- This is a beta feature, and requests may take longer to process. We do not recommend it for production use cases as it may directly impact your customers’ experience. Our current recommendation is for VA designers to review generated answers and add them to the Knowledge Graph.
Enable Answer from Documents
To enable the Answer from Documents feature, follow these steps:
- Go to Build > Conversation Skills > Knowledge AI.
- Under Answer from Documents, click Get Started. The configure Generative AI & LLM pop-up is displayed.

- Click Enable Now. The Generative AI & LLM page is displayed.

- Configure the LLM Integration.
- To enable Answers from Documents, select the model and toggle the status to enable it.
- Once the feature has been enabled, you can begin uploading PDF documents.
Upload PDF Documents
To upload PDF documents, follow these steps:
-
- Click the Upload button that displays after enabling the Answer from Documents feature.

- Drag and drop your document or click Browse to find it on your computer.
Note: Filenames must not be longer than 10 characters. 
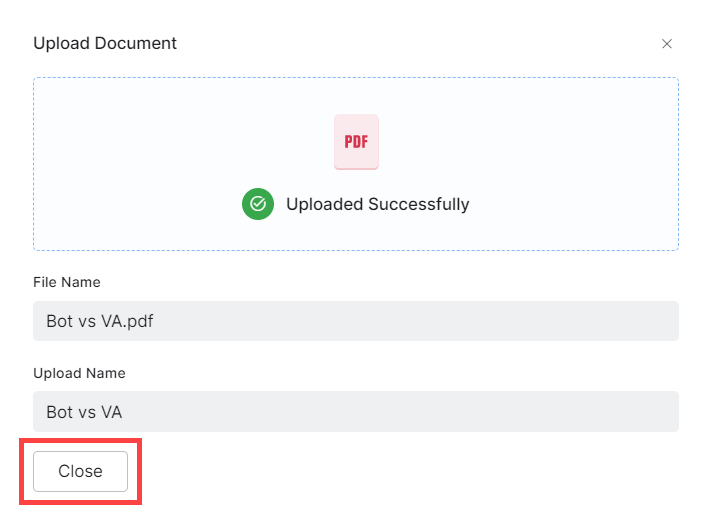
- Once selecting the document, you can update its name if required. Click Proceed when ready.
- Click the Upload button that displays after enabling the Answer from Documents feature.

-
- Please wait a few moments until your document uploads. This action may take longer than expected, depending on the file size, your connection speed, and other factors.

-
- When the upload completes successfully, close the upload window.
Uploaded documents are listed under the Answer from Documents section. 
| Note: After uploading your first document, the Upload Document option moves to the right side of the section, as shown below. You can use it to add up to 10 PDF documents. |

View Uploaded PDF Documents
To view the contents of an uploaded document, hover over it and click the corresponding View icon under Actions. 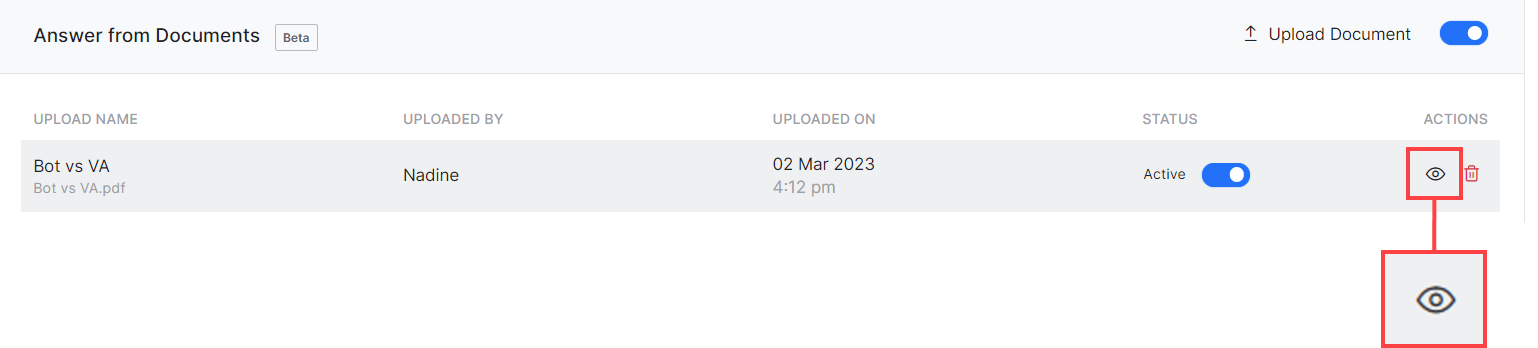 The document will open within a separate window, where you can browse each page, download, print, etc. The viewer is browser-specific. To exit the document view and return to the Knowledge AI section, click the X on the right side corner.
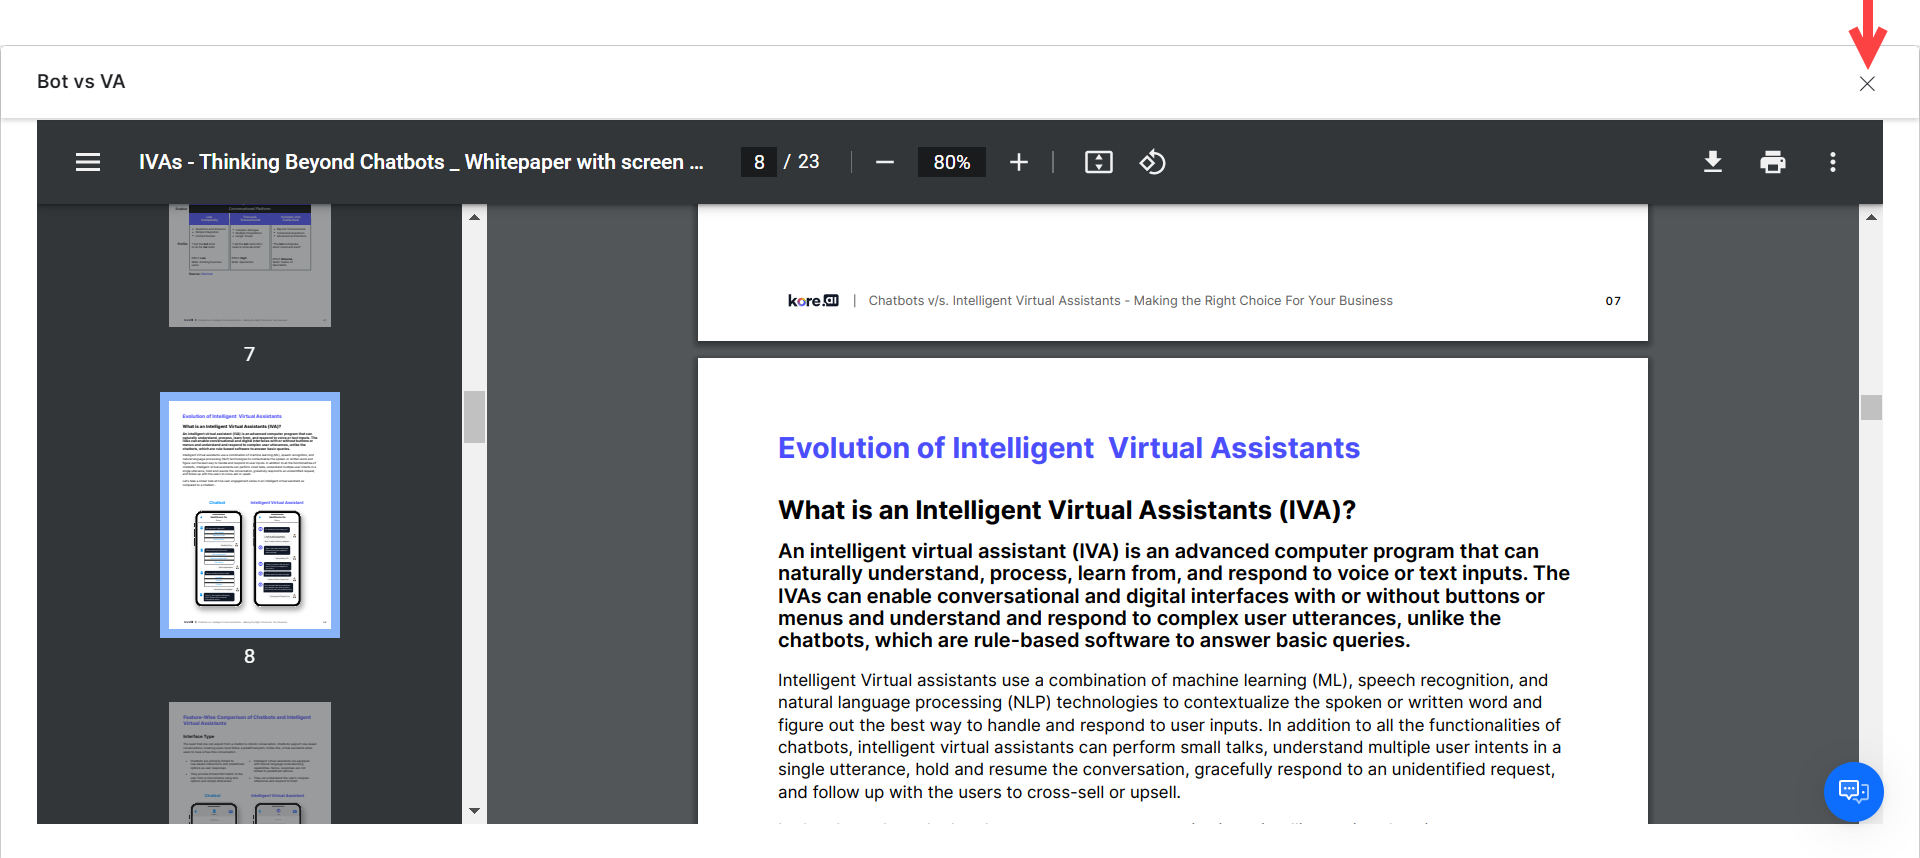
Test Answer Generation
A good testing practice for this feature is to ask the VA a question directly related to the contents of your uploaded documents. You can use the Talk to Bot feature to test the answers generated from your uploaded documents. The Debug Log within the Talk to Bot feature and NLP Insights lets you see if a response failure is due to OpenAI or Azure OpenAI timing out.
You can also run Utterance Testing to see results related to use cases where no intent is identified and the query is answered using the Answer from Documents feature.
Batch Testing and Conversation Testing do not use the Answer from Documents feature as a fallback; therefore, no related test results are available.
Disable Uploaded PDF Documents
Disabled documents are not considered by the VA when providing answers, even if the Answer From Documents feature is active overall. As such, answers are only provided from uploaded documents that are active. To disable a document, toggle the Status to Inactive. 
Delete Uploaded PDF Documents
To delete an uploaded document, hover over it and click the corresponding Delete (bin) icon under Actions. 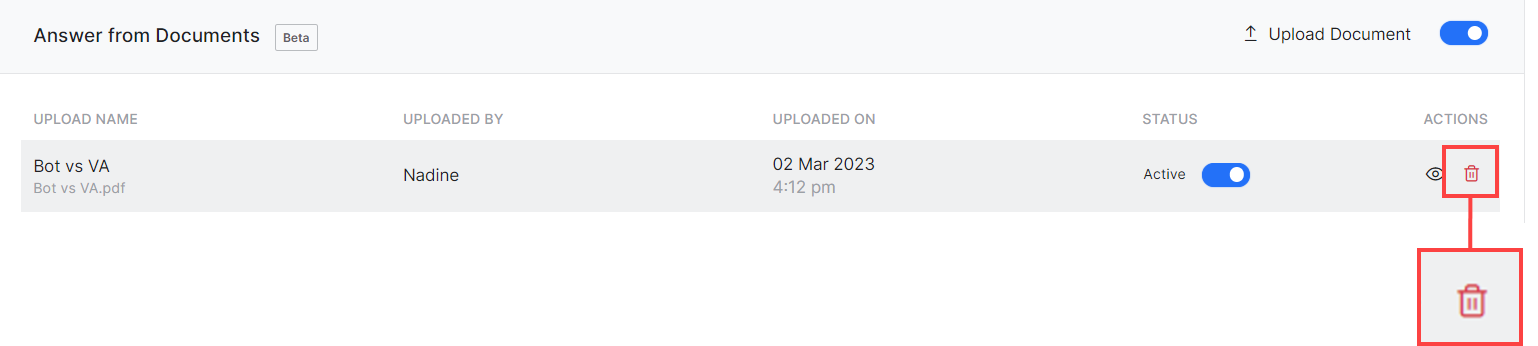 You must confirm your choice. Click OK to do so, or Cancel otherwise.

| Note that you cannot restore deleted documents. You must upload them again if you change your mind later. |
Disable Answer from Documents
If you disable Answer from Documents, queries will no longer be sent to LLMs as a fallback, but documents are stored in the database, and you can enable the feature again later.
Follow these steps:
- Navigate to Build > Natural Language > Generative AI & LLM > Dynamic Conversations.
- For Answers from Documents, toggle the status to disable it.