Prior to the Version 10.0 release, you had to add filter conditions in the ‘Filter by’ clause for individual widgets within a dashboard. There was no provision to filter the records at a dashboard level. The platform now allows you to create custom filters that filter the data for all the widgets across a custom dashboard.
You can either add or update the custom filters for the dashboard.
| Note: The date selection filter is a default filter that gets applied to all the widgets across the dashboard. |

Add Filters
To add one or more filters at the Custom Dashboard level, perform the following steps:
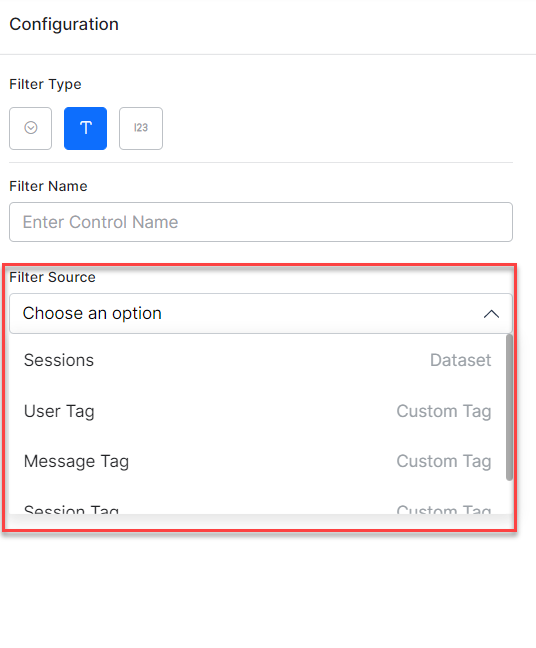
- Click the Add Filter button to go to the Configuration panel shown below.
- The Platform currently supports 3 types of filter:

| Note: Tooltips are available for all the fields in the Add Custom Filter panel except the Preview Date. Using the Preview Date, you can select a date range to display the data. |

- Drop-down list: Allows you to choose from a list of values based on the selected field name within the dataset or meta tag. You can set one or more values as a ‘default values’ for this control.
- This is an optional feature.
- The existing values of the selected field are displayed in an ascending order as suggestions. Either choose from the suggested values or add a new value.
| Note: By adding a new value, you can create filters for values that are not available for the VA. |
- Enter the Filter Name.
- Select a field from any of the following data sources in the Filter Source drop-down:
- Sessions (Dataset) – It presents all the fields captured by the platform during conversation sessions.
- User Tag (Custom Tag) – It presents the Custom user tags generated in the VA to choose from. You can also add a user tag which is not yet available in the VA.
- Message Tag (Custom Tag) – It presents the Custom message tags generated in the VA to choose from. You can also add a message tag which is not yet available in the VA.
- Session Tag (Custom Tag)– It presents the Custom session tags generated in the VA to choose from. You can also add a session tag which is not yet available in the VA.
The fields in the Sessions dataset are supported for custom filters. Messages and Analytics dataset filters are not supported.
See Datasets and Fields to understand more.
For custom filters we can use fields either from the Sessions dataset or from Message, User, or Session tags. We can add filters for the existing tags and also the tags that are not available in the VA. See Custom Meta Tags to understand more.
| Note: Based on the Filter Source, select the fields in the Field Name drop-down. In case of Custom Tags, you can select any of the existing tags or add a tag that is not available in the VA. |
- Click the button Save & Preview to save and preview the filter details.
- You can also select a Default filter to be applied to all the widgets in the entire dashboard.
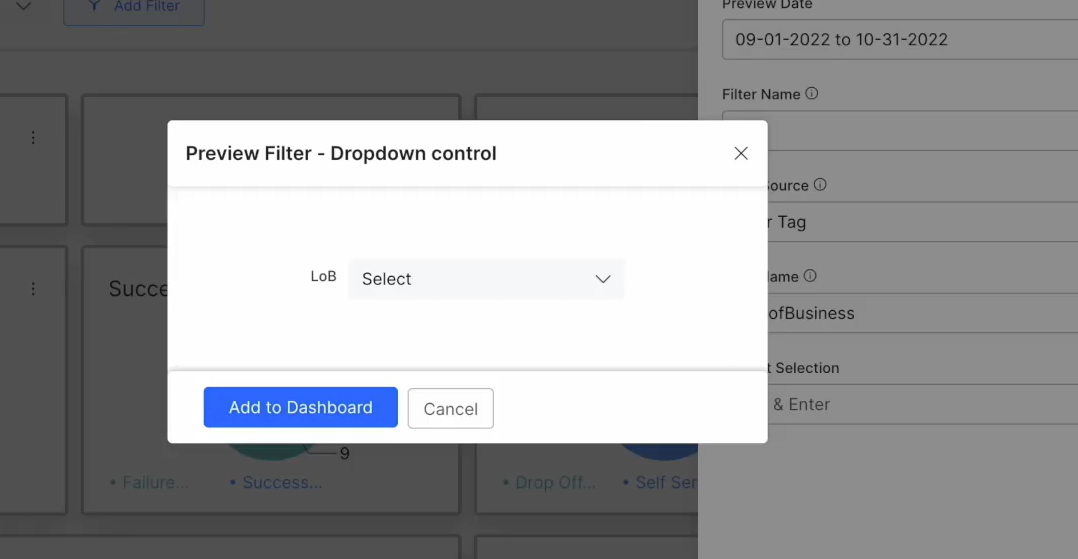
- Click the button Add to Dashboard in the preview panel to add the filter to the dashboard.
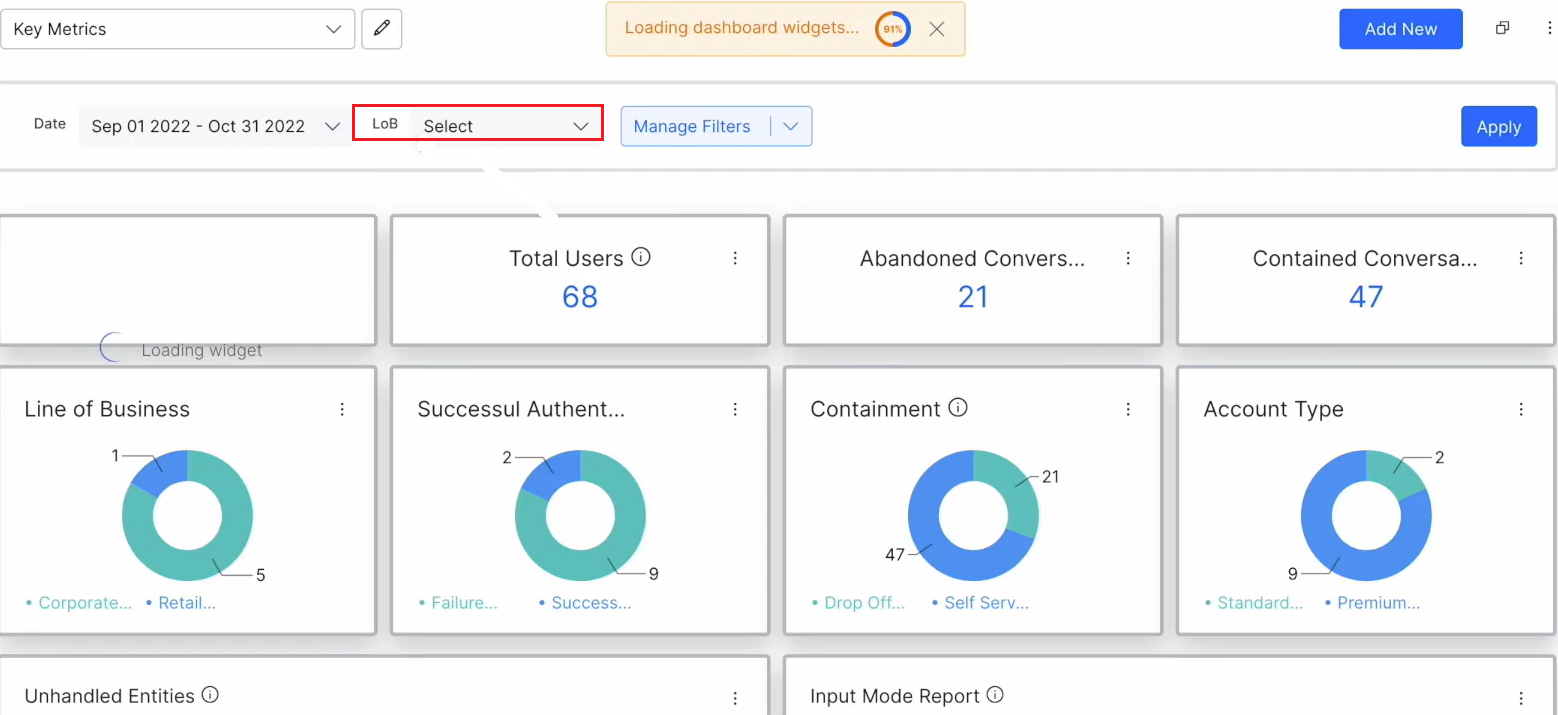
- Click the button Apply, if you want to apply the filter to the dashboard.
| Note: The default filter is added at the dashboard level (highlighted in the screenshot) and you can select the value from the LoB drop-down to apply to all the widgets. |
Manage Filters
All the filters added to the dashboard are displayed on the Custom Dashboards home page. You can edit or delete a filter added to the Custom Dashboard.
| Note: The default Date Filter cannot be edited or deleted. |
Update Filter
You can perform the following steps to update the filters of the Custom Dashboard:
- Click the Manage Filter drop-down button . The options Add Filter and Update Filter are displayed.
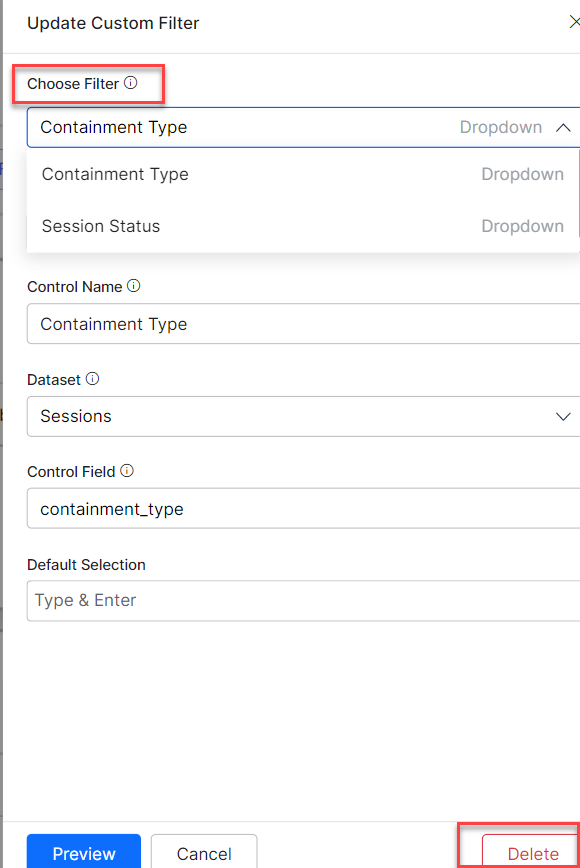
- Select the Update Filter option. The panel Update Custom Filter is displayed as shown below.
- Select a filter from the Choose Filter drop-down menu.
- Edit the details as per the requirement, in the Configuration panel.
- Click the Preview button. The Preview Filter pop-up is displayed as shown in the preceding screenshot. Select a value from the drop-down as per the requirement.
- Click the Update filter button to update the details.
- Click Proceed in the displayed pop-up to confirm the updates.


Delete Filter
You can perform the following steps to delete the filters of the Custom Dashboard:
- In the Update Custom Filter panel, select the filter to be deleted from the Choose Filter drop-down.
- Click the button Delete to delete the selected filter.
- Click Proceed in the displayed pop-up to confirm the deletion.


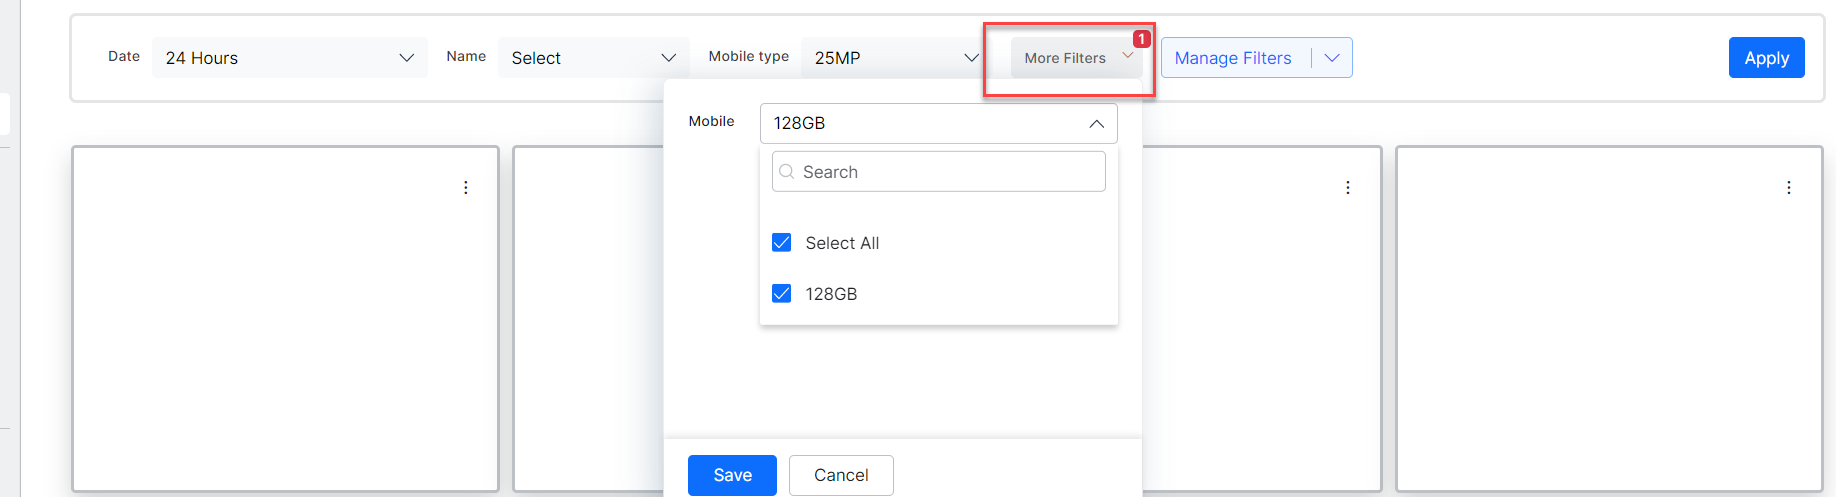
More Filters
If more than two filters are added to the dashboard, then they are displayed in the More Filters drop-down next to the first two added filters.
Filter Configurations
The following list details the filtering configurations available on the Custom Dashboard:
Set Default Value
- Whenever a Custom Dashboard is loaded or refreshed, the ‘default values’ of the dashboard level filters are applied for all the widgets in that Custom Dashboard.
- If the default value is not set, then the filter is not applied to any of the widgets in the dashboard.
- If the default value is set, the filter is applied as per the filter component type as follows:
- If the dropdown is used, all the values are selected as the default values and filtered.
- If a date range is selected, the records between the From Date and To Date, including both dates, are filtered.
- If a numeric range is selected, then the records that are between the From Value and To Value, including both the values, are filtered.
- If a text field is selected, the records that contain the exact value are filtered.
- The system dynamically appends the dashboard level filters to each of the widget’s ‘Filter’ conditions during query execution.
- If the filter is not applicable for any of the widgets, then the data for that widget is not loaded, and a message is displayed. This usually happens when the dashboard filter’s dataset differs from the dataset used to define the widget.
— If only the ‘From Date’ is selected, the records equal to or greater than the value in the ‘ From Date’ are filtered.
— If only the ‘To Date’ is selected, the records less than or equal to the value in the ‘To Date’ are filtered.
— If only the ‘From Value’ is selected, the records equal to or greater than that value are filtered.
— If only the ‘To Value’ is selected, the records less than or equal to that value are filtered.

| Note: As per the settings in the Kore config, the maximum number of allowed Dashboard level filters is 5. |