The Dialogflow engine is responsible for understanding user inputs and providing relevant responses based on pre-defined intents and entities. It uses natural language processing (NLP) and machine learning algorithms to identify the user’s intent and extract relevant information from their inputs. It also enables developers to build complex conversational flows, manage context, and integrate with external APIs. To use the Dialogflow engine for Natural Language Understanding, you need to create the agent and train the model on Dialogflow if you don’t have one already. The following sections detail the agent creation and training steps and also explain how to obtain the information needed to configure the Dialogflow ES Adapter. Once all the configurations are done, you can start testing the conversation behavior/flow of the bot using your Dialogflow ES model.
Train the Dialogflow Engine
Dialogflow ES NLU is one of the external NLU adapters. If you want to configure the Dialogflow ES adapter, you need the Project ID and private key obtained from the JSON file in the google cloud console. See Enable the Dialogflow API and Create Service Account Credentials to understand how to obtain the Project ID and the Private Key. These sections explain training and usage of the Dialogflow NLU engine.
Prerequisites: You need to have at least one agent created on the Dialogflow Essentials page, to be able to configure the intent, entity nodes, or FAQs.
To enable intent and entity detection using the Dialogflow engine during a user conversation, you need to create the intents and entities on the Dialogflow Essentials cloud page with the same names used during their creation on Kore.ai XO Platform.
The following steps explain how to create an agent, intent and test the configuration.
-
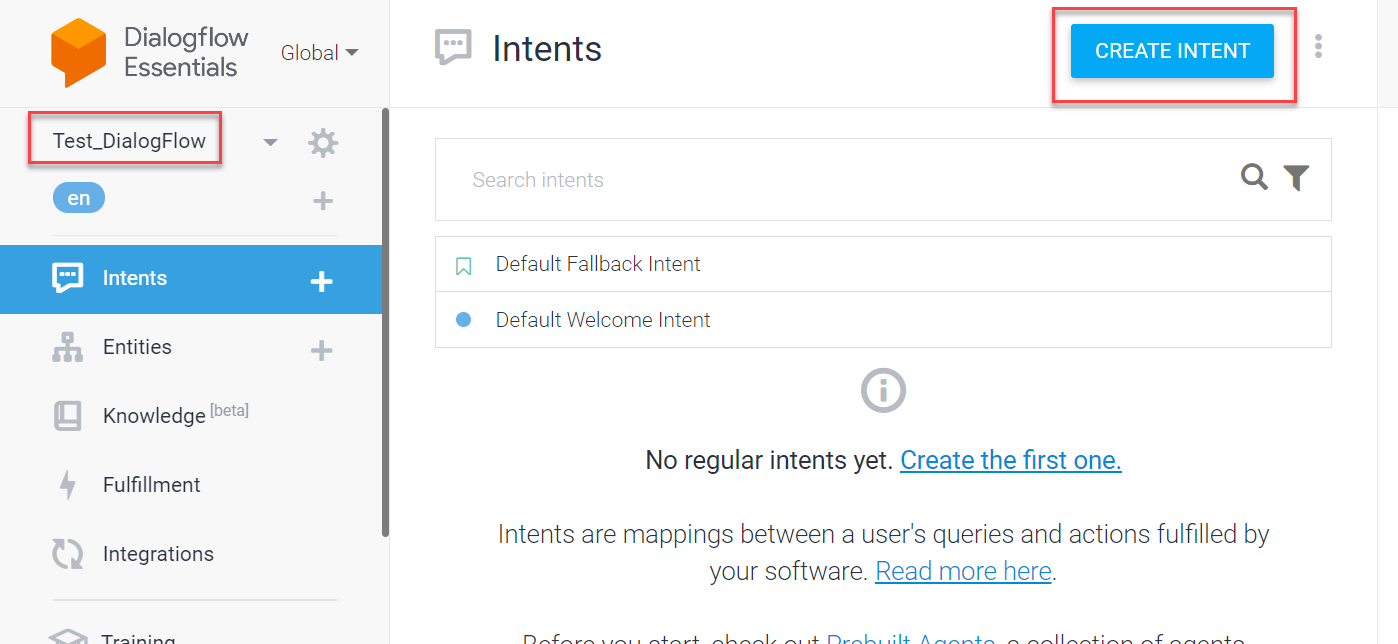
- Go to Dialogflow Essentials and click Create Agent, if you don’t have any available agent. In this example an agent with the name Test_Dialogflow is created.
-
- Click Create Intent to create an intent with the same name as in your VA.

-
- In this example an intent with name Phone Number Verification is created as we have the same user intent in the VA.
- Under Action and Parameters, add Action as per the name of the entity. Add the Parameter Name, Entity, Value and the Prompt details.

-
- Under Responses → Default, add the Text Response to be displayed for the user.

-
- Click Save to save the configuration.
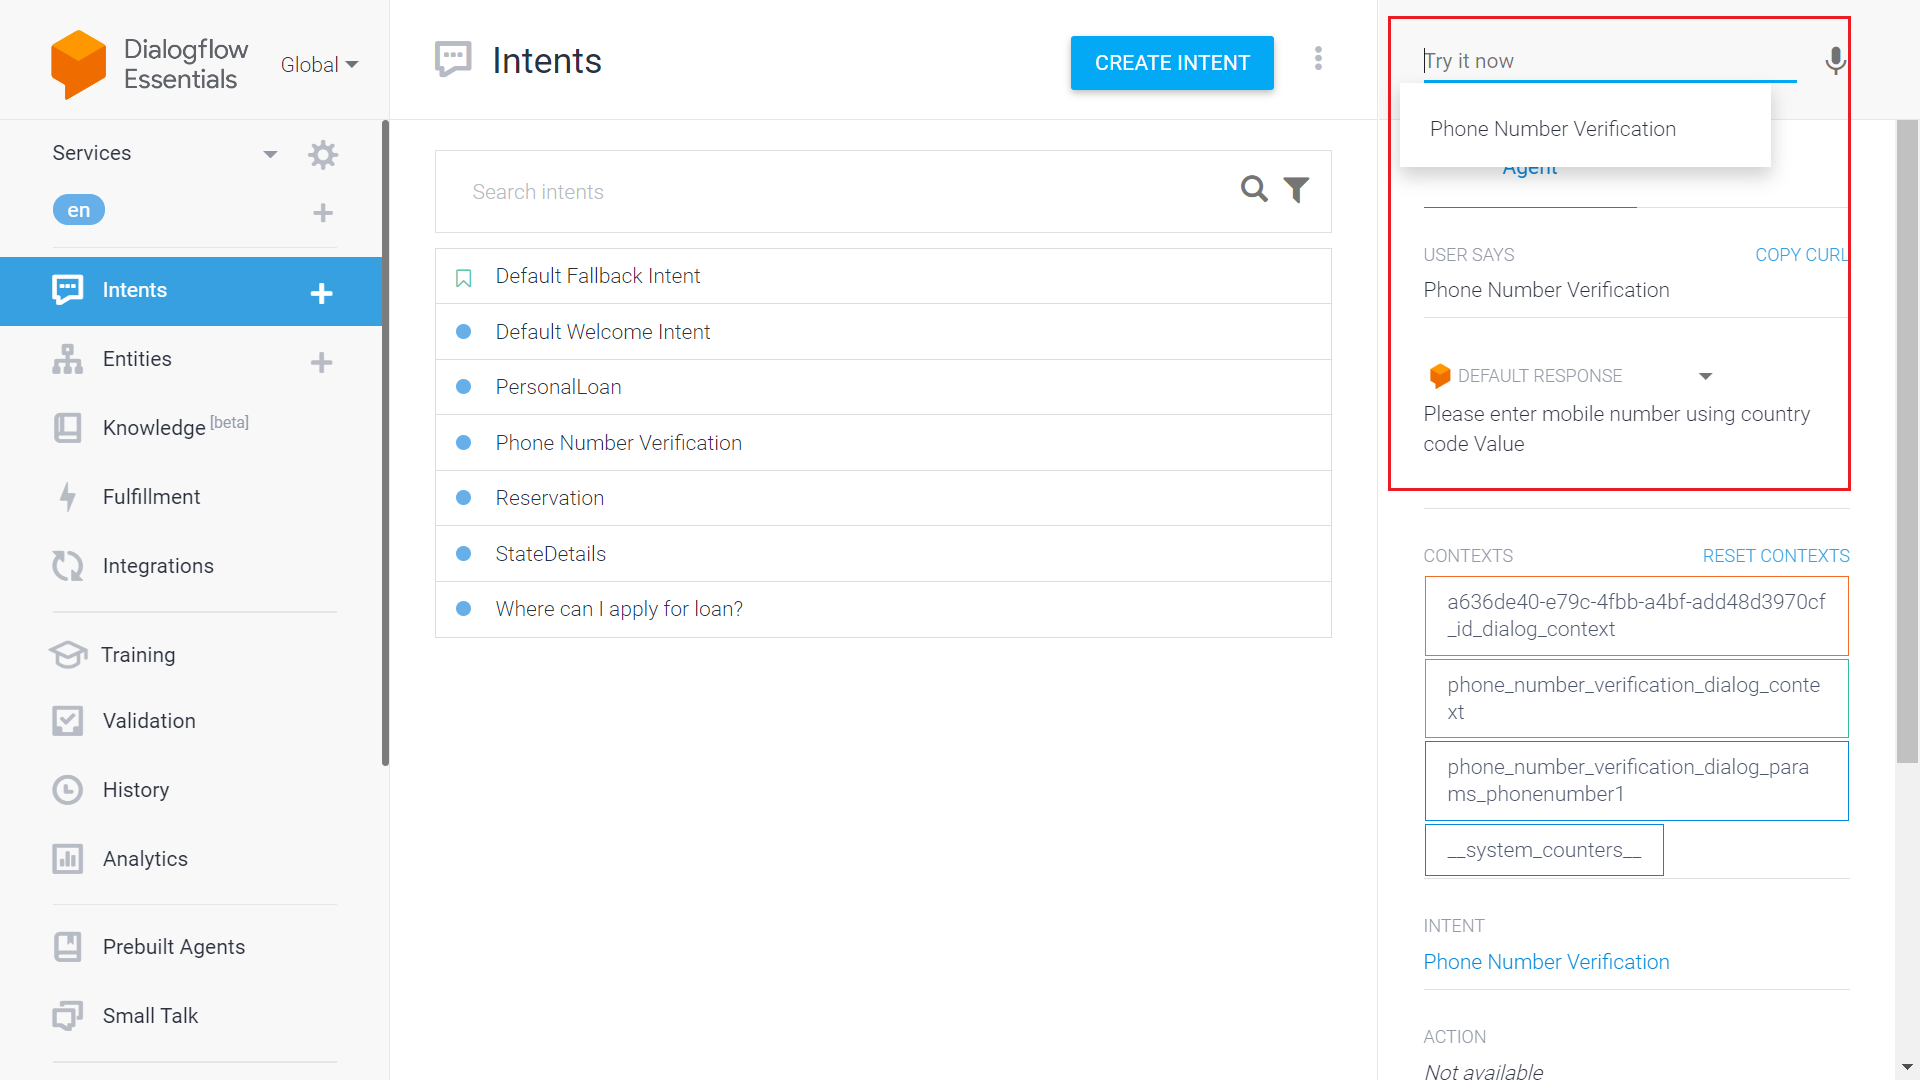
- Go to Training in the left side menu and enter the intent name at User Says.

-
- Enter the intent name same as it is in the VA, in the top most right corner of the page in Try Now, to test the Dialogflow configuration.
- The configured text response would be displayed under the Default Response.
| Note: You can configure any intents, entities or FAQ details which you require to be identified using the Dialogflow ES adapter. |
Enable the Dialogflow API
You can activate the Dialogflow API feature for your agent within Dialogflow cloud page.
Follow these steps:
-
- Click the Gear icon next to the agent name from the top left of the Dialogflow dashboard.

-
- The General Settings page is displayed. From there scroll down, to note the project ID value.

| Note: The Project ID will be used to fill the credentials while enabling the Dialogflow adapter on the Kore.AI platform. |
-
- Click on the project ID to open google cloud.
- You will navigate to the Google Cloud dashboard.
- Select APIs & Services → Enabled APIs & Services from the left resources menu.
- Click + Enable APIs and Services from the top of the display and find the Dialogflow API option.


-
- Upon activation of Dialogflow API, select Manage to open the Dialogflow API management dashboard.

Create Service Account Credentials
The next step on the Dialogflow API management dashboard is to create a set of credentials to use the API, and to connect to the Dialogflow cloud from the Kore.ai platform.
Service Account Creation
Follow these steps to create service account:
-
- Click the button Create Credentials at the top of the screen.
| Note: If you already have service accounts with credentials, you can access them from the Credentials option in the left navigation menu. |

-
- In the Create Credentials page, the Dialogflow API is by default selected in the Select an API drop-down.

-
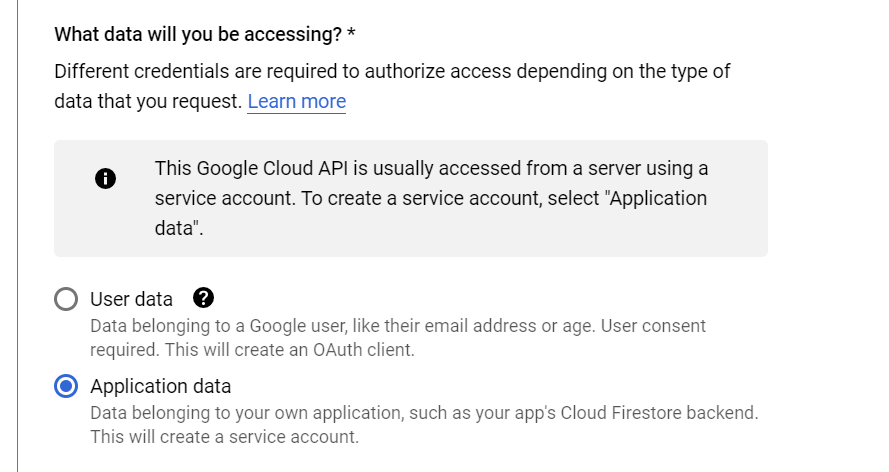
- Select Application Data option for What data will you be accessing? as you are creating a service account. Click Next.
-
- Select No. I’m not using them and click Next.

-
- In the Service account details page, provide details for service account name, ID and description as shown below.

-
- Click Create and Continue. The service account is created.
- Grant access permissions to this service account and also grant users access to this service account if required in the next pages that get displayed.


Private Key Generation
Follow these steps to generate the private key:
-
- Click on the service account created under Service Accounts in the API & Services page as shown below.

-
- The service account details are displayed as shown in the following screenshot. Go to the Keys tab.

-
- Select Create a new key in the Add Key drop-down to generate the private key.

- In the displayed pop-up, select JSON as the option to generate the private key.

| Note: The JSON option is by default selected. |
A file containing the JSON Private Key information for use in the External NLU settings of Kore.ai platform, is downloaded and saved to your computer.

The file has the layout as follows:
{

"type": "***",

"project_id": "***",

"private_key_id": "***",

"private_key": "***",

"client_email": "***",

"client_id": "***",

"auth_uri": "***",

"token_uri": "***",

"auth_provider_x509_cert_url": "***",

"client_x509_cert_url": "***"

}
| Note: Save this JSON payload securely. You will not be able to access it again. The entire content of this JSON file must be copied into the private key field inside the Kore.AI External NLU adapter settings. See Adapter Configuration to know more. |
To understand the testing and debugging of your VA, to validate the working of the DialogFlow NLU, see Test and Debug.