Ricenter Glip을 채널로 설정하려면 Ringcentral’s Developer Portal에서 앱을 생성하고 플랫폼이 메시지를 수신할 수 있도록 Webhook을 활성화해야 합니다. 봇에 Ringcentral Glip 채널을 추가하려면, 다음을 수행해야 합니다.
- Create RingCentral App – Kore.ai에 채널로 Ringcentral Glip을 사용하도록 설정하려면, RingCentral에서 앱을 생성해야 합니다. Ringcentral 계정이 없는 경우 회원가입을 합니다.
- Get App Details – Apps 탭의 애플리케이션 인증 정보로 이동하여 채널 설정을 위해 Application Key 및 Application Secret을 확인합니다.
- Create Extension – Ringcentral 계정의 봇에 새 확장을 생성합니다.
- Authorize – 계정에 권한을 부여하여 Kore.ai 봇 플랫폼이 Glip API에 액세스할 수 있는 개발자 액세스 토큰을 생성하도록 합니다.
- Apply for Production (Optional) – 샌드박스 환경에서 앱을 개발했고 프로덕션 환경에서 실행할 준비가 되었다면, Ringcentral 앱 졸업 과정을 따라야 합니다.
Ringcentral Glip 채널을 추가하려면 다음 단계를 따르세요.
- 봇 빌더의 Bots 섹션에서, RingCentral 채널을 추가하려는 봇을 클릭하세요.
- Channels 탭에서, Ringcentral Glip 아이콘을 클릭하세요. Ringcentral Glip 페이지가 표시됩니다.
- Ringcentral Developer Portal에 Log in 하고 My Apps 섹션으로 이동합니다.
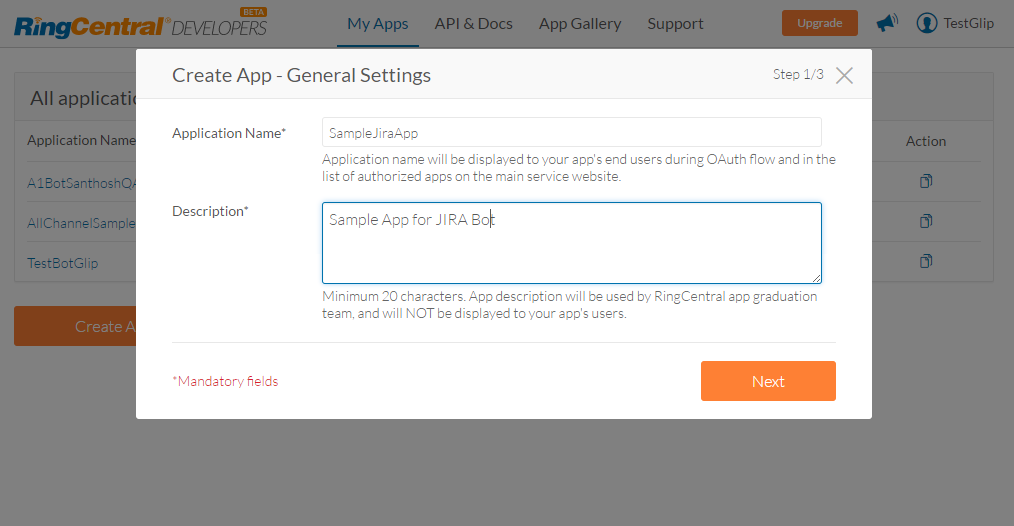
- Create App을 클릭합니다. Create App – General Settings 페이지에서 필요한 모든 세부 정보를 입력하고 Next 버튼을 클릭하세요.
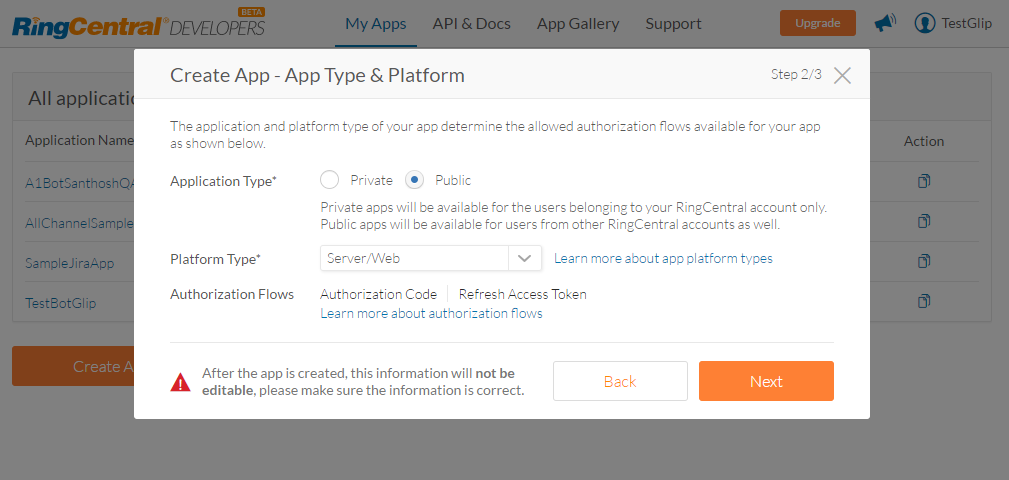
- Create App – App Type & Platform 대화 상자에서 앱의 추가 정보를 입력합니다. 이 페이지에서 선택한 옵션은 저장한 후 수정할 수 없으니 주의하세요. 다음 옵션을 선택한 후 Next을 클릭합니다.
- 앱 유형
- Private – 자신만의 Ringcentral 계정 이용을 위해 앱을 개발 중인 경우입니다.
- Public – 여러 Ringcentral 계정을 위해 앱을 개발 중인 경우입니다.
- Platform Type – 옵션으로 Server/Web 선택
- 앱 유형
- 이 앱과 연결된 권한을 정의해야합니다. Webhook Subscriptions 및 Glip 권한을 선택합니다. Permissions에 Glip이 표시되지 않으면 Ringcentral에서 앱을 화이트리스트에 추가합니다.
- Ringcentral 페이지의 Configuration 탭에서 OAuth Redirect URI를 복사하여 OAuth Redirect URI 필드에 입력합니다.
- Create를 클릭합니다.
 앱 생성 과정이 완료되고 App Dashboard 페이지로 리디렉션됩니다.
- 앱 정보의 Credentials 탭으로 이동합니다. Application Key 및 Application Secret을 복사하여 Ringcentral Glip 채널 페이지의 Configuration 탭에 입력하세요.
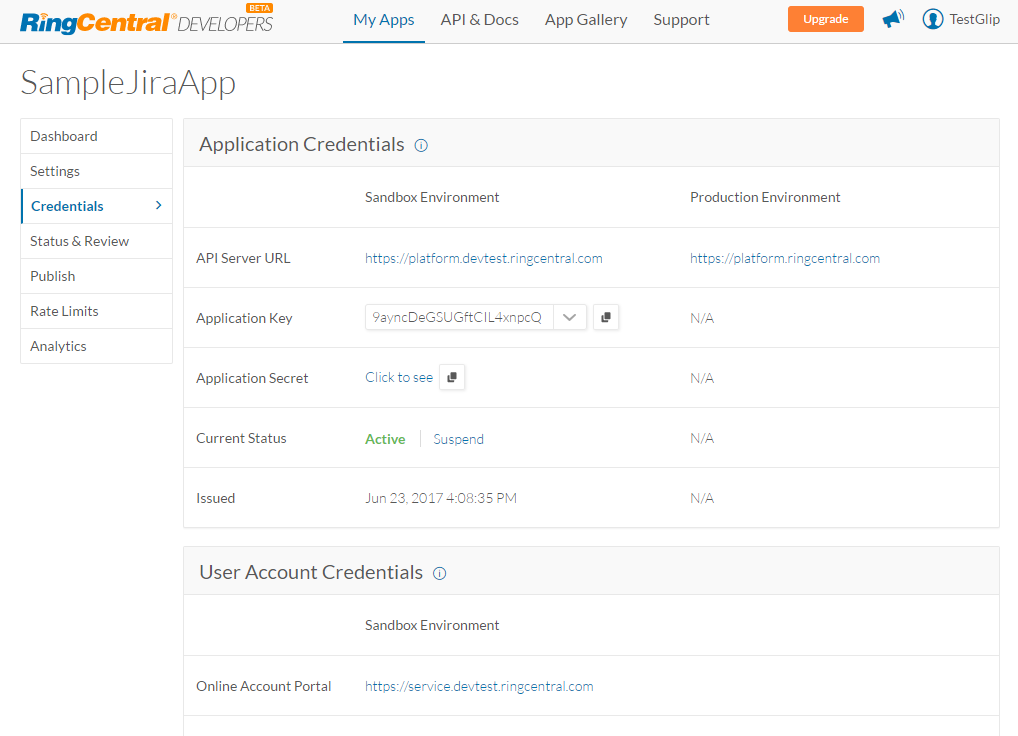 참고: 선택한 환경에 따라 Configuration탭에서 Application Key와 Application Secret을 복사하고 붙여넣습니다.
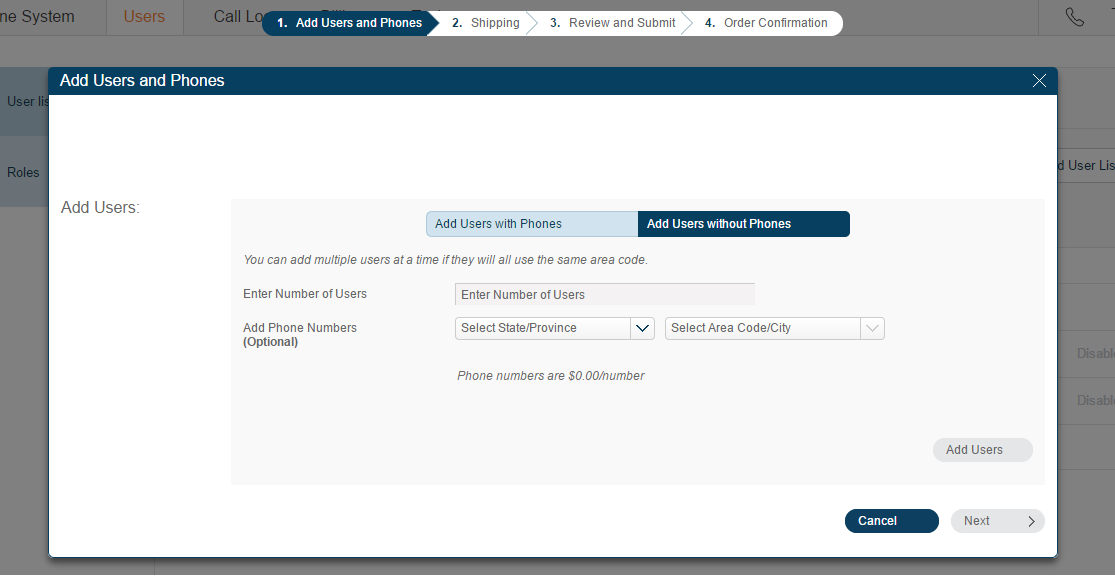
- 봇은 Ringcentral 계정에 일반 사용자와 연결되어야 합니다. 이를 위해 귀하의 Ringcentral 계정에 새로운 내선(확장)을 생성합니다. Ringcentral 계정(Sandbox | Production)에 로그인하고 Users 탭으로 이동하여 Add User 옵션을 선택합니다.
- Add Users and Phones 대화 상자에서 Add Users without Phone 옵션을 선택하고 설명을 따르세요.
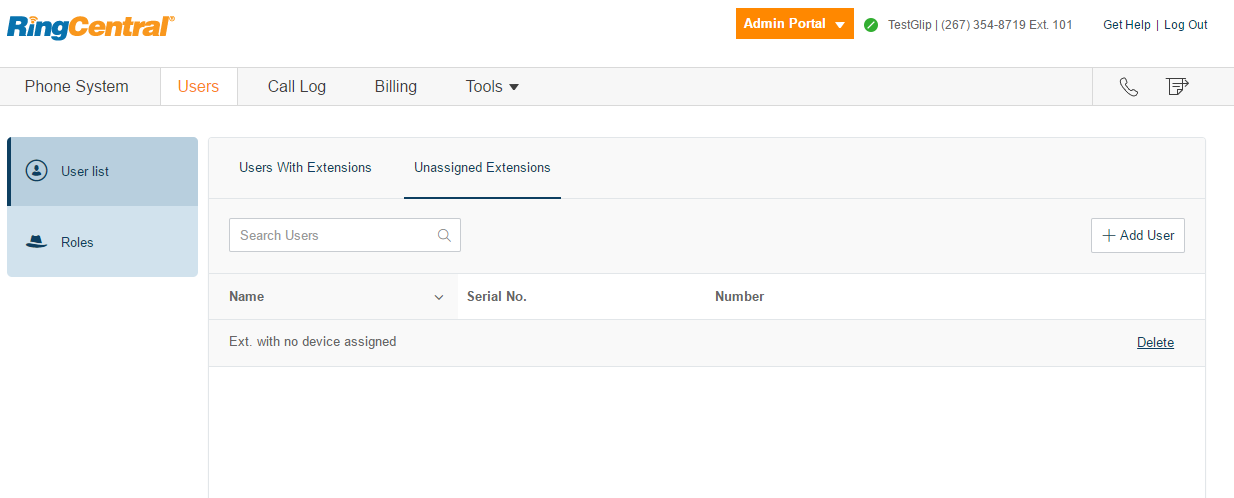
- 사용자 생성을 완료한 후 사용자 페이지에서 Unassigned Extensions 탭을 클릭합니다. Unassigned users를 클릭하면 User profile information 페이지로 이동합니다. 모든 필요한 정보를 입력합니다.
- Save 및 Enable를 클릭합니다.
 참고: 새로 생성된 사용자는 이메일 주소로 사용자 활성화 방법이 포함된 소개 이메일을 받게 됩니다. 새 사용자에 대해 설정한 사용자 이름과 암호를 기록해 두세요. Configuration 탭에서 봇에 권한을 부여하려면 이 인증 정보를 사용해야 합니다.
- 봇은 Ringcentral 계정에 유효한 내선(사용자)과 연결되어야 합니다. 이전 단계에서 생성된 새로운 내선의 인증 정보를 사용하여 Ringcentral Glip 채널 페이지의 Configuration 탭에서 봇에 Authorize을 부여합니다. 이 단계에서는 Kore.ai 봇 플랫폼이 Glip API에 액세스할 수 있는 개발자 액세스 토큰을 생성합니다.
- 샌드박스 환경에서 앱을 개발했고 프로덕션 환경에서 실행할 준비가 되었다면 Ringcentral의 시작하기 가이드에서 Apply for Production 섹션에 설명된 단계를 따릅니다. 앱이 프로덕션 환경에서 실행할 준비가 되었다면 Configuration 탭에서 프로덕션 앱에 따라 Environment, Application Key 및 Application Secret을 업데이트합니다.
- Enable Channel 섹션에서, Yes 를 선택하고 Save를 클릭하여 채널을 사용합니다.