The XO Platform lets you easily connect the HubSpot integration to create, view, update, search and delete deals. You can also create, view, update, search and delete contacts using the pre-built templates. Click the HubSpot link to know more.
This article explains how to authorize and enable the HubSpot action and install the pre-built templates.
Authorizations Supported
The Kore.ai XO Platform supports OAuth 2.0 authentication to allow a HubSpot integration to exchange data. For more information, see Setting Up Authorization Using OAuth v2 article.
The Kore.ai XO Platform supports the following authorization types for the HubSpot CRM integration:
- Pre-Authorize the Integration – To make the integration process smoother for developers and customers, you can pre-authorize it by providing the necessary authorization credentials to obtain the access token.
- Allow Users to Authorize the Integration – This method requires the end user to provide credentials during the conversation for authorization. This authorization process involves requesting permission for Kore.ai’s HubSpot app to access an access token at runtime.
| Authorization Type | OAuth – System | OAuth – Custom |
| Pre-authorize the Integration | Yes | Yes |
| Allow Users to Authorize the Integration | Yes | Yes |
Step 1: Enable the HubSpot CRM Action
Prerequisites:
Before enabling the HubSpot CRM actions, complete the following prerequisites:
- Create a developer account in the HubSpot CRM and note down login credentials. Use the HubSpot Developer Center for more information.
- Copy the Client ID and Client Secret key values and keep them for future use to enable the integration.
Steps to enable the HubSpot action:
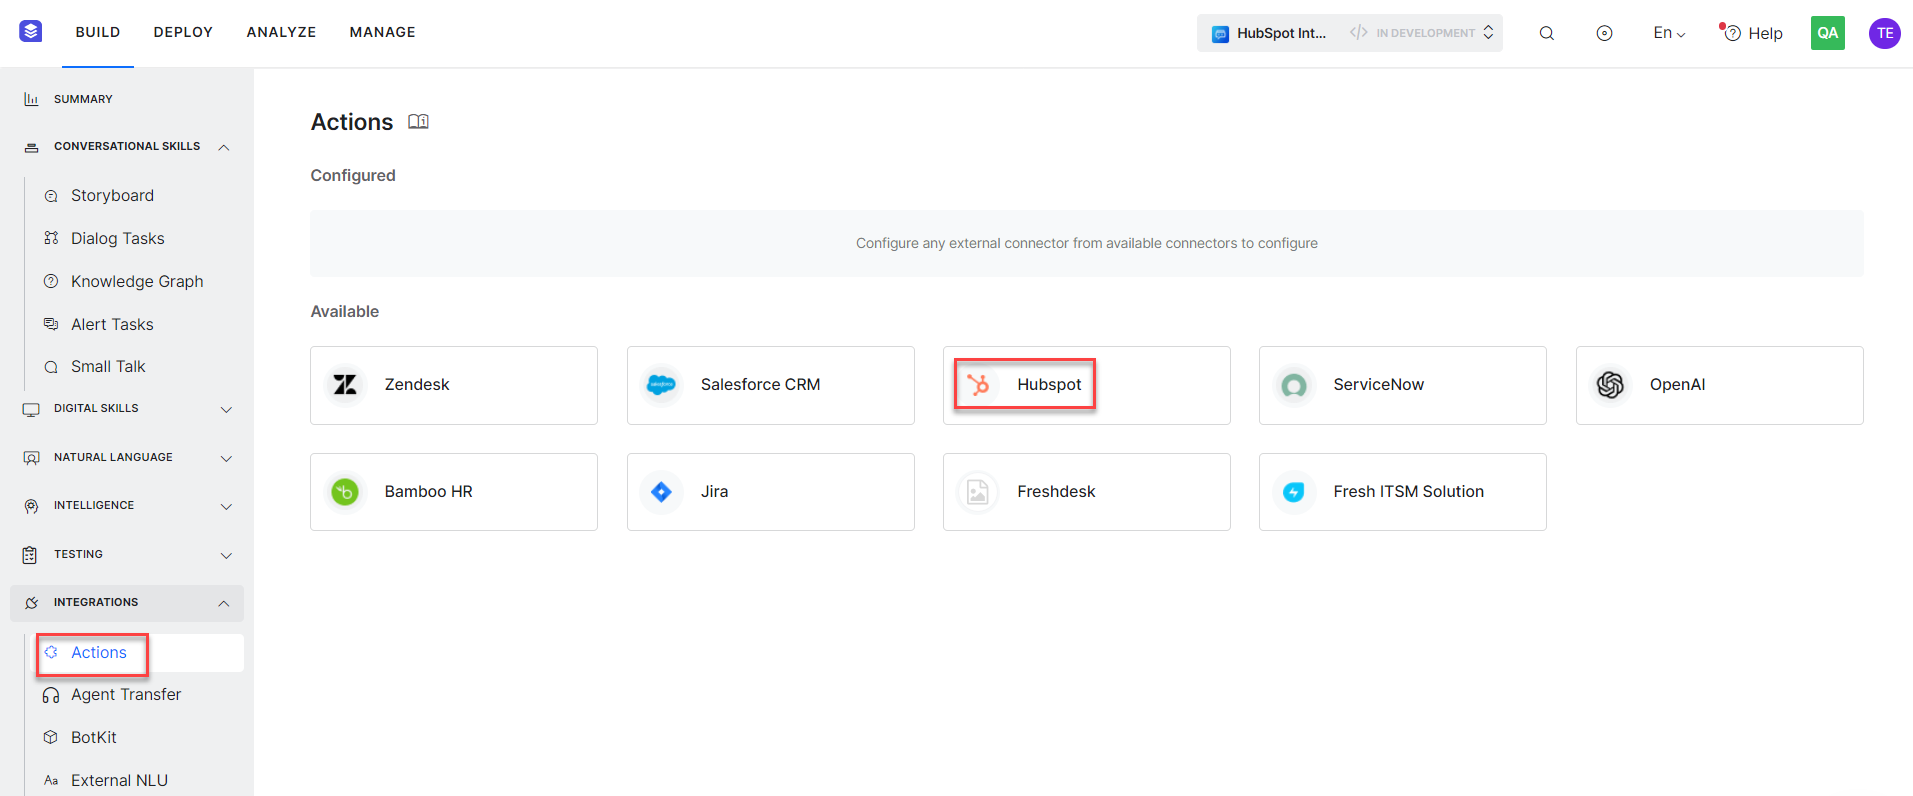
- Go to Build > Integrations and select the Actions menu item.
- Once you click the Actions menu, all integrations are shown in the Available region. Select the HubSpot action.
Pre-authorize the Integration
OAuth
You can authorize the integration using developer credentials. The developer authorization lets you authorize the integration with preconfigured Kore.ai’s app or use the custom authorization profile to let a developer configure the integration.
Steps to authorize a HubSpot action using developer credentials:
- Go to Build > Integrations and select the Actions menu item.
- Select the HubSpot action in the Available Actions region.
- In the Configurations dialog, select the Authorization tab
- Enter the following details:
System Authorization
Pre-authorize HubSpot CRM integration with the necessary authorization credentials to obtain the token to access external services.
- Authorization Type – Select the Pre-authorize the Integration option, and then select the OAuth option.

- Select the System card to enable the Kore.ai’s preconfigured HubSpot app and click Authorize.

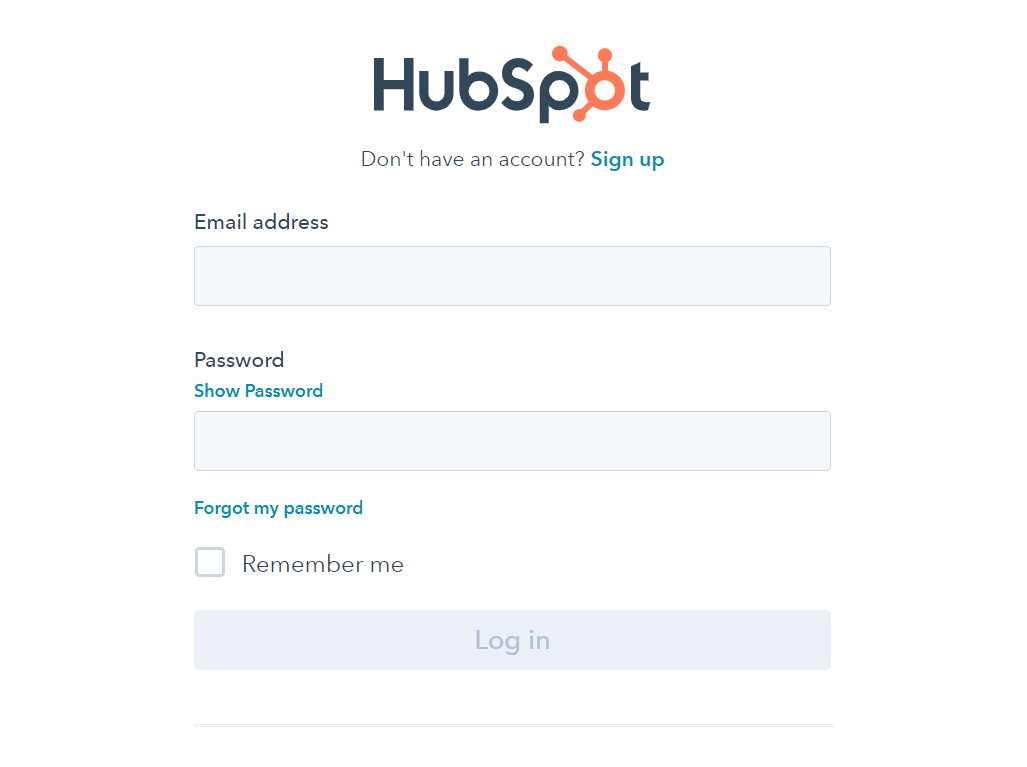
- Once you click Authorize, you are redirected to “login.hubspot.com”
- Enter your developer account credentials to successfully connect with your HubSpot Account
- Select a HubSpot account and click Choose Account. The Authorization completed successfully message is displayed.
- Click the Enable button to use Kore.ai’s app to fetch the access token to complete the authorization.
Custom Authorization
Create your own custom authorization profile to obtain an access token and use it to complete integration without using Kore.ai’s HubSpot app for authorization.
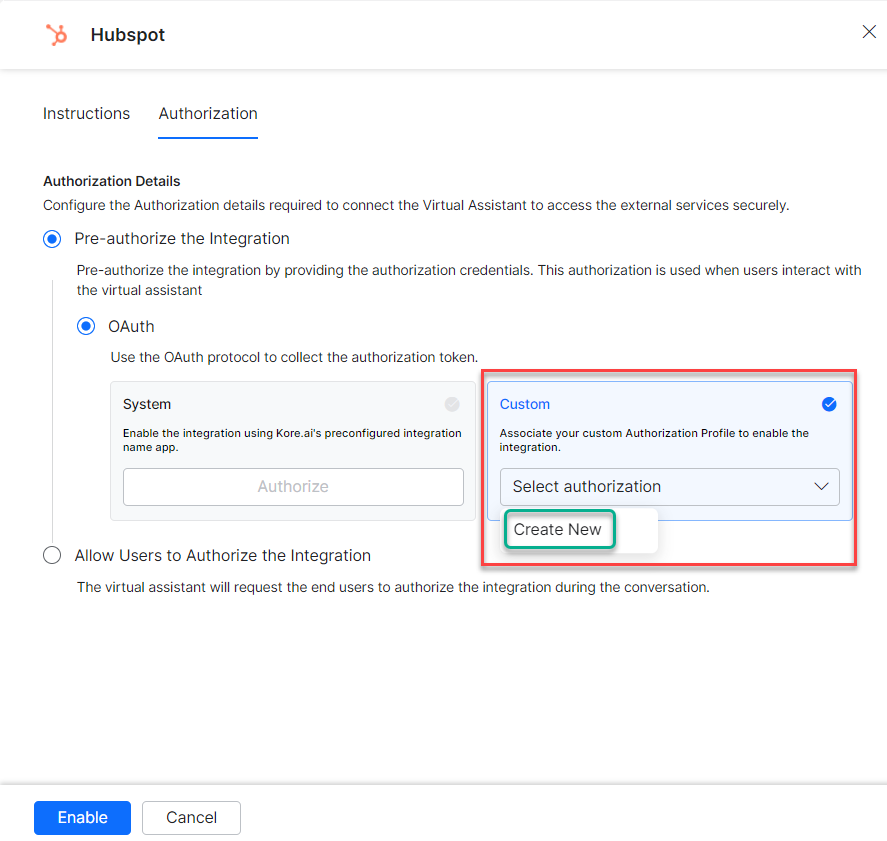
- Select the Custom to enable the custom authorization profile.
- Click the Select Authorization drop-down and select the Create New option.
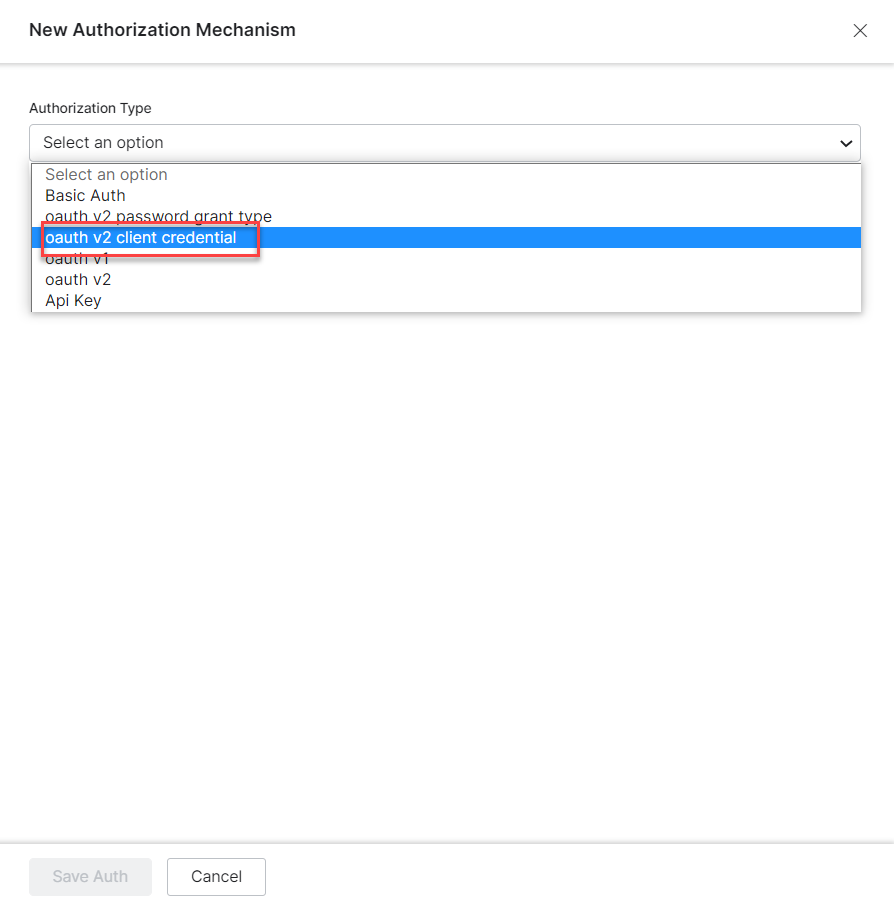
- Select the type of authorization mechanism. For example, select the OAuth v2 option. To create custom OAuth profiles, see Setting Up Authorization Using OAuth v2.
- Enter the following authentication credentials for the OAuth v2 mechanism:
- Call back URL
- Identity Provider Name
- Client ID
- Client Secret
- Authorization URL
- Token Request URL
- Scope
- Refresh Token URL

- Click Save Auth to save Authorization Profile.
- Select the new Authorization Profile, which you created to enable integration
- Once click Authorize, you are navigated to “login.hubspot.com”
- Enter your developer account credentials to successfully connect with your Hubspot Account
- Select a HubSpot account and click Choose Account. The Authorization completed successfully message is displayed.
- Authorization Type – Select the Pre-authorize the Integration option, and then select the OAuth option.
- Click Enable. When you configure the action for the first time, the Integration Successful pop-up is displayed.

Note: You will notice the HubSpot action is moved from Available to Configured region.
Allow End User to Authorize
You can authorize the integration at a user level with their login credentials. The user authorization process involves requesting permission for Kore.ai’s HubSpot app to access an access token at runtime. You can also use the custom authorization profile to let a user configure the integration at runtime.
Steps to authorize a HubSpot action at a user level:
- Go to Build > Integrations and select the Actions menu item.
- Select the HubSpot action in the Available Actions region.
- In the Configurations dialog, select the Authorization tab
- Enter the following details:
System Authorization
The end user has to provide credentials during the conversation to authorize users for HubSpot CRM integration to obtain the access token.
- Select the System card to enable the Kore.ai’s preconfigured HubSpot app.
- Once you click the Enable button, a link is sent to the end user to authorize integration.

- Click on the link and enter the login credentials to allow the user to authorize the integration.
Custom Authorization
Create your own custom authorization profile to obtain an access token and use it to complete integration without using Kore.ai’s HubSpot app for authorization.
- Authorization Type – Select the Allow Users to Authorize the Integration option, and then select OAuth option.
- Select the Custom to enable the custom authorization profile.
- Click the Select Authorization drop-down and select the Create New option. Follow the instructions in the Custom Authorization section.
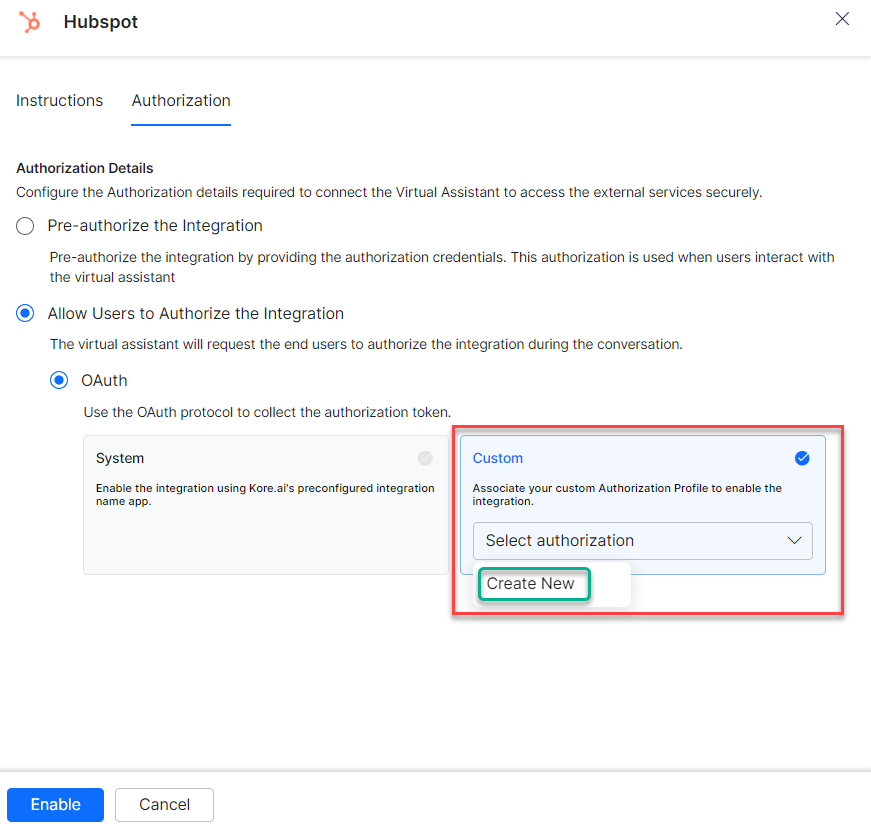
- You can also select an existing authorization profile as shown below:

- Once you click the Enable button, the user will see the authorize option during the runtime execution.
Step 2: Install the HubSpot Action Templates
Once you have configured a HubSpot CRM Integration, you can explore and install action templates.
Steps to install action templates:
- On the Integration Successful dialog, click the Explore Templates button to view the templates.
- In the Integration Templates dialog, click the Install button to begin the installation.

- Once the template is installed, click the Go to Dialog button to open the dialog task.
- Once all templates are installed, a dialog task for each template is auto-created.

- You can also select the desired dialog task from the templates, and click Proceed. For example, select the Create a Deal task.

- Once you click Proceed, the dialog task is auto-created and the canvas opens with all required entity nodes, service nodes, and message scripts.