Drift is a conversation cloud platform. It helps marketing and sales teams to connect with customers easily through the conversation chat module. Kore.ai XO Platform’s Drift Agent integration allows you to seamlessly hand off the virtual assistant conversations to your live agents on Drift.
Use the configuration steps below as general guidelines to enable the Drift Agent integration. You may notice minor differences based on the version of the Drift you are using.
Overview
Kore.ai’s virtual assistant (VA) serves as the central point of interaction for the users. The VA facilitates communication and interaction between the user and the Drift agent using the chat module. In addition to its regular capabilities, the VA acts as a proxy or intermediary between the users and the Drift agents to hand over conversations seamlessly. The VA also allows you to integrate with the Drift platform.
Configuration
To configure the Drift agent, follow the instructions in the sections below.
Step1: Create a Drift App
Create an external integration in Drift to receive messages.
- Log in to https://dev.drift.com/apps with your drift credentials.
- Go to the App Store and click Create New App. To create an app, follow the instructions at https://devdocs.drift.com/docs/quick-start.
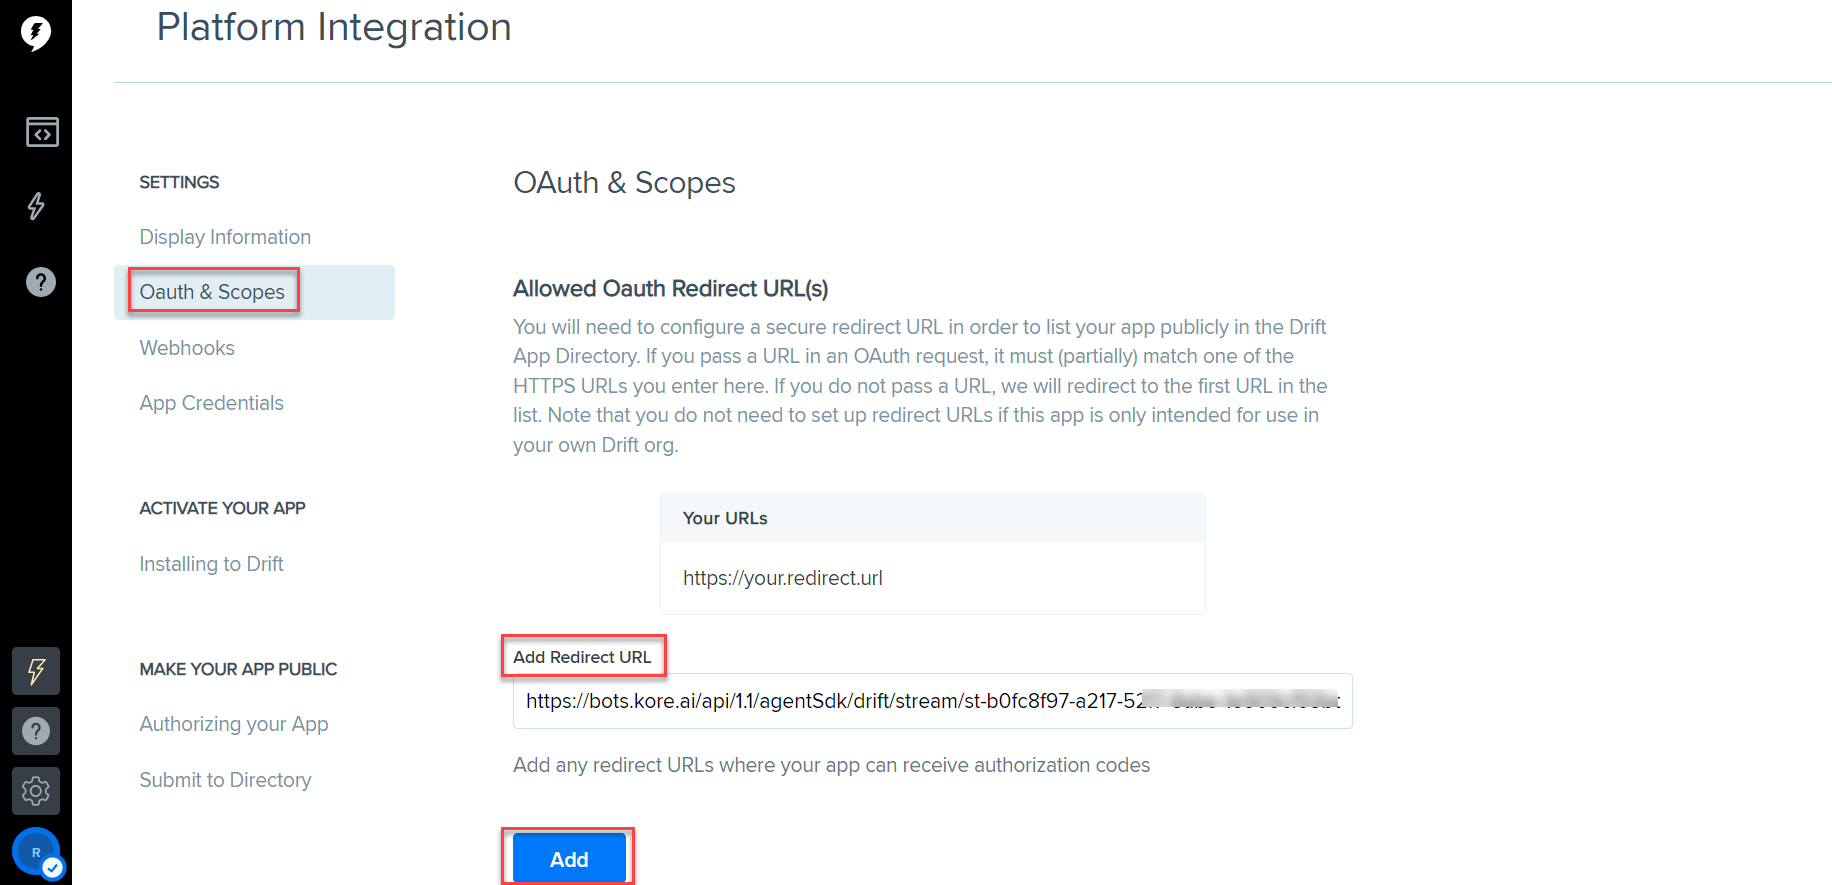
- Once you have created the App, go to the Settings > OAuth & Scopes page.
- Add the redirect URL. This URL is found on the Configurations tab of Kore.ai’s Drift Agent.
- Paste the URL and click Add.
- Select the WebHooks tab and add the Request URL, which is Kore.ai’s Drift Agent Webhook URL on the Configurations tab. Provide access to the following scopes for the Webhook as shown:
- new_message
- new_conversation
- conversation_status_updated
- conversation_inactive
- conversation_push
- chat_to_call for webhook

- Click Create App.
Step 2: Retrieve the Access Token
- Once you have created the App, click the Installing to Drift link under the Activate Your App menu and copy the Install App to Drift to generate a non-expiring access token.

Note: This token is used to access your Drift data via API. - Copy the Access Token and keep it for future use.
Step 3: Retrieve the Verification Token
To set up the retrieve the verification token, follow these steps:
- From the main menu on the left, navigate to Settings > App Credentials.
- Copy the Client ID, Secret ID, and Verification Token.

- Copy and keep them for future use.
Step 4: Enable the Drift Agent
- Log in to the Kore.ai XO Platform https://bots.kore.ai/botbuilder.
- Select a Virtual Assistant for which you want to configure the Drift agent.
- Navigate to Build > Integrations > Agent Transfer and click the Drift button.

- Click the Configurations tab and enter the following credentials for the Drift Agent:
- Access Token: The access token ID for the Drift, which was copied in step 2.
- Verification Token: The token ID for the Drift, which was copied in step 3.

- If you want to make Drift the default agent, enable the Default Agent System for all bot channels option.
Note: This option is available only when multiple agents are configured for your VA. - You can customize the channel mapping by clicking the Manage link, as shown below:
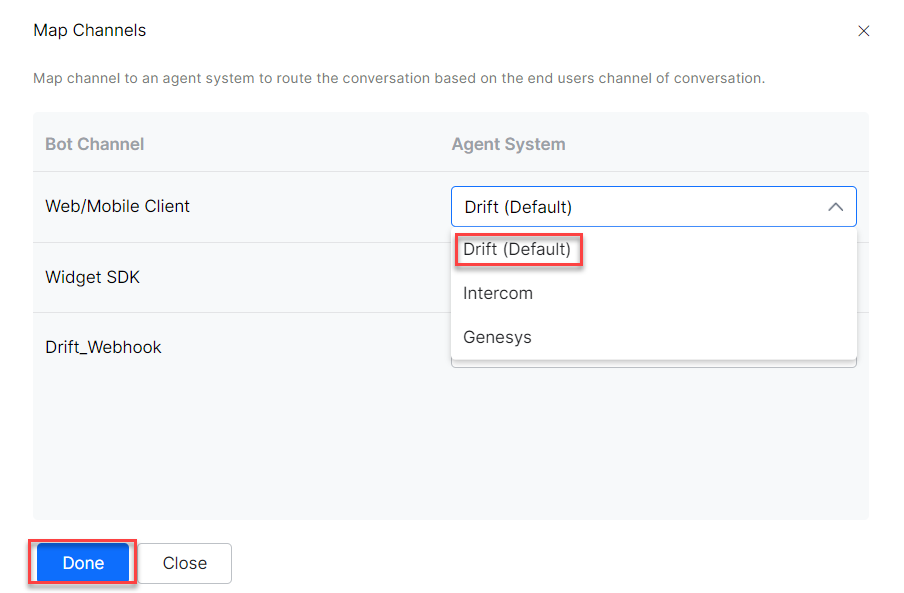
- Click Manage to map the channels you want to use Drift agent for handing over the conversations. To learn more about channel enablement, see Adding channels to your bot.

- After mapping channels, click Done.
- Click Save to enable the Drift agent.
- Publish the VA. For more information, see Publishing Bot.
Execution
This section helps you verify how the conversations from the Kore.ai XO Platform are being handed over to the Drift agent after enabling it.
To verify the data exchange between Kore.ai’s VA and Drift agent, follow these steps:
- Open a virtual assistant for which you have enabled the Drift agent.
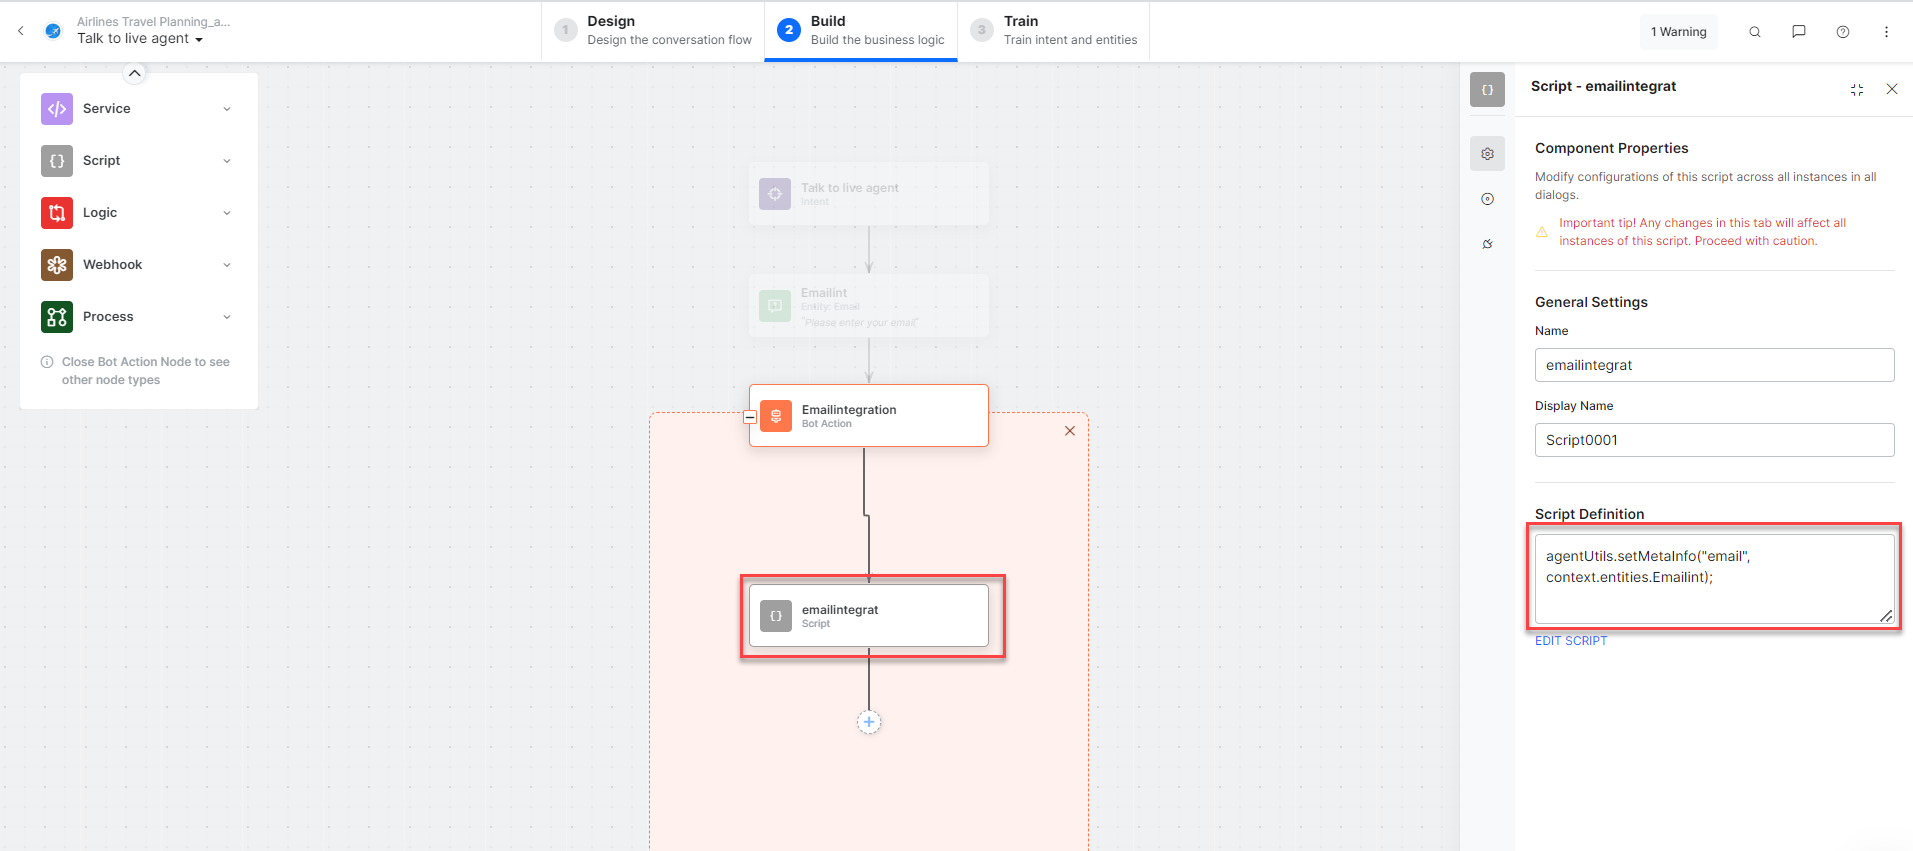
- Create a new Agent Transfer Node task. For example, create a Talk to Live Agent task with the LiveChats node and configure it to use the Drift agent. For more information, see Agent Transfer Node.

- Add an email entity node and bot action to capture the email address of an agent.
- Enter the following script in the Bot Action script:
agentUtils.setMetaInfo("email", context.entities.Entity0001);
- Click the Talk to Bot icon to launch the VA and enter Help.
- Once you invoke the agent transfer dialog, the Drift Developer Hub receives a notification alert.
- When a user initiates the chat from the VA, it transfers the conversation to the Drift agent and sends a message to the user. Agent receives a notification about this on Drift.
- Now, the connection between the Drift agent and the user has been established, and the conversation continues.
