채널로 Twilio SMS를 추가하려면 프로그래밍 가능한 SMS 앱을 설정하고 메시징 서비스를 정의한 다음 봇을 Twilio 전화번호와 연결해야 합니다. 봇에 Twilio 채널을 추가하는 경우, 봇의 최종 사용자는 텍스트 메시지를 사용하여 봇과 상호작용할 수 있습니다. Twilio SMS 채널을 추가하려면 다음 단계를 따르세요.
- Setup Account – Twilio 개발자 포털에 로그인하고 계정을 설정합니다.
- Setup Messaging Service – 프로그래밍 가능한 메시지 섹션에서, 메시징 서비스를 생성합니다.
- Add Phone Number– Twilio 전화번호를 봇에 연결합니다.
Twilio 채널을 추가하려면 다음 단계를 따르세요. 다음 절차는 Twilio 콘솔에 액세스할 수 있는 개발자를 위한 활성 Twilio 계정이 필요합니다. 더 자세한 내용은 이 항목의 뒷부분에서 Creating a Twilio Trial Account을 참조하세요.
- 봇 빌더의 Bots 섹션에서, Twilio SMS 채널을 추가하려는 봇을 클릭하세요.
- Channels 탭에서, Twilio SMS 아이콘을 클릭하세요. Twilio SMS Channels 페이지가 표시됩니다.
- Twilio 개발자 포털에 Login 합니다.
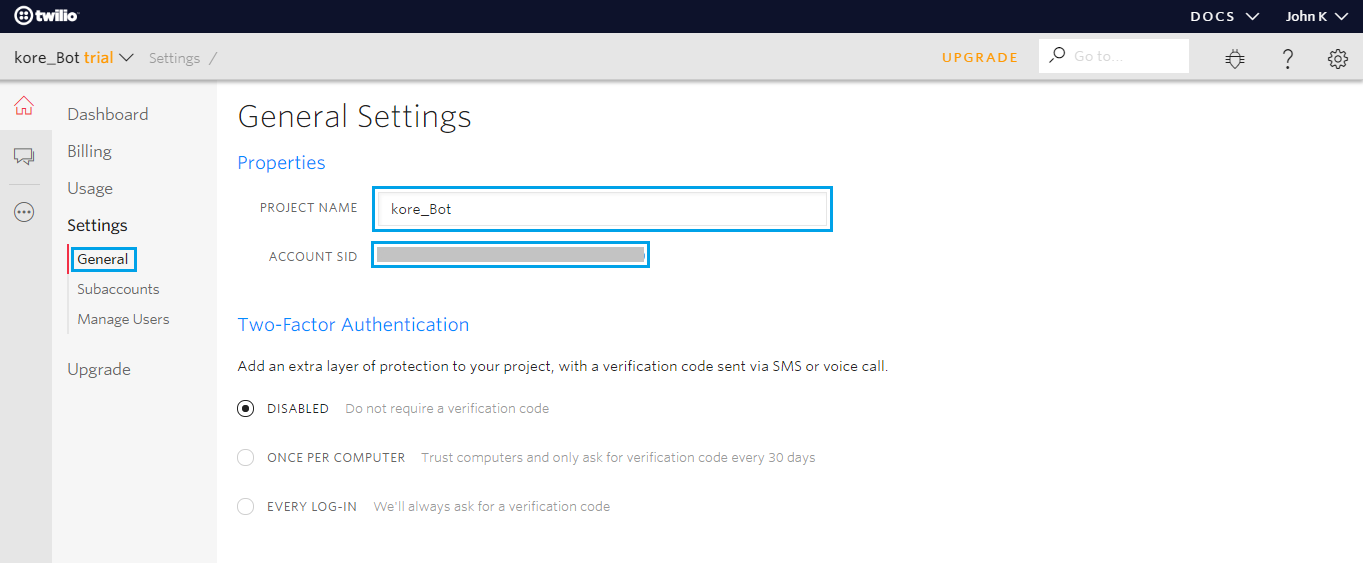
- Settings 섹션에서 General 탭을 클릭합니다.
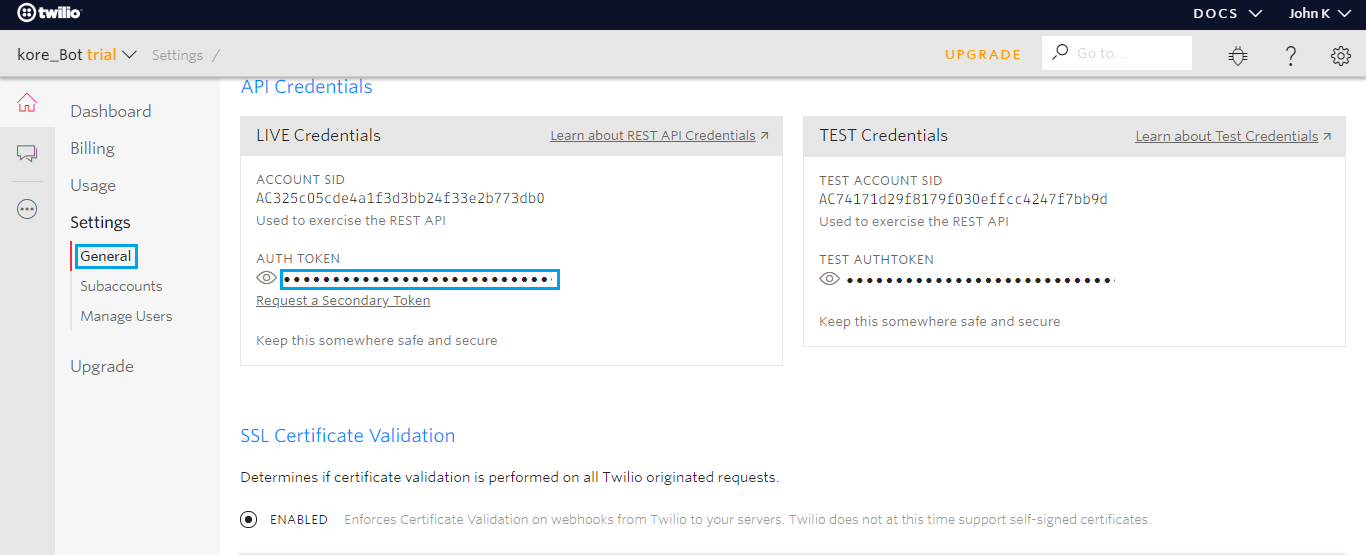
- 아직 계정을 설정하지 않은 경우, API 인증 정보를 생성하세요.
- Account SID 및 Auth Token을 복사하여 Twilio 채널 페이지의 Configurations 탭에 입력하세요.
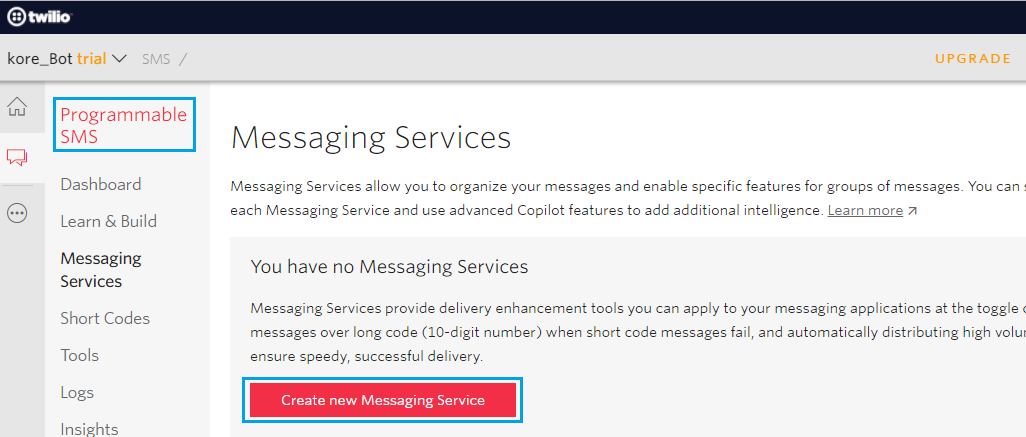
- All Products & Services 메뉴에서 Programmable SMS 섹션으로 이동합니다.
- Create New Messaging Service 옵션을 클릭합니다. 메시징 서비스 이름을 입력하고 Chat Bot/Interactive 2-way으로 사용 사례를 선택합니다.

- 서비스를 생성한 후, 이 서비스의 Service SID를 기록하고 Twilio SMS 채널 페이지의 Configurations 탭에 입력합니다.
- Inbound Settings 섹션에서 Process Inbound Messages 옵션을 클릭하고 Request URL과 Fallback URL 필드를 Twilio SMS 채널 페이지의 Configurations 탭에 있는 정보로 업데이트합니다.
- Outbound Settings에서 Status Callback Request URL 필드를 설정 탭에 있는 정보로 업데이트합니다.

- Copilot Features 섹션에서 Sticky Sender, MMS Converter,Scaler, Short Code Reroute, Country Code Geomatch 옵션이 활성화되어 있는지 확인합니다.
- 변경 사항을 Save하고 진행합니다.
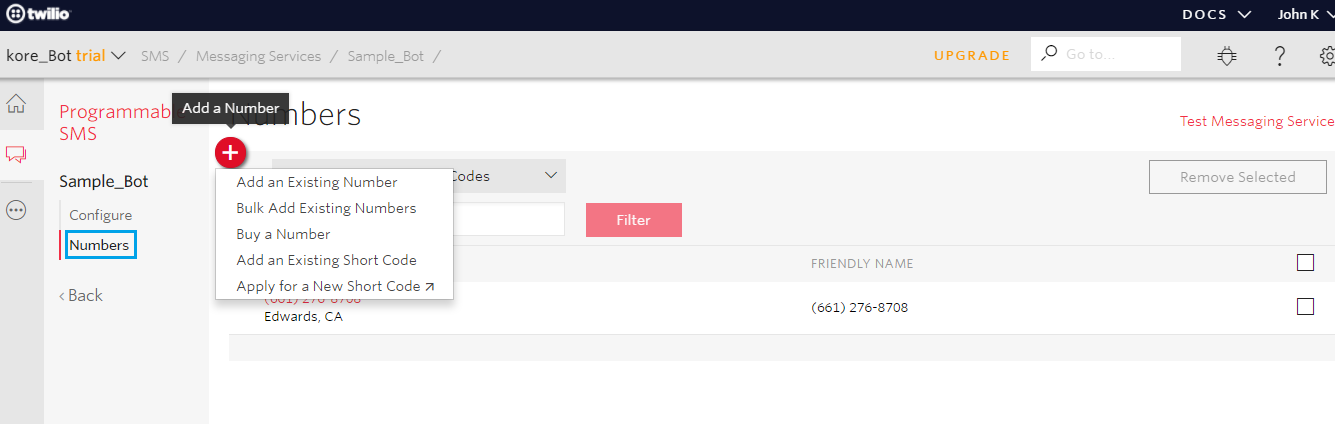
- 번호를 추가하려면, Numbers 섹션으로 이동하여 Twilio 전화번호를 이 봇에 연결합니다. Twilio 번호가 없는 경우, 구입해야 합니다.
- Twilio SMS 채널 페이지의 Configurations 탭으로 이동하여 채널 설정을 검토 및 완료합니다.
Twilio 채널 편집
Twilio 채널을 편집하려면 다음 단계를 따르세요.
- 채널 위로 마우스를 이동하고 클릭하여 수정합니다.
- 채널 설정에서 필요한 업데이트와 저장을 할 수 있습니다. 또한 Settings 아이콘을 클릭하여 채널 정보를 사용하지 않거나 삭제할 수도 있습니다.
 채널을 수정하려면 다음과 같은 명령 중 하나를 선택하세요.
- Disable/Enable
- Disable을 클릭하여 봇의 Twilio SMS 채널 사용을 일시적으로 비활성화하세요. Twilio SMS 채널 사용을 활성화하려면, Enable을 클릭하세요.
- Delete
- Delete를 클릭하세요.
- Delete Confirmation 대화 상자에서, OK를 클릭하여 봇 채널 설정을 영구적으로 삭제합니다.
Warning: 이 작업은 영구적이므로 , 취소할 수 없습니다.
Twilio 평가판 계정 생성
- https://www.twilio.com/try-twilio에서 회원 가입을 하여 무료 Twilio 평가판 계정을 생성할 수 있습니다.
- 계정 생성 후, 로그인하여 Twilio Console Dashboard를 열 수 있습니다.
- Account Summary 섹션에서 Account SID 및 Auth Token을 찾을 수 있습니다.
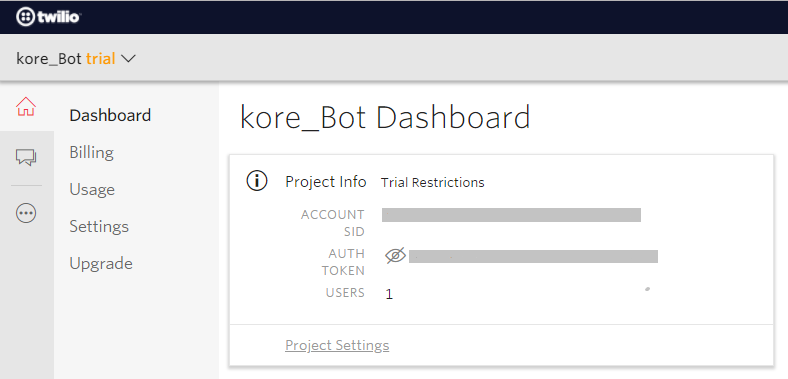
- Account SID 및 Auth Token을 복사하고 Kore.ai 봇 빌더의 Twilio 채널 설정을 하기 위해 저장합니다. 또한 최종 사용자가 봇에 문자 메시지 상호 작용을 보내도록 전화번호가 필요합니다.
- Dashboard 페이지에서 아래로 스크롤하여 번호를 클릭할 수 있습니다. Phone Numbers Dashboard가 표시됩니다.
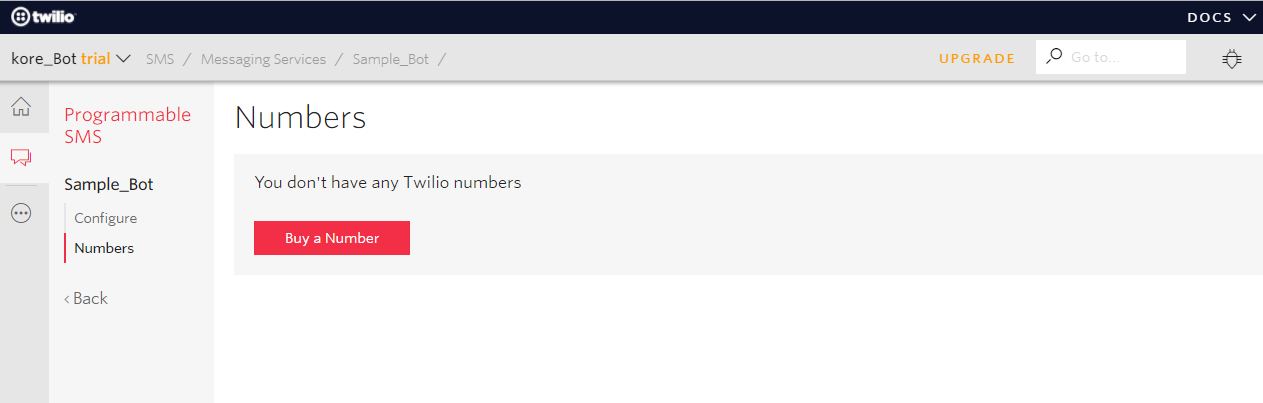
- 왼쪽 메뉴의 Numbers를 클릭하여 Numbers 페이지를 표시합니다. Buy a number을 클릭합니다.
- Get Started with Phone Numbers 페이지에서 Get your first Twilio phone number를 클릭합니다.
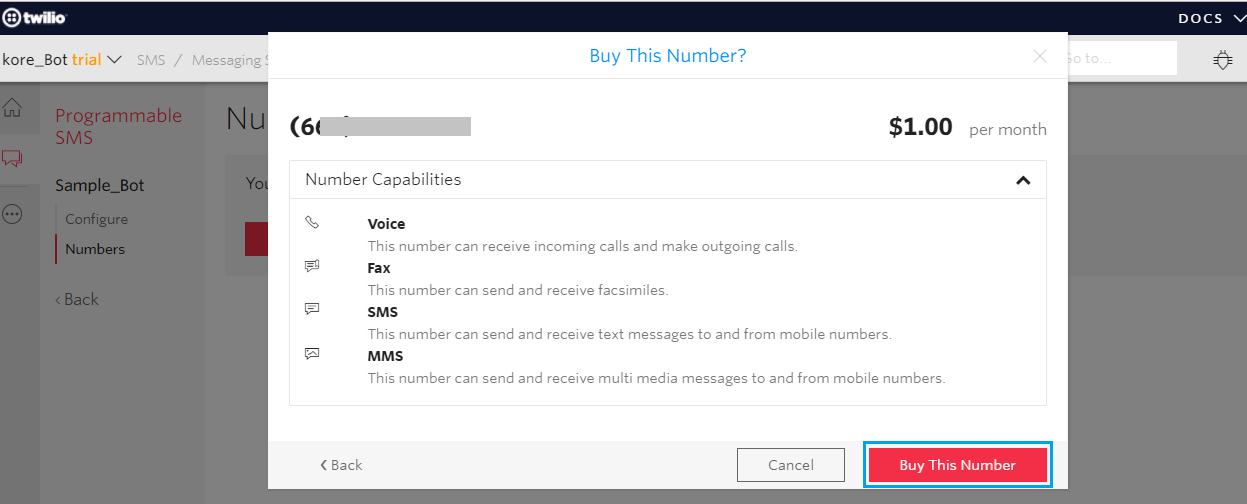
- 해당 대화 상자에서 Korea.ai Twilio 채널을 설정해야 하는 전화 번호를 확인할 수 있습니다.
- Buy This Number를 클릭하여 계정에 번호를 저장합니다.
- 전화번호가 저장되고 Dashboard의 Home 화면에서 접속할 수 있습니다. 이제 Kore.ai 봇 빌더에서 Twilio 채널을 설정할 준비가 되었습니다.