Slack을 채널로 설정하려면 Slack 앱과 봇을 연결해야 합니다. Kore.ai 봇에 Slack 채널을 추가하면 봇의 최종 사용자가 사용자의 Slack 계정을 사용하여 봇과 상호작용할 수 있습니다.
- Create a Slack App – Slack에서 새 앱을 생성 및 설정한 후 Kore.ai 봇 빌더의 앱 데이터를 봇 이름 및 리디렉션 URL에 대한 Slack 앱 설정에 복사합니다.
- Copy Authorization Details – Slack의 앱 권한 부여 세부 정보를 봇 빌더 Slack 채널 Get App Details 탭에 복사합니다.
- Create a Bot User in Slack – Slack에서 봇을 식별하기 위해 봇 사용자 이름을 추가합니다.
- Enable the Channel – 봇 빌더에서 채널 설정을 저장합니다.
봇에 Slack 채널 추가
이 절차를 완료하려면, Slack 계정이 이미 있어야 하며 Slack 팀의 회원이어야 합니다.
- 봇 빌더의 Bots 섹션에서, Slack 채널을 추가할 봇을 클릭하세요.
- Channels 탭에서, Slack 아이콘을 클릭하세요. Slack Channels 페이지가 표시됩니다.
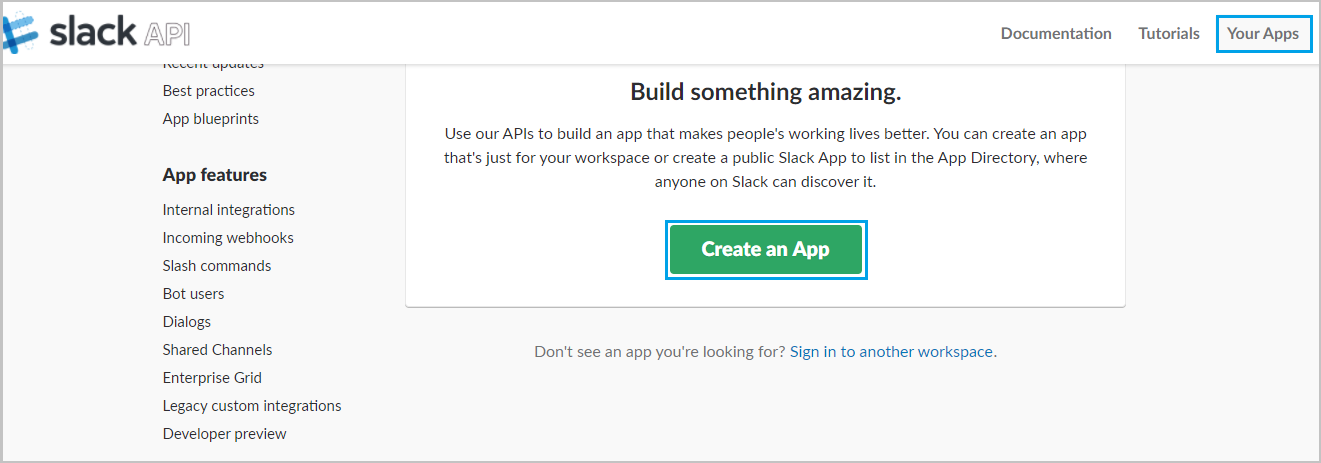
- 새 브라우저 탭에서, Slack 개발자 포털에 Login 하고 앱 섹션의 https://api.slack.com/apps로 이동합니다. 첫 번째 앱인 경우 Create an App을 클릭하고 이미 일부 앱이 있는 경우 Create New App을 클릭하세요.
- Create App 창에서 App Name을 입력하고 Development Slack Team 드롭다운 목록에서 팀을 선택합니다. App Name으로 봇 이름을 사용하세요.
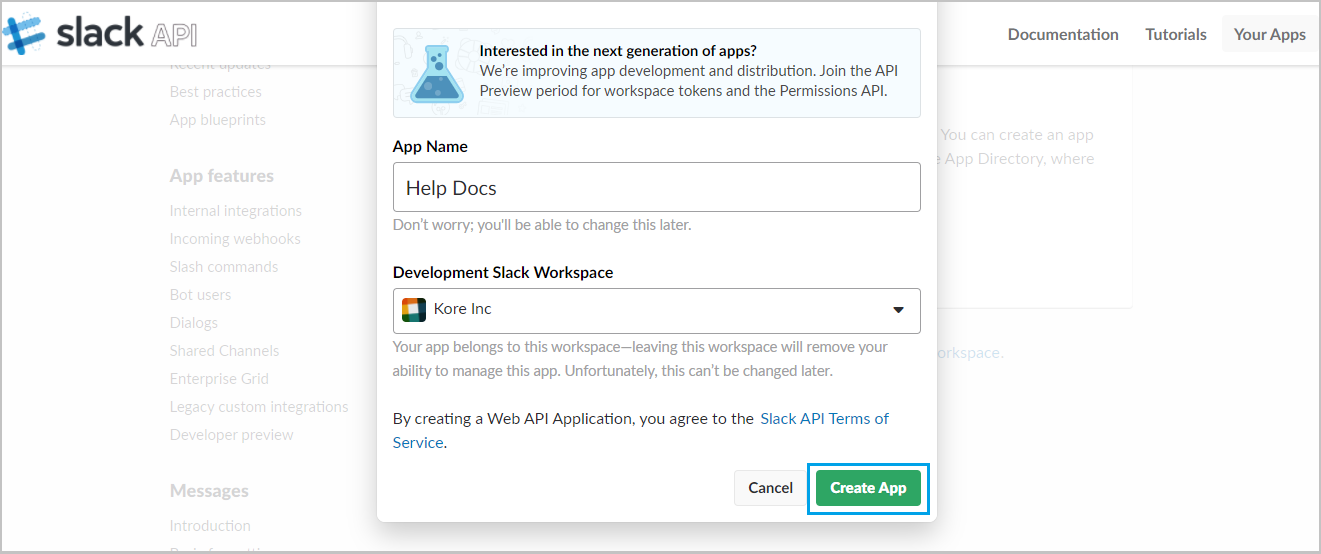
- 필요한 정보를 입력한 후 Create App을 클릭합니다. 이제 Slack에 새 앱이 생성되고 새 앱의 Basic Information 섹션으로 리디렉션됩니다.
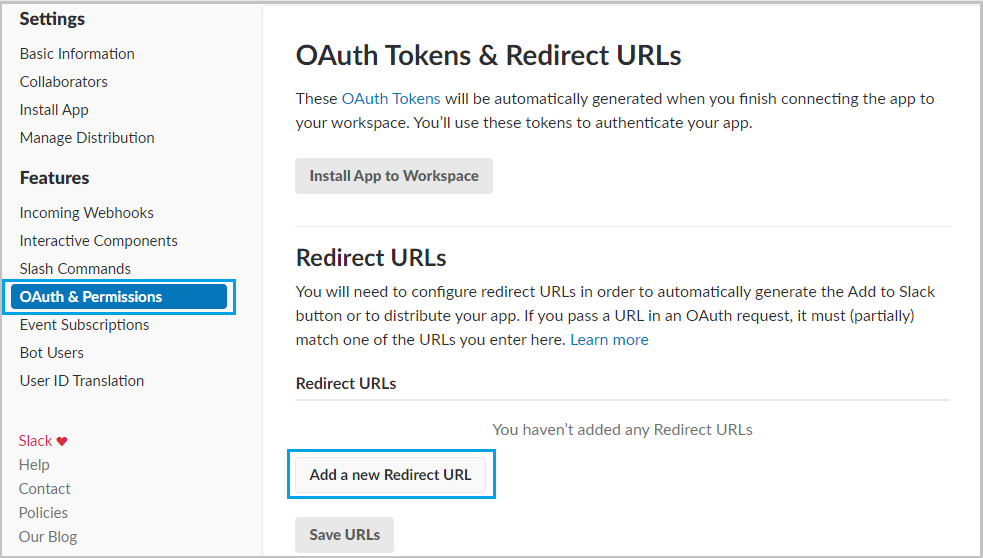
- OAuth & Permissions 탭으로 이동하여 Add a new Redirect URL를 클릭합니다. Slack 채널 페이지의 Configurations 탭에 있는 리디렉션 URL을 복사하여 Redirect URLs field에 입력합니다.
- Add > Save URLs을 클릭합니다.

- ‘Scopes’ 섹션 아래 Bot Token Scopes에서 처리합니다.
- incoming-webhook 및 chat:write 범위를 추가합니다.
- 사용자가 봇에 첨부 파일을 보내도록 하려면 ‘files:write‘ 범위도 선택해야 합니다
- Slack에서 사용자에게 사전 알림을 보내려면 users:read, users:read.email, team:read 범위를 선택합니다.
- OAuth & Permissions 탭에서 OAuth Tokens & Redirect URLs 섹션으로 이동하고 Install to Workspace 옵션을 선택합니다. 필요한 워크스페이스를 선택하고 과정을 완료합니다. 선택적으로 Slack에서 사용자에게 사전 알림을 보내려면 ‘OAuth Tokens for Your Team’ 섹션에서 ‘Bot User OAuth Token’을 복사하여 이 페이지의 설정 탭에 입력합니다.
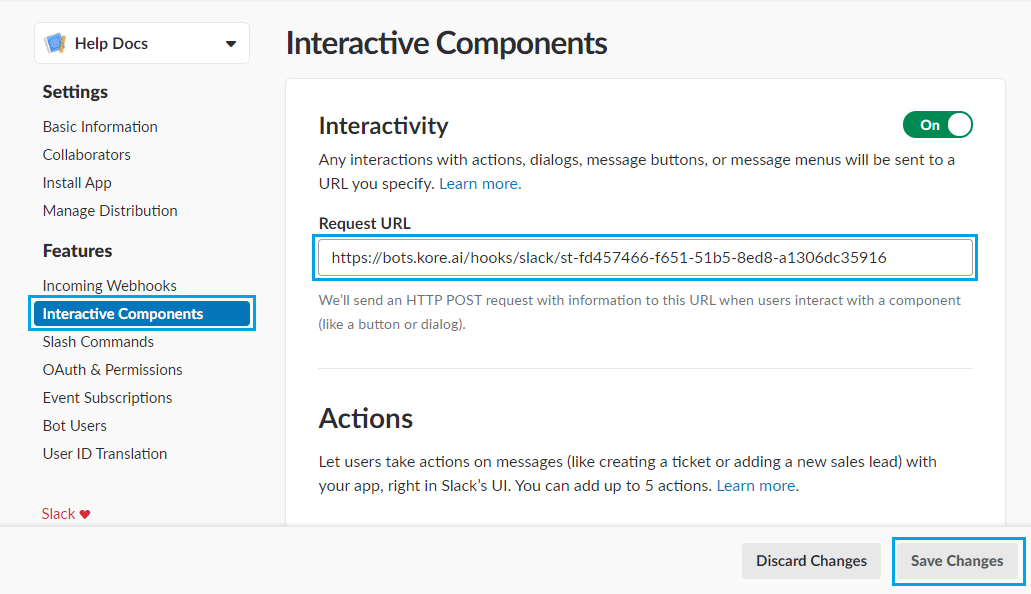
- 상호 작용형 설정 요소를 활성화하려면 b 섹션으로 이동하여 Interactivity을 활성화합니다. 이 페이지의 Configurations 탭에 있는 Webhook URL을 복사하여 Request URL 필드에 입력합니다.
- Save Changes을 클릭합니다.
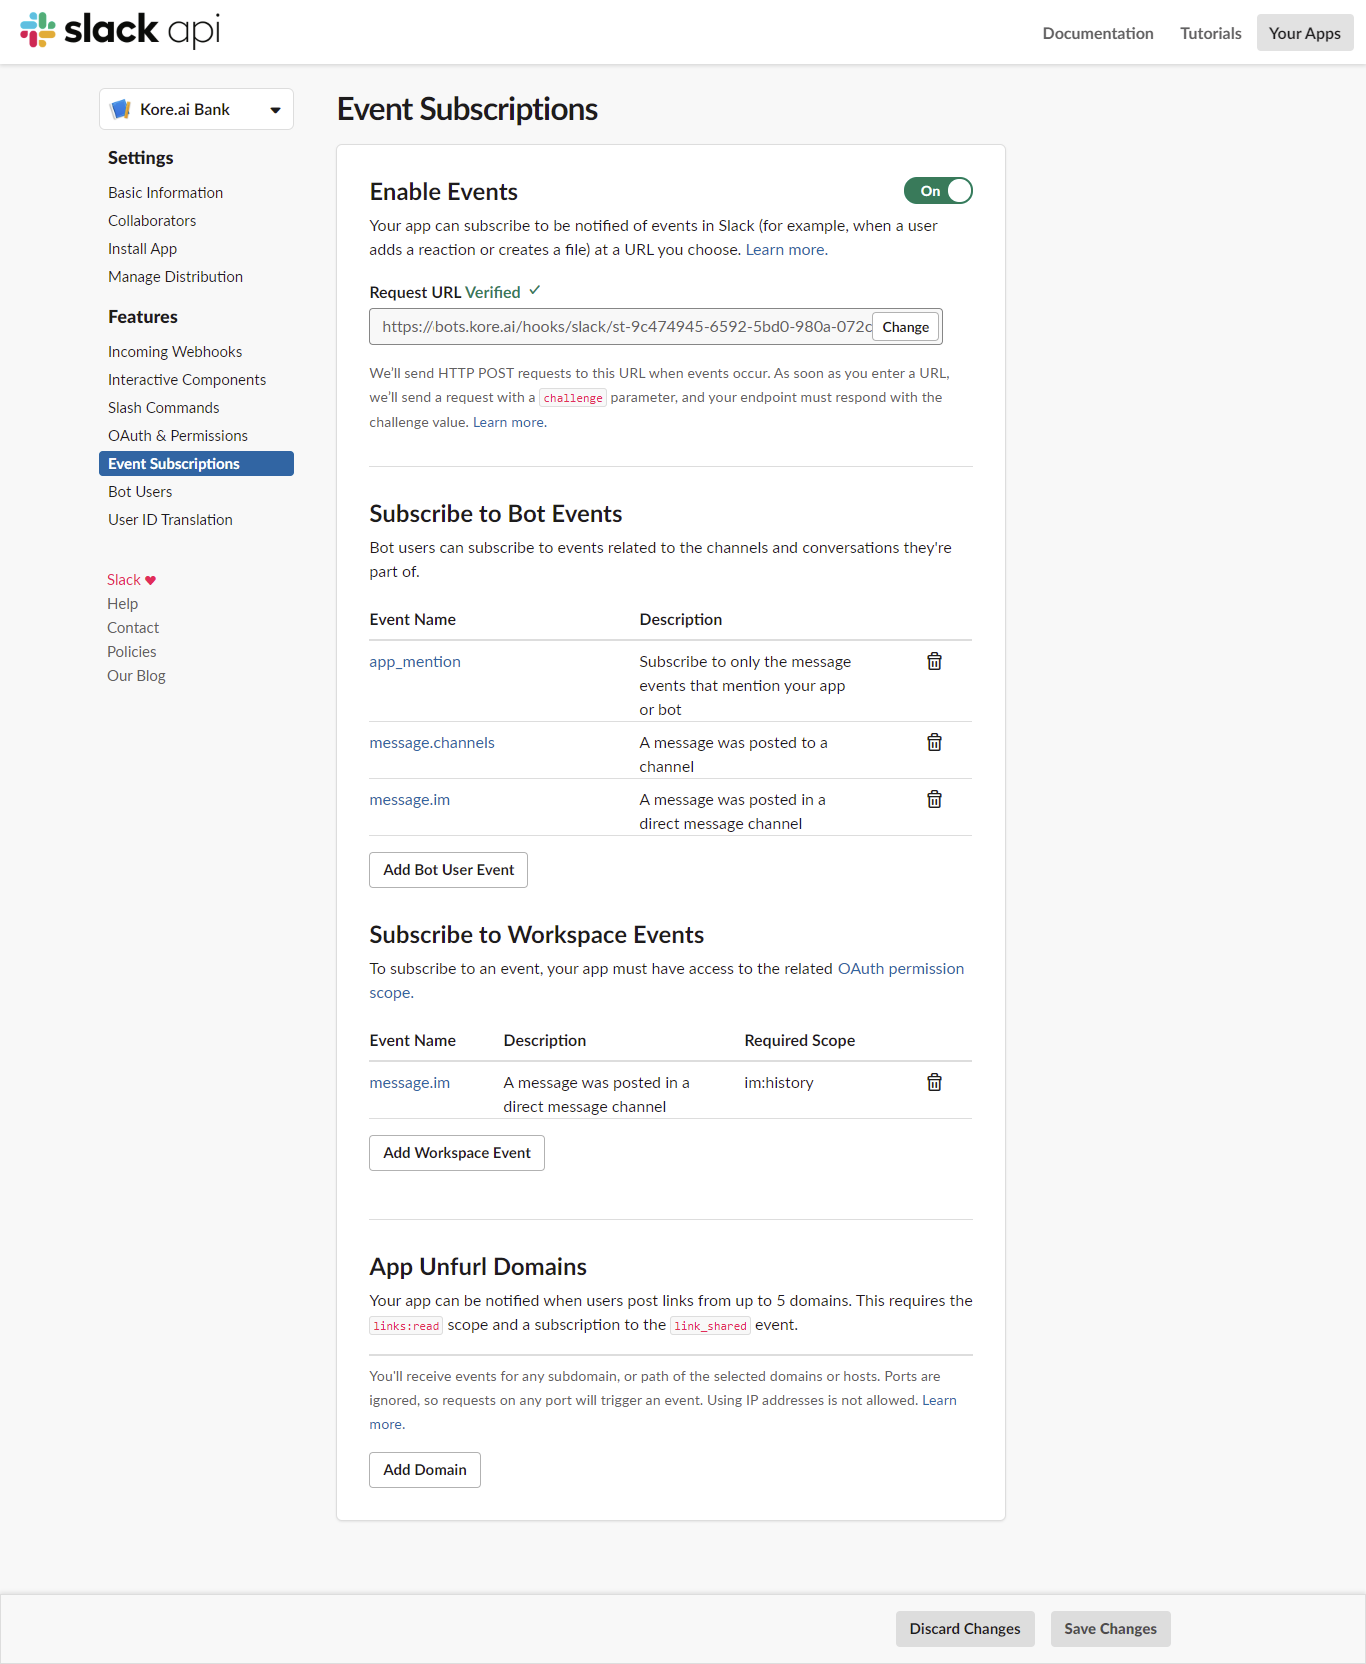
- Event Subscriptions 섹션으로 이동하고Enable Events 옵션을 활성화합니다.
- Slack 채널 페이지의 설정 탭에 있는 Webhook URL을 복사하고 Request URL 필드에 입력합니다.
- Subscribe to Bot Events 섹션에서 app_mention, message_channels 및 message.im 이벤트를 추가합니다
- Subscribe to Workspace Events 섹션에서 message_im 이벤트를 추가합니다.
- Save Changes을 클릭합니다.
- App Home 섹션 및 Show tabs 아래로 이동합니다. Messages Tab을 활성화하고 Allow users to send Slash commands and messages from the messages tab을 활성화합니다. 이것은 메시지 탭에서 앱과 사용자가 즉시 상호작용 할 수 있도록 하는 데 필요합니다.
- Basic Information 섹션으로 이동하고 App Credentials 섹션으로 스크롤을 내립니다. Client ID와 Client Secret, Verification Token 필드의 값을 확인하고 Slack 채널 페이지의 설정 탭에 입력합니다.

- Slack에서 앱을 공개적으로 배포하길 원하는 경우 다음 단계를 진행해야 합니다. Manage Distribution 섹션으로 이동하여 Remove Hard Coded Information 버튼을 클릭합니다.
- I’ve reviewed and removed any hard-coded information 체크 박스를 선택하고 Activate Public Distribution를 클릭합니다.

- Configurations 탭으로 이동하여 채널 설정을 검토 및 완료합니다.
Successfully added Slack channel 메시지는 봇 빌더 홈페이지 상단에 표시됩니다. Slack에서, Slack 앱 디렉토리에 앱을 제출하는 것은 선택 사항입니다.
Slack 채널 편집
Slack 채널을 편집하려면 다음 단계를 따르세요.
- 채널 위로 마우스를 이동하고 클릭하여 수정합니다. 채널 설정에서 필요한 업데이트와 저장을 할 수 있습니다.
- 또한 Settings 아이콘을 클릭하여 채널 정보를 사용하지 않거나 삭제할 수도 있습니다.
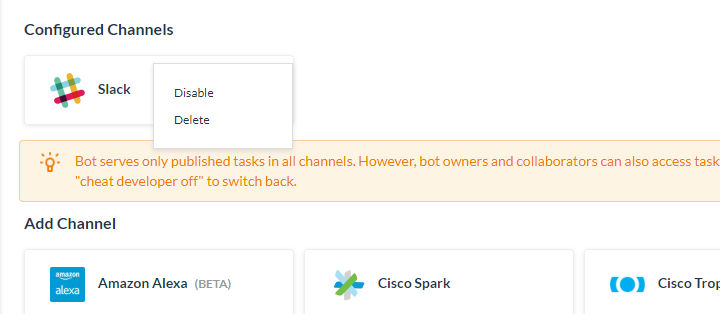
- 채널을 수정하려면 다음과 같은 명령 중 하나를 선택하세요.
- Disable/Enable– Disable을 클릭하여 봇의 Slack 채널 사용을 일시적으로 비활성화하세요 Slack 사용을 활성화하려면, Enable을 클릭하세요.
- Delete– Delete를 클릭한 후 Delete Confirmation 대화창의 OK를 클릭하여 봇 채널 구성을 영구적으로 삭제합니다.
경고: 이 작업은 영구적이므로, 취소할 수 없습니다.