In this article, we will see how to configure an API Request for a SOAP service, as part of an Alert Task. Learn more about Alert tasks here.
SOAP API Request Overview
For a task with the Connection Type specified as Webservice and the Connection Mode set to SOAP you need to define:
- Authentication – If required for your alert task, you will need to define the authentication to access the API, for example, using basic authorization, OAuth, or API Key as mentioned here.
- WSDL URL – Define the URL that contains your WSDL data. When the URL is retrieved, you can choose from a list of Available Operations based on the WSDL, and then customize the user input fields, see below for details.
- Access Using a connector – Specify if your Bots Platform is installed on-premises and you want to user the Kore.ai Connector agent, see below for details.
- Response Sample – Define key/value pairs that you expect to receive in the task payload. The keys that you provide are available as drop-down choices for handling the data to display to the end-user, see below for details.
- Preview Website Link Content in Post – The website preview content displayed in the task notification message, see below for details.
Click Save to save the API request settings.
Define the WSDL URL
- On the API Request tab, expand the WSDL URL section
- To begin the request task configuration for a SOAP request, enter the URL for your SOAP WSDL in the WSDL URL field.

- Click Get WSDL Description. A list of available operators defined in the WSDL opens.
- Click Select for the SOAP request that you want to use for your task. Kore.ai will automatically populate one or more Alert Task Fields if necessary for user input.


Customize SOAP Alert Task Fields
You can customize the default input fields provided by Kore.ai after you select one or more of the Available Operations from your WSDL. To customize the default Alert Task Fields, click Edit for the Alert Task Field that you want to customize.
The Set up Alert Task Field dialog is displayed as shown in the following illustration. 
To define end-user fields for a task, specify the values for the parameters in the Set up Alert Task Field dialog as described in the following table.
| Field Name | Description |
|---|---|
| Field Title | The title of the task input field displayed in the end-user interface, for example, Country. |
| Help Hint | The help text displayed below the task setting the title to describe the task, for example, Enter the Country Name you want the Weather for. |
| Field Key | A read-only key that represents the end-user input value that you want to collect, for example, country. |
| Field Type |
Specifies the type of task input field displayed in the end-user interface to collect user input for the request object to assign to the Key value. The default setting is Textbox, but can be customized to any one of the following:
|
| Data Type |
Select one of these user input types:
|
| Placeholder | The text displayed below the input textbox to help the user define the field. This field is only displayed for some Field Types. |
| Visibility | Specify if the task input field should be visible or hidden from the end-user. The Visibility field can also be set to Custom field where data is captured from the user but not used as a query parameter or payload field. For example, with a JIRA bot, posting a comment on a ticket using an @mention tag as shown below: “@Mike, please look into this issue” The JIRA API to Post a comment requires one query field and one payload field as:
With the Visibility field set to Custom, you can capture the user information for the user mentioned as |
| Mandatory | Select if the end-user must define this setting to save the task settings configuration. |
| Untranspose the Key | Select to disable key transposition by Kore.ai. By default, Kore.ai transposes a key/value pair, for example, "parameter":"value" is transposed by Kore.ai to "parameter:{value:"actualValue"}. When selected, keys are not transposed by Kore.ai and passed in the response as received. |
Click Add & Continue to save the alert task field for the API request and create another alert task field, or click Add & Exit to save the alert task field for the API request and close the dialog.
Access Using a Connector
To get started with defining access using a connector for a task, follow these steps:
- On the API Request tab, expand the Access using a connector section.
- In the Access Using A Connector field, select Yes to enable access for Kore.ai Bots using the Kore.ai Connector agent. This option is only visible if a Kore.ai Connector agent is configured and enabled in your enterprise on-premises network. For more information, see Using the Kore.ai Connector.


Add the Response Sample
In the Response Sample section, you can enter or paste examples of the key-value pairs that you expect to receive in the task payload. When you define the response sample, the keys specified in the Response Sample section are available as drop-down choices for handling the output data.Add the Sample Response
- On the API Request tab, Expand the Sample Response section.
- Enter your Response Sample that contains the key-value pairs from your JSON response payload. Do one of the following:
- To format the view of the response as a JSON structure with indentation as shown in the following illustration, click the Formatted
 icon.
icon.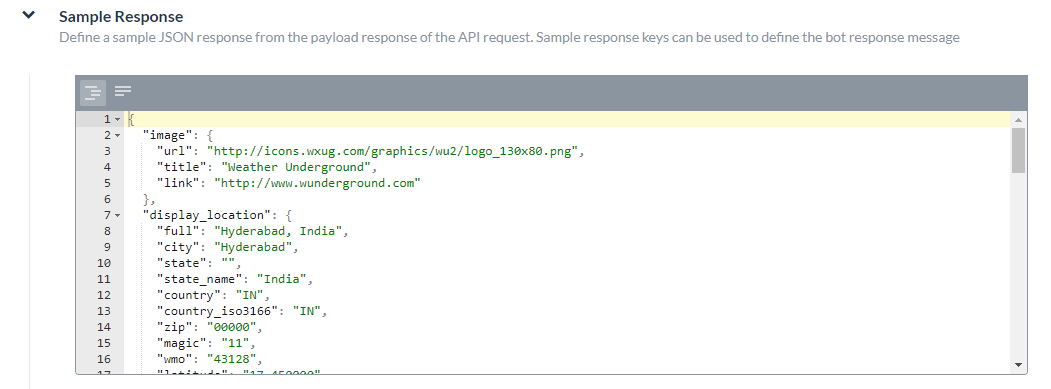
- To format the view of the response in serialized compact form as shown in the following illustration, click the Unformatted
 icon.
icon.
- To format the view of the response as a JSON structure with indentation as shown in the following illustration, click the Formatted
Website Preview Content
Some web services send links to preview media as part of the payload response. In this section, you can enable or disable preview links, and define the path to the links in the payload. By default, website preview links are disabled. The following illustration is an example of the Preview Website Link Content in Post section, when Yes is selected.

When enabled, define the path to the preview links in the payload in the Path to the Link(toPreview) field, if the path is not in the root of the payload. For example, in the following code example from an RSS payload, the path to the preview is… “item”: [ { “title”: “U.S. to Boost Refugee Intake by 30,000 by 2017”, “guid”: { “-isPermaLink”: “false”, “#text”: “SB12418904751422433479504581245034032986752” }, “link”: “http://www.wsj.com/articles/john-kerry-says-u-s-to-admit-30-000-more-refugees-in-next-2-years-1442768498?mod=fox_australian”, …When Preview website link content in Post is enabled, select preview objects such as:
- Preview Title – Displays the title of the website content.
- Preview Description – Displays the description of the website content.
- Preview Media(Video) – Enables display of video links from the website content.
- Preview Media(Image) – Enables display of image links from the website content.