As a Bots Admin or admin user, you can configure Kore.ai to synchronize with your organizational LDAP Active Directory to enroll users from your company into Kore.ai. On the Enrollment > Directory sync page, you can do the following:
- Use a cloud-based agent to connect to your Active Directory (AD) server
- Manually start synchronization with your company Active Directory
- Create exclusion rules used to prevent unwanted updates to existing users or groups
- Define distribution lists to import from Active Directory
- Define organizational units to import from Active Directory
- Set up an automated schedule for synchronization.
Kore.ai can synchronize with your LDAP Active Directory to match the member information from your organization to include, for example, user profile data such as name, department, title, telephone number, location, and user status in the organization.
If a Kore.ai user leaves your company and is deactivated in Active Directory, Kore.ai can automatically deactivate the Kore.ai account during the next scheduled Active Directory synchronization. Your company’s Active Directory is never modified during synchronization.
Note: Post v8.1, the support for Kore.ai Directory Agent for AD Sync has been discontinued. You can use the Cloud Connector option discussed in detail in this document or use the public APIs for synchronizing your users, click here for details.
Prerequisites
To configure Active Directory synchronization, you must:
- Have administrative access for reading and executing actions on your LDAP server.
- Familiarity with LDAP queries and LDAP server administration.
- Have a Microsoft Active Directory LDAP Server.
Kore.ai offers a wizard-based approach that will take you through the process to set up access to an Active Directory and configure the synchronization process customized for your company. You can define synchronization for members, and if needed, distribution lists and organizational units.
Configuration
To configure Active Directory using the cloud-based connector, you must log on to the Bots Admin Console, and complete the following steps to access the configuration settings for your company Active Directory sync.
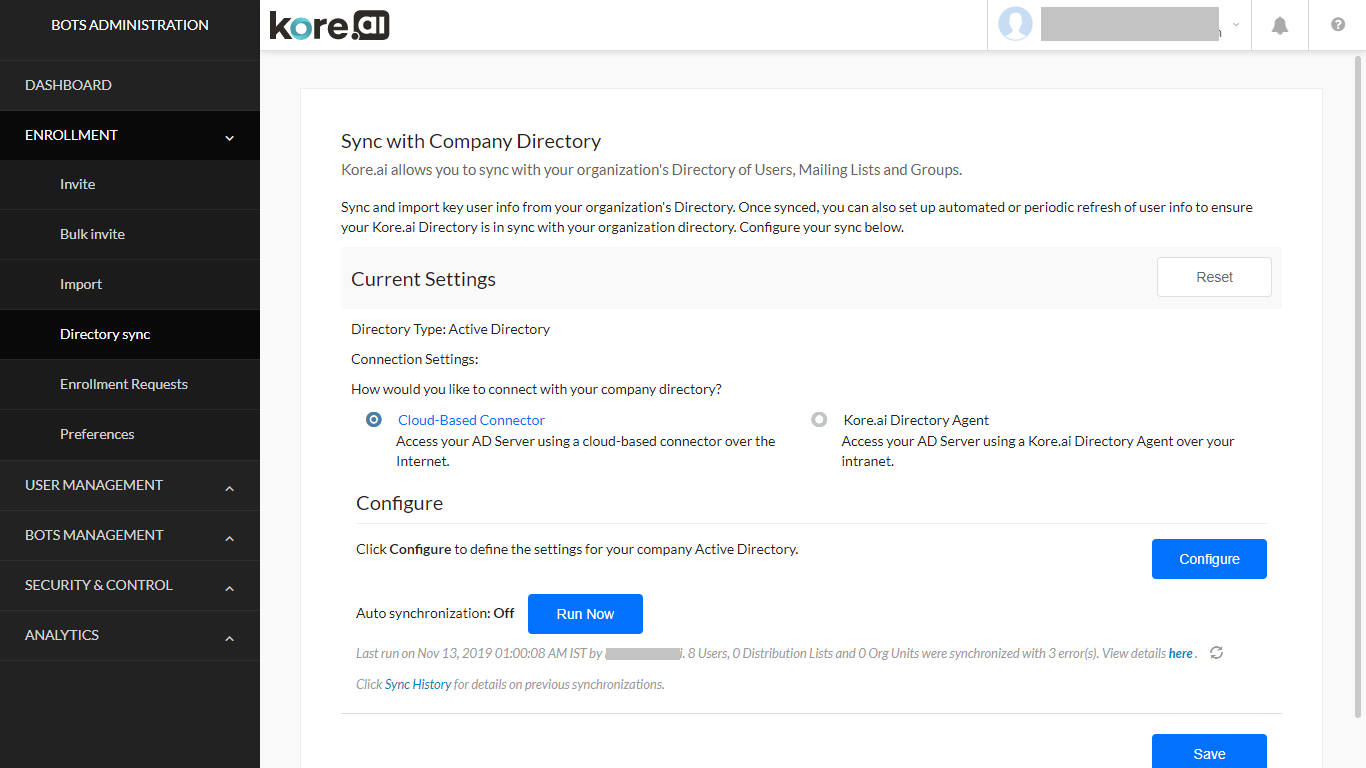
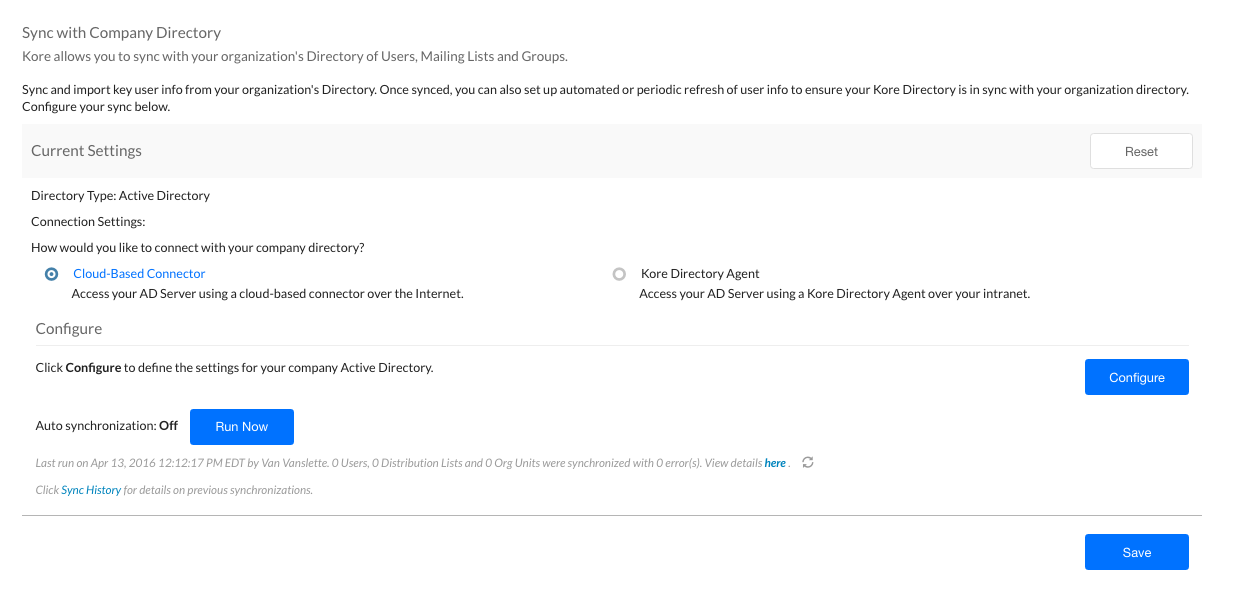
- In the Enrollment module, on the Directory Sync page, select Cloud-Based Connector.
- From the Configure section, click Configure.
- The Configure Synchronization with your Company Directory dialog is displayed. Follow the steps given here to proceed.
AD Sync Configuration
Complete the steps in the following procedure to define the synchronization settings. If you have already defined your synchronization settings, you can modify the settings and initiate a manual sync.
NOTE: If you are using a bot built on the platform from before v7.3, you will have an option to Upgrade or Configure. If you proceed to Configure without Upgrade the following options from the configuration steps will not be available:
-access to AD sub-Groups or option to create a group within Kore.ai for the OUs in AD;
-add custom fields to the user data by mapping it to the right key from the AD server incoming payload;
– specify the inclusion rules.
Also, the older version would be deprecated in the upcoming releases.
In the following procedure, the cloud-based connection settings dialogs are described.
- On the Connection tab, define the following fields:
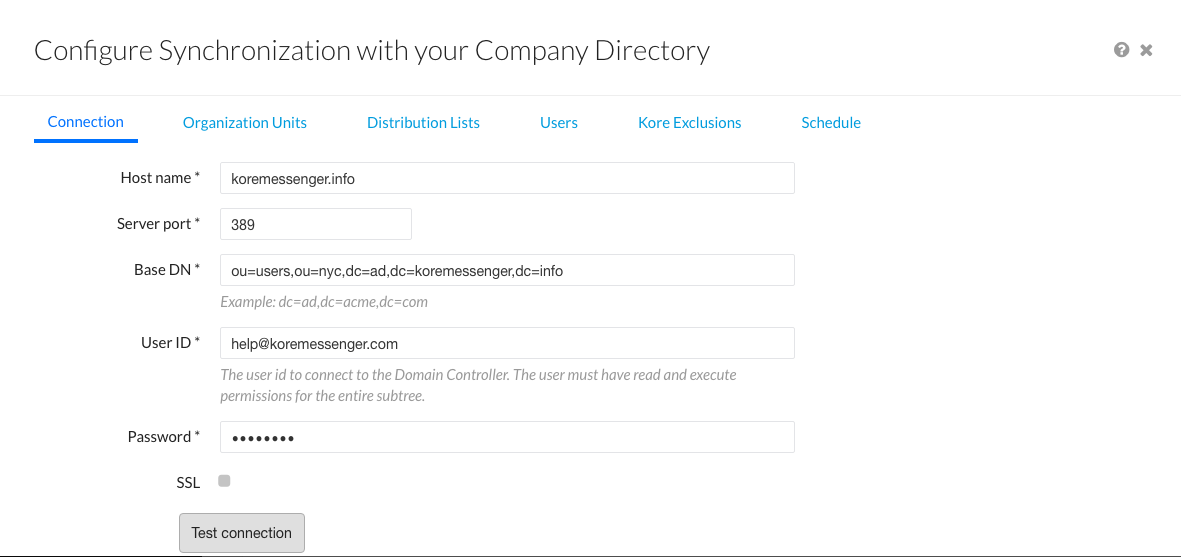
- Host Name – The name of the domain host, for example, MyCompany.com or 10.12.6.151.
- Server Port – The port number for the domain host, for example, 10042.
- Base DN – The server location for users and groups in a domain, for example, dc=kore,dc=com.
- User ID – The username for authentication to connect to the domain controller.
- Password – The password for authentication to connect to the domain controller.
- SSL – Select to enable SSL for HTTPS.
- Test Connection – Click to test the authentication and Host configuration settings.
- Click Save and next to continue.
- Optionally, on the Organizational Units tab, you can define the Org Units that need to be imported from your company directory. Groups and sub-groups from the selected OU will be synchronized into the platform and the hierarchy of groups as present in the AD Server will be maintained in the platform.
- You can choose to
- Import all Organization Units,
- Not Import any unit, or
- Import specific units.
- . Click Save and next to continue.
- You can choose to
- Optionally, on the Distribution Lists tab, you can select to Import Distribution Lists from Active Directory.
- On the Users tab, you can define the desired User Attributes (profile fields) that need to be imported from your company directory. You can set import criteria, inclusion rules, and exclusion rules to control the information that you want to import from your organization.
- On the User Attributes child tab you can import the user profile information
- using predefined Default mapping of Kore.ai user profile fields to relevant LDAP attributes or
- create your own custom mapping with the Customer Attribute name and values.
- On the Inclusion Rules, you can sync select users from your AD Server by defining the sync criteria or filters using the profile parameters. You can write the rules using the LDAP filter syntax, refer here for more.
- On the Exclusion Rules child tab, you can create rules to limit incoming user records for the user (default and custom) data.
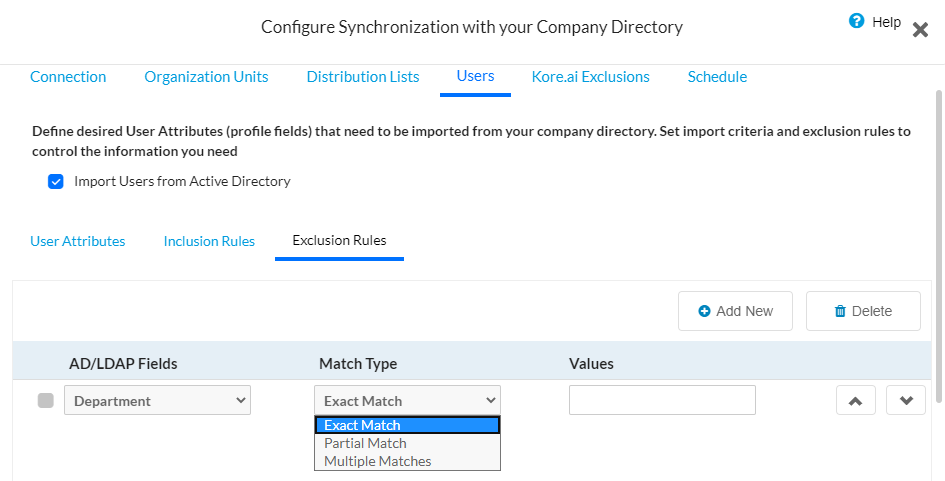
- On the User Attributes child tab you can import the user profile information
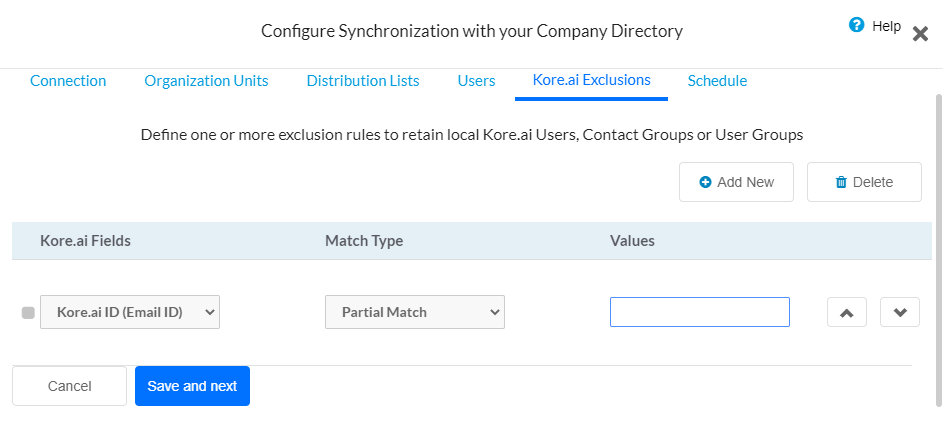
- Optionally, on the Kore.ai Exclusions tab, you can define exclusions for synchronization to prevent Active Directory from replacing specific users (default and custom), distribution lists, or organizational groups.
- On the Schedule tab, enable and define the synchronization schedule with the Active Directory as shown in the following illustration.
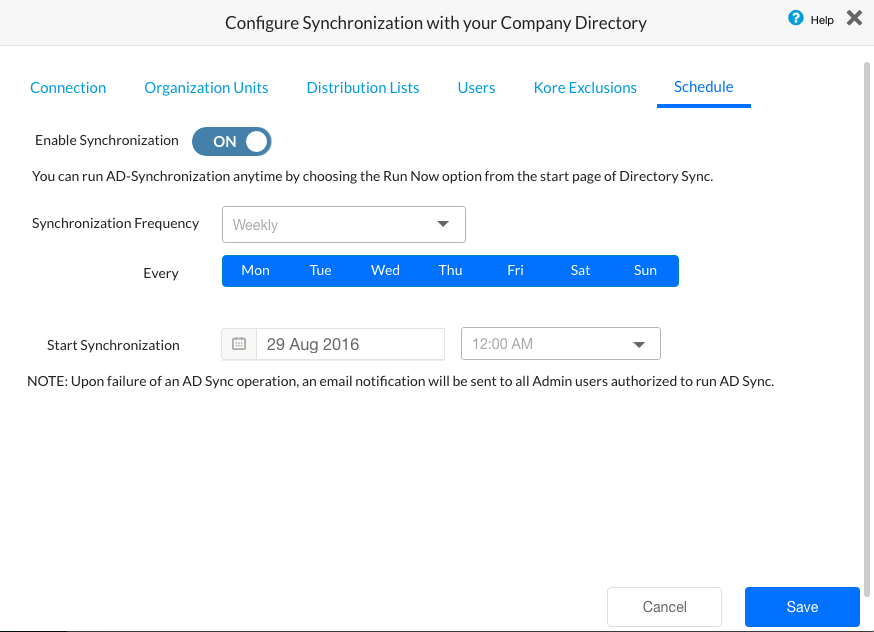
- Enable Synchronization – Click to enable or disable a synchronization schedule.
- Synchronization Frequency – Select one of:
- Daily – Specify the Start Synchronization date and time to begin the daily sync.
- Weekly – Specify the day of the week to synchronize and the Start Synchronization date and time to begin the weekly sync.
- Monthly – Specify the day of the month to synchronize and the Start Synchronization date and time to begin the monthly sync.
- Other – Specify the number of DAY(S) or WEEK(S) to synchronize and the Start Synchronization date and time to begin the sync.
- Click Save to save the synchronization settings and close the Configure Synchronization with your Company Directory dialog.
You may want to view the results of Active Directory sync, see here.
Notes regarding deleted users:
- Users who are deleted or marked as deleted in the AD Server will be deleted from the Bots Platform as well and will be not available in the list of users during AD sync process
- The user record will be retained in the database for any cross-reference and audit purposes
- Any login attempts by such users will be blocked by the system
- Deletion would be against a specific Account to which the user belongs to i.e. if the user is part of multiple accounts, then the user will be able to access any other accounts in which the user is still an active state
- The following user cannot be deleted from the account
- User is Bot Owner for one or more bots
- User is Account Owner
Such users will not be deleted from the account during the AD Sync process. The AD Sync logs will contain the list of such users who could not be deleted along with the reason.
Manual Sync
You may want to initiate manual sync with your Active Directory to update when there are many changes between scheduled syncs.
To complete this procedure, you must have already defined synchronization settings for your account.
How you access the Active Directory Sync configuration depends which type of connector you are using. Complete one of the following procedures to access the Kore.ai Active Directory configuration dialog.
To manually start an Active Directory sync using the cloud-based connector
- In the Enrollment > Directory Sync page, in the Current Settings section, click Run Now as shown in the following illustration.
The Directory Synchronization is in-progress message is displayed at the top of the page.
View Report
After you configure and run an Active Directory sync for your account, you should review the results of the sync. This topic describes how to access and view a report for the current Active Directory sync.
How you access the last run results for your Active Directory sync runs depends which type of connector you are using. Complete one of the following procedures to access the last run results for Kore.ai Active Directory sync.
To view the last run report for an Active Directory sync using the cloud-based connector
- In the Bots Admin Console Enrollment module, on the Directory Sync page, click here as shown in the following illustration.

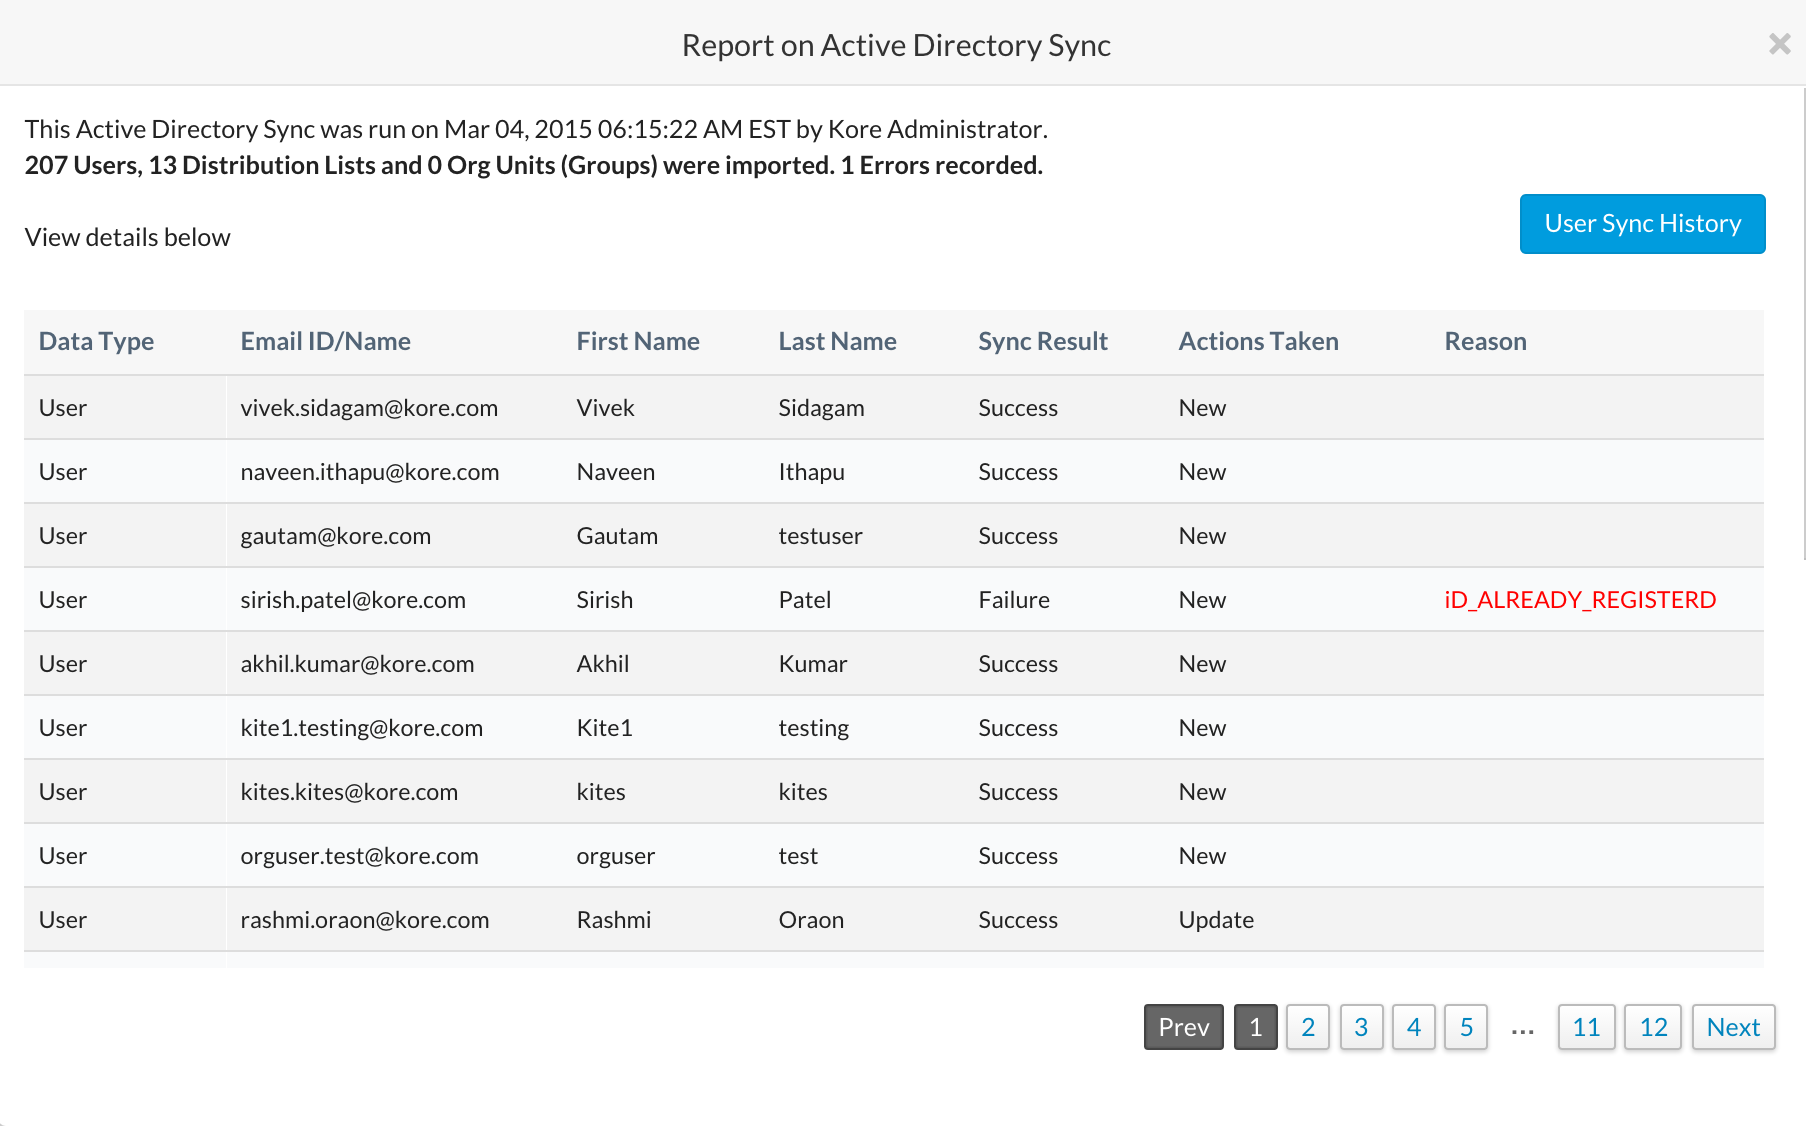
Viewing the Last Run Report
The Report on Active Directory Sync dialog is displayed as shown in the following illustration.
View History
You can review all historical Active Directory sync operations along with the results of that sync. This topic describes how to access the report and how to retrieve details about the synchronization.
How you access the history for your Active Directory sync runs depends which type of connector you are using. Complete one of the following procedures to access the history results for Kore.ai Active Directory sync.
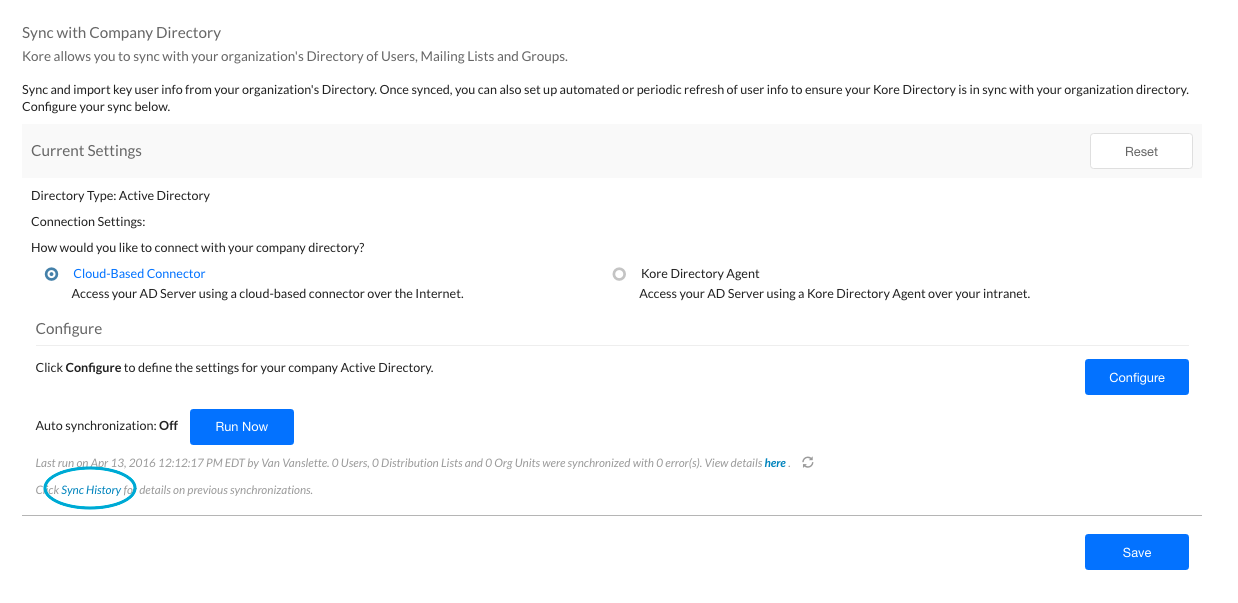
To view historical reports for Active Directory sync using the cloud-based connector
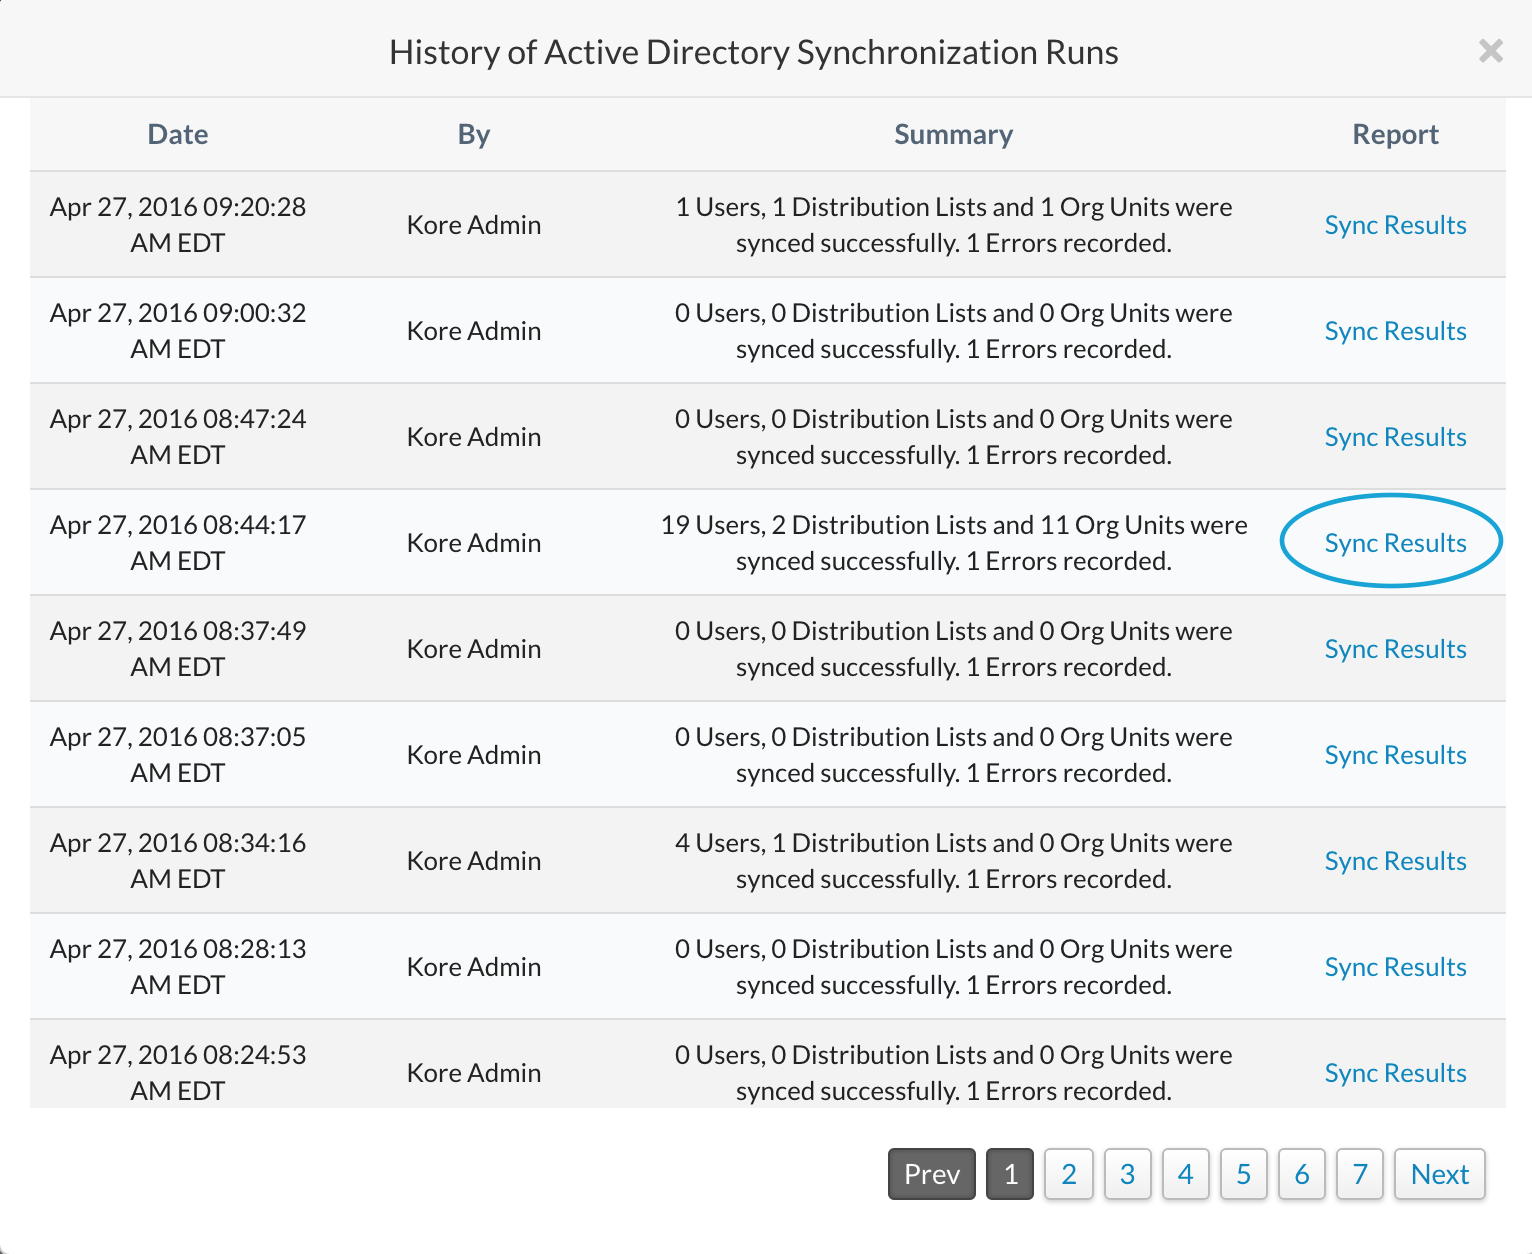
- In the Bots Admin Console Enrollment module, on the Directory Sync page, in the Current Settings section, click Sync History as shown in the following illustration.
Viewing a Report
In the History of Active Directory Synchronization Runs dialog, to view the results of an import, in the Report column for the import that you want to view, click Sync Results.