| Important: The Skype channel is now deprecated. |
To add the Skype channel to your bot, you need a developer Microsoft Bot Framework account to configure the connection between Skype and Kore.ai. Adding the Skype channel to your Kore.ai bot is a three-step process to allow end-users to interact with your bot. To add the Skype channel to your bot, follow the steps below:
- Register the Bot – In your Microsoft Bot Framework developer account, you must register the bot by adding all the bot details and creating the App ID and Password. To register the bot, you must have created and registered for a free account in the Microsoft Bot Framework developer portal.
- Enable Channel – After registering the bot, you must enable the channel.
- Publish Channel – After the channel is enabled and all configurations are verified, you must publish the bot to make it available for developers.
Add Skype Channel
To complete this procedure, you must have or register for a new developer account in the Microsoft Bot Framework developer portal.
- In Bot Builder, under the Bots section, click the bot you want to add the Skype channel to.
- On the Channels tab, click the Expand
 icon for the Skype section. The Skype Channel page is displayed.
 - Log in to the Microsoft Bot Framework portal, and then click Register a bot.
- On the Register a bot tab, under the Bot profile section, enter your Bot Name, Bot handle, and Description.
- In the Configuration section, paste the Webhook URL from the Bot Builder into the Messaging endpoint field. For example, https://bots.kore.ai/hooks/skype/st-2724c525-484b-55ca-a844-8d7dfa6b6b23
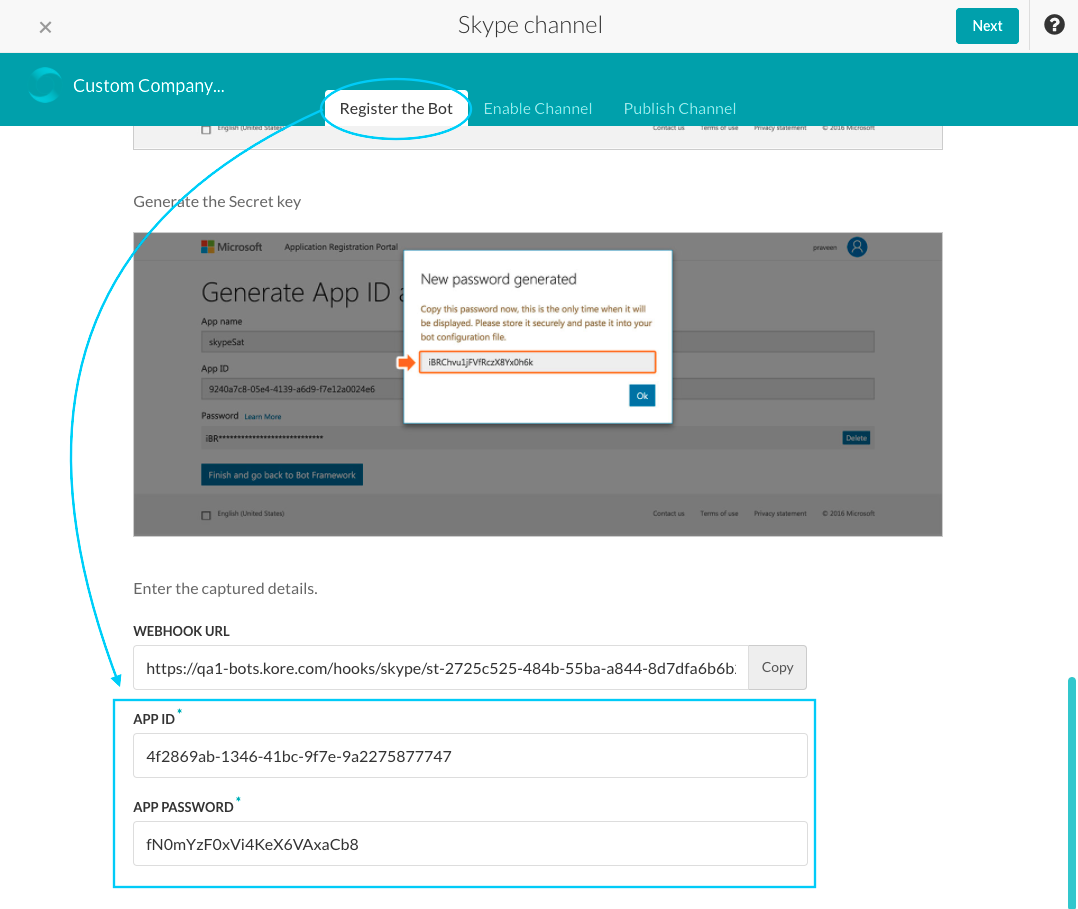
- Click Create Microsoft App ID and password as shown in the following illustration.

- On the Generate App ID and password page, click Generate an app password to continue.
- Save the generated Password and the App ID to use later in the Register the Bot tab in Bot Builder for the Skype Channel page.
Note: The only time the full password is displayed is when it is generated and displayed in the Generate Password dialog. Copy and save the password to a secure location until added to the Skype Channel page in Bot Builder.

- Click Finish and go back to Bot Framework. The Register a bot tab is displayed.
- To save your settings, agree to Privacy statement, Terms of Use, and Code of Conduct.
- Click Register.
- On the Bot created dialog, click OK. The My bots tab is displayed.
- Optionally, click Test to check the connection to your bot. The Endpoint authorization succeeded message is displayed.
- In Bot Builder, on the Register the Bot tab, paste the App ID and Password you saved from the Microsoft Bot Framework developer portal into the APP ID and APP PASSWORD fields.
- Click Next as shown in the following illustration.
- On the Enable Channel tab, review how to edit the Skype channel settings in the Microsoft Bot Framework developer portal if needed, and then click Next. The Publish Channel tab is displayed.
- In the Enable Channel section, click Yes to enable the Skype channel for Kore.ai.
- Click Save.
The channel configuration settings are saved and the Skype Channel page is closed.
Edit Skype Channel
To edit the Skype channel, follow the below steps:
- Hover over the channel to modify, and then click the Settings
 icon displayed to show the command menu displayed in the following illustration.
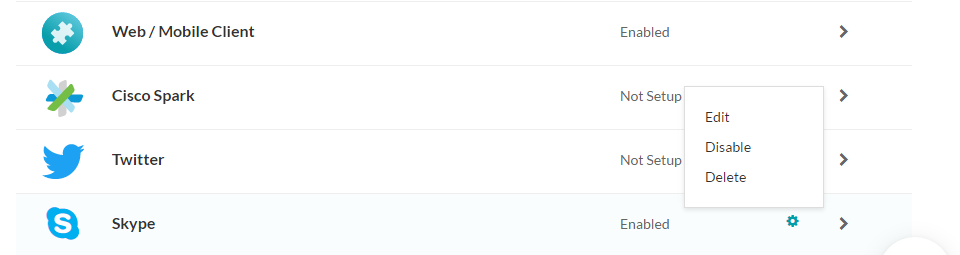
Select one of the following commands to modify the channel:
- Edit – Click to open the Skype Channel page.
- Disable/Enable – Click Disable to temporarily disable the use of the Skype channel for your bot. When the channel is disabled, click Enable to enable use of the Skype channel.
- Delete – Click Delete. On the Delete Confirmation dialog box, click OK to permanently delete the bot channel configuration.
Warning: This operation is permanent and cannot be undone.