In this use case we will explore a scenario in a Travel Planning Assistant, where Bot Functions can help reuse the same functionality in several places. We will see how a travel spend report can be programmed as a function and used, for example, to send to users upon request in different circumstances, to integrate with apps or create digital views.
For details on what Bot Functions are and how they are implemented in the Kore.ai Bots platform, refer here.
Problem Statement
In a Travel Planning Assistant used by a travel agency, we have a reporting task that requires the VA to provide information on how much a traveller has spent in different categories, as part of a booking made via the agency.
This information can be provided in several ways. For the purpose of this article, we will demonstrate how to create a dialog task that sends the user these details upon request, and how to create a widget, as part of a Digital View, that will display the information, say within an app that is integrated via the Widget SDK.
Prerequisites
- To go through these configurations, you need to know at least the basics of building a Virtual Assistant.
- A pre-built Virtual Assistant. We will use the Travel Planning VA for this example.
- Following is the Script file with two functions using the message templates to display the data (see here for more on message templates):
- tableTemplate – takes a two-dimensional array and displays the content in a tabular format
- pieTemplate – takes a two-dimensional array and displays the content in a pie format
Copy the following content and save it as a .js file (say, functionEX.js)function tableTemplate(data){ var message = { "type": "template", "payload": { "template_type": "mini_table", "layout": "vertical", "text":"Travel Spend", "elements": [] } }; for (i=0; i < data.length; i++) { var j=0; var element = { "primary":[[data[i][j]],[data[i][j+1],"right"]], "additional":[[data[i][j+2],data[i][j+3]],[data[i][j+4],data[i][j+5]]] }; message.payload.elements.push(element); } return JSON.stringify(message); };function pieTemplate(data){
var message = {
“type”: “template”,
“payload”: {
“template_type”: “piechart”,
“pie_type”: “regular”,
“text”: “Travel Spend”,
“elements”: [] }
};
for (i=0; i < data.length; i++) {
var element = {
“title”: data[i][0],
“value”: data[i][1] };
message.payload.elements.push(element);
}
return JSON.stringify(message);
};
Implementation
Import the Bot Function Script
To begin using Bot Functions, you first need to import a script into your assistant, by following the steps below:
- Open the Travel Planning Assistant.
- Select the Build tab from the top menu
- From Configurations select the Bot Functions section.
- Click Import (or Import New) to open the Import Custom Script window
- Drag and drop or Browse the script file that you saved from the Prerequisites section and click Import.
- Once the success message is displayed click Done.
- Your Script file is ready to use.

Create a Dialog Task
Open the Dialog Tasks page and create a New Dialog Task called “Get Travel Spend”.
- Add entities to capture the Flight Number and Fare.
- Ideally, there would be a service call to fetch the =details. Here we will use static values for demonstration purposes.
- Add a Script node using the Bot Action and enter the following – we are declaring an array carrying the spent amount on Airlines, Hotels and Experiences.
context.travelspend = [["Airlines",1264],["Hotels",568],["Experiences", 324]; - Add a Message node to send this data to the Bot Function declared earlier and get the report.
- From Bot Responses section, click Manage Responses
- Add Bot Response, select Web/Mobile Client as the Channel, switch to JavaScript tab and enter the following code to display the values in a tabular format:
var info = context.travelspend;

print(tableTemplate(info));
- Add another Message node to send this data to the Bot Function declared earlier and get the report.
- From Bot Responses section, click Manage Responses
- Add Bot Response, select Web/Mobile Client as the Channel, switch to JavaScript tab and enter the following code to display the values in a pie chart:
var info = context.travelspend;

print(pieTemplate(info));
Close the Dialog Task.
Create a Widget
The bot function can also be used to create a Widget using Digital Views, as follows:
-
- Go to Build > Digital Skills > Digital Views.
- Click Create Widget.
- Name your Widget as Travel Spend.
- Select Pie Chart as the Template Hint.
- You can link the Widget to the Dialog Task you just created. For this example, we will choose JSON as the Source to populate the data for this widget.
- Add the following script:
var message =
{
      "templateType": "piechart",
      "pie_type": "regular",
      "title": "Summary",
      "description": "monthly report",
      "elements": [
        {
          "title": "Airlines",
          "value": "1264.0",
          "displayValue": "$ 1,234"
        },
        {
          "title": "Hotels",
          "value": "568",
          "displayValue": "$ 568"
        },
        {
          "title": "Experiences",
          "value": "324",
          "displayValue": "$ 324"
        }
      ]
    };
print(JSON.stringify(message));
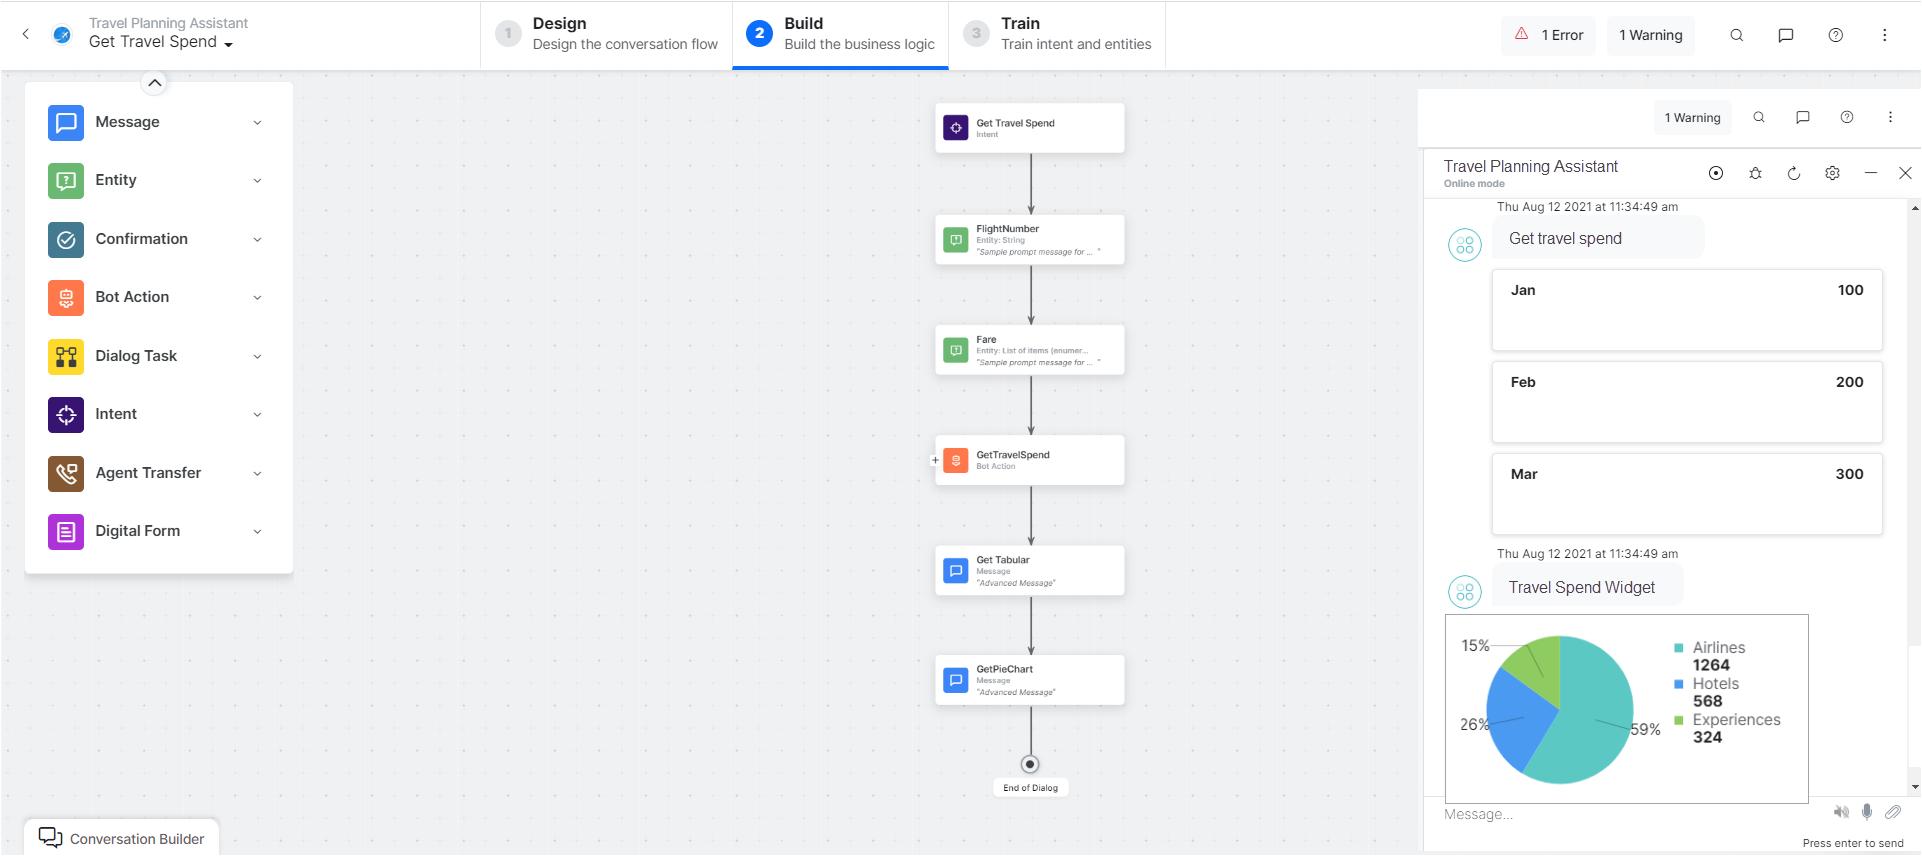
Testing
Use Talk to Bot and try both functions. Thus we have used the same function to display the reports in multiple places.