The Kore.ai XO Platform allows you to declare and use variables within the assistants you build. These variables can be used to capture values that are commonly used by different tasks, nodes, and other elements
In this use case, we will explore a scenario in a Travel Planning Assistant, where variables can be used, and see how Content Variables can be used to pass language-specific messages.
For details on what Variables are and how they are implemented in the XO Platform, refer here. For a use case with Global Variables, refer here.
Problem Statement
In our Travel Planning Assistant, we welcome users when they connect. The assistant is multilingual and we want the messages to be in the appropriate user language.
In this document, we will see how Content Variable can be used to store the message in multiple languages.
Prerequisites
To go through these configurations, you need to know at least the basics of building a Virtual Assistant. This is because your assistant needs to have been already built when you begin working on your variables.
Your Virtual Assistant will also need an on Connect event configured, as well as some language settings, as explained below:
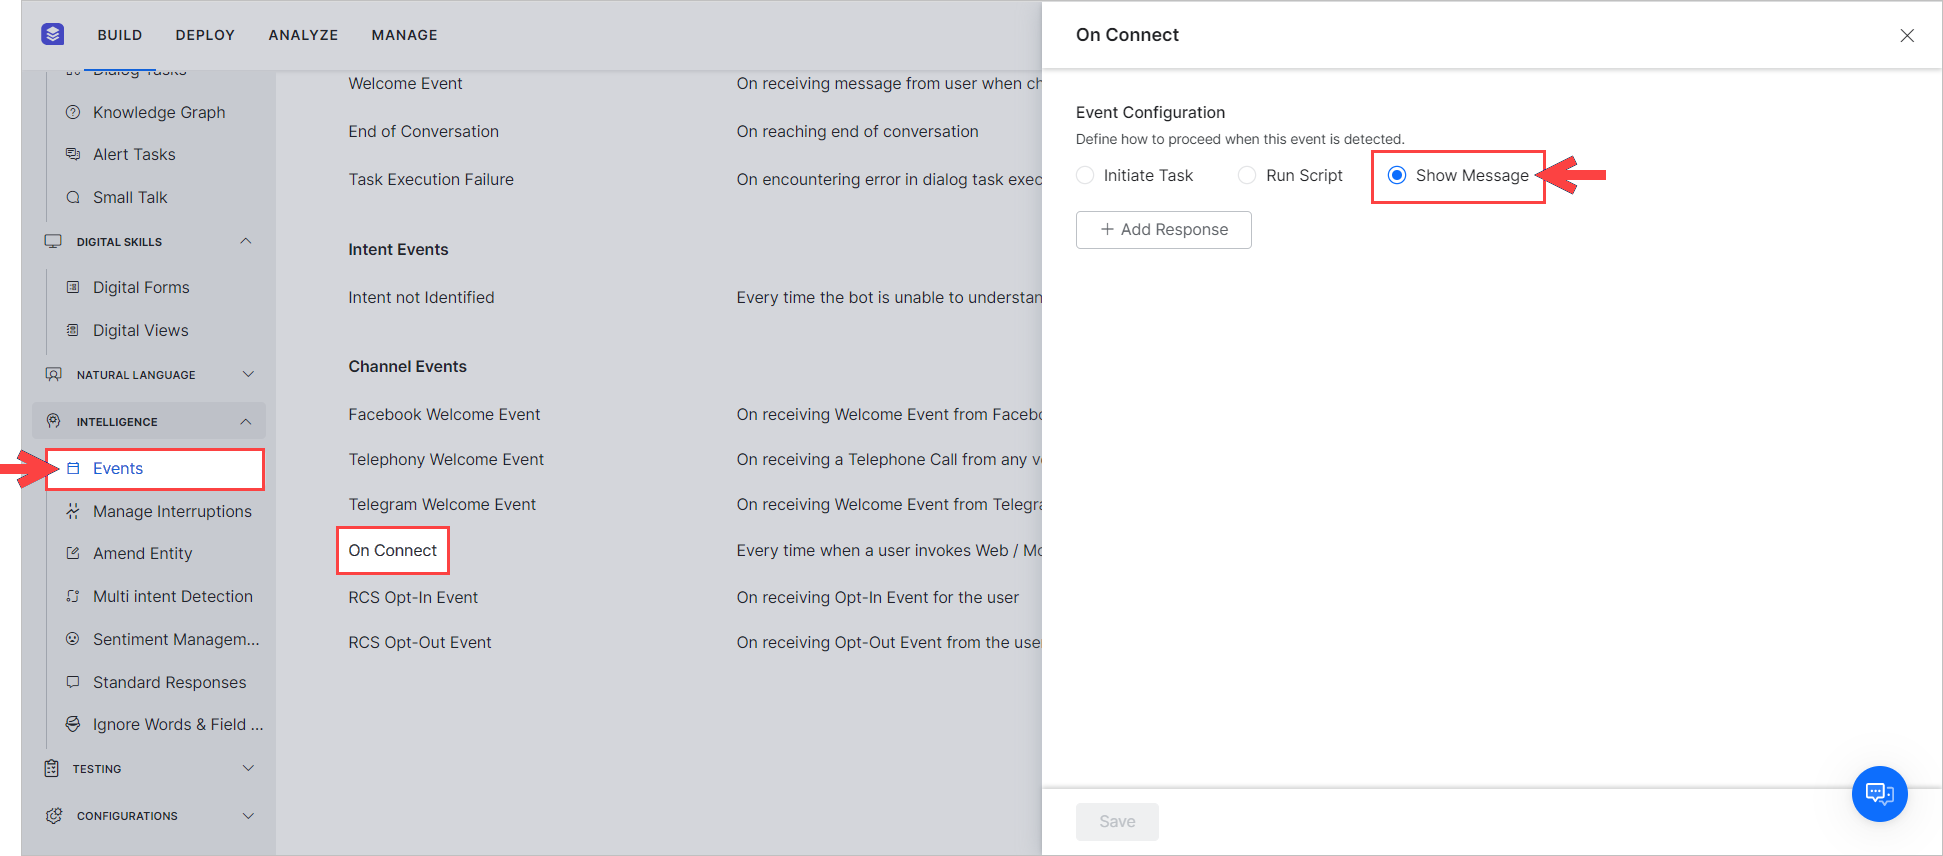
- Select the Build tab from the top menu
- From Intelligence select Events
- Click the On Connect event and configure to Show Message.

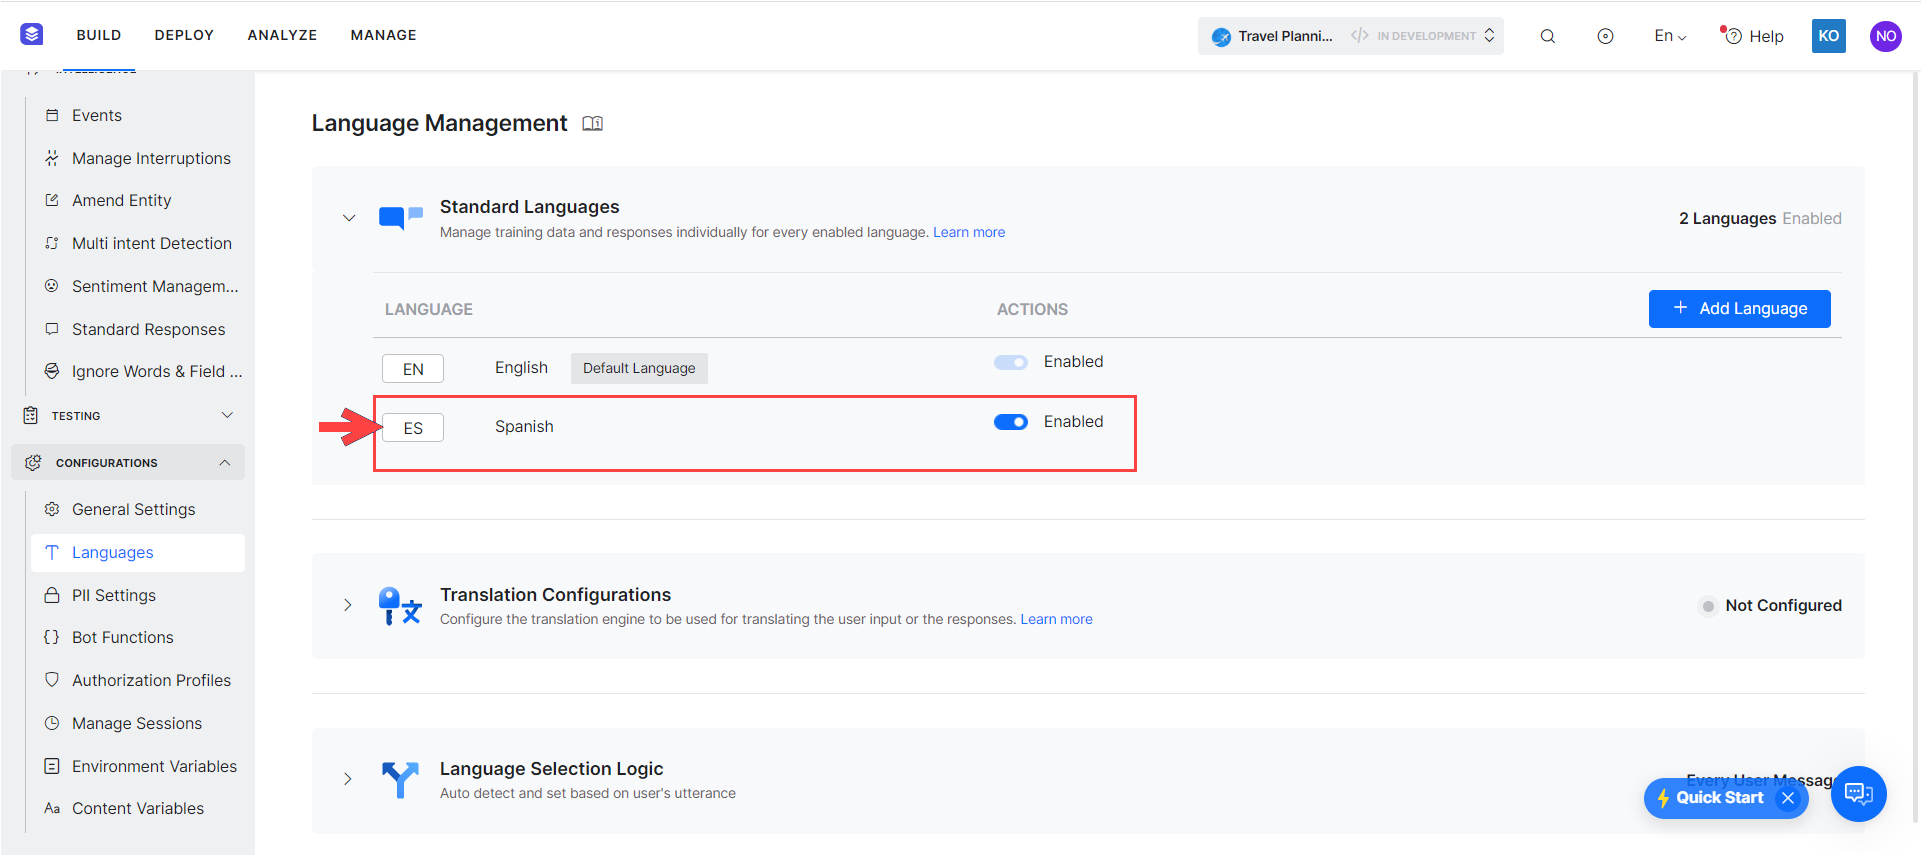
- Enable the Spanish language for the assistant
- From Configurations, select Language,
- Click Add Language and Configure the Spanish language.

Prerequisites
Declaring a Content Variable to hold the On Connect message will ensure it is not missed in the language translation.
- Open the Travel Planning Assistant.
- Select the Build tab from the top menu
- From Configurations select the Content Variables section.
- Click Add Variable to open the corresponding window.
- Enter Variable Name and Variable Value. For this use case, we are calling the Variable connectMessage, and for the value, we are entering the “Welcome to our Travel Portal. ”.
- Save.

- Now switch the language to Spanish and for the same connectMessage variable using the edit icon enter the text in Spanish – “Le damos la bienvenida al portal de viajes. “.

- Return to the English version of your assistant.
- Return to the On Connect Event Handler, click Add Response and replace the text with reference to the content variable using the following code:
{{content.connectMessage}}
- Save the changes.


Testing
Use Talk to Bot to test the changes.
- Open Talk to Bot.
- The message will appear in English.
- Use the cheat command to switch the language:
cheat lang Es. - Reconnect to the assistant and see the message in Spanish.
