The new Intent Discovery module helps you auto-extract popular intents from previous user conversations. It reduces the time and effort to build a virtual assistant and leads to the success of your Conversational AI Journey. This is a beta feature and is available only for the English language and Enterprise users.
You can upload your historical transcripts in CSV format. After the transcripts are uploaded into the bot, the bot uses LLMs to identify the different topics, intents, or conversations between the user and the bot. It intelligently identifies all the intents available. You can review each intent to understand which conversations have resulted in identifying these intents. After the review, you can also see the underline utterances that resulted in identifying an intent. You can either add these intents as new intents for your virtual assistant or pick specific utterances and train them as utterances for your existing dialogs and FAQs. So, it helps both ways – either create new intents or enhance the training you provide to your virtual assistant.

The Intent Discovery journey consists of the following steps:
- Create a Project: You may have many business use cases to automate. Projects help manage intent discovery for each business use case separately – a project for a specific use case.
- Upload Transcripts: Upload your use case-specific historical transcripts in CSV format. Conversations are extracted from the uploaded transcripts.
- Extract Intents: Intents and training data are extracted from the conversations.
- Train the Utterances: to create new intents or add them as training data: You can add new intents as dialogs or FAQs or train them for existing dialogs or FAQs.
Create a Project
- Go to Build > Tools > Intent Discovery.

- Click the Create Project button.
- Enter a name and a brief description of the project. Note that the character limit for Project Name is 256, and Description is 1000.

- Click Proceed. The new project is created. You see the Intent Discovery page with the header Projects / {{New Project’s Name}}.


The Intent Discovery landing page lists all the projects with conversational insights for each project, such as the status of the project, number of sessions, intents extracted, and Results in terms of added dialogs, added FAQs, trained dialogs, and trained FAQs. Note that the result will be NA for the projects for which intent extraction is incomplete.
The status of a project can be any of the following, displayed in the Status column:
- No Files Uploaded
- Intents Not Extracted
- Intent Extraction In Progress
- Intents Extracted

Upload Transcripts
On the Intent Discovery page for the new project, you can see a button to initiate the upload of the transcript file(s) and a link labelled Sample File to download a sample transcript file.
![]()
You can download the sample CSV file by clicking the link. Ensure to upload transcripts in the format specified in the sample file. Please note that all the columns in the file must be filled.
Format of the CSV file

| Field Name | Description |
|---|---|
| Id | The session ID of the conversation. (For all the conversations in a session, the Id must be the same.) |
| Sender ID | The ID of the bot or agent. |
| Other Party ID | The ID of the user talking to the bot or agent. |
| Direction | The message direction – in (user input) or out (bot/agent response). |
| Message | The message shown to the user or the bot/agent, depending on the message direction. |
| Message Type | Format in which the message is sent or received – text/html. |
| Created on | Date & time on which the message is sent or received. |
Limitations
- Number of transcripts files allowed: Up to 5 CSV files per project
- Maximum size of CSV transcript file: 1MB each
Steps to upload the transcripts
- Click the Upload Transcript button, and then browse and select the transcripts files (CSV format). The selected files are uploaded, and you see a prompt to manage the transcripts on the next page.


- If some transcript files are uploaded but No intents extracted so far, the Manage Transcripts button is displayed as shown in the screenshot below.

- On clicking Manage Transcripts, you can see the Transcripts dialog box with the list of all the transcript files. Below details are displayed on the window:
- File Name: Name of the transcript file uploaded
- Upload Time: Time of transcript upload
- Sessions: Count of sessions in the transcript, gets populated after the successful extraction of conversations.
- Status, which can be one of the following:
- Conv. Extraction In-progress
- Conversations Extracted
- Intents Extracted
- Invalid File
- Upload Failed
![]()
The dialog box has the provision to download a sample file using the Sample File button and upload additional transcript files by clicking the Upload Transcripts button.
View Conversations in the Transcript
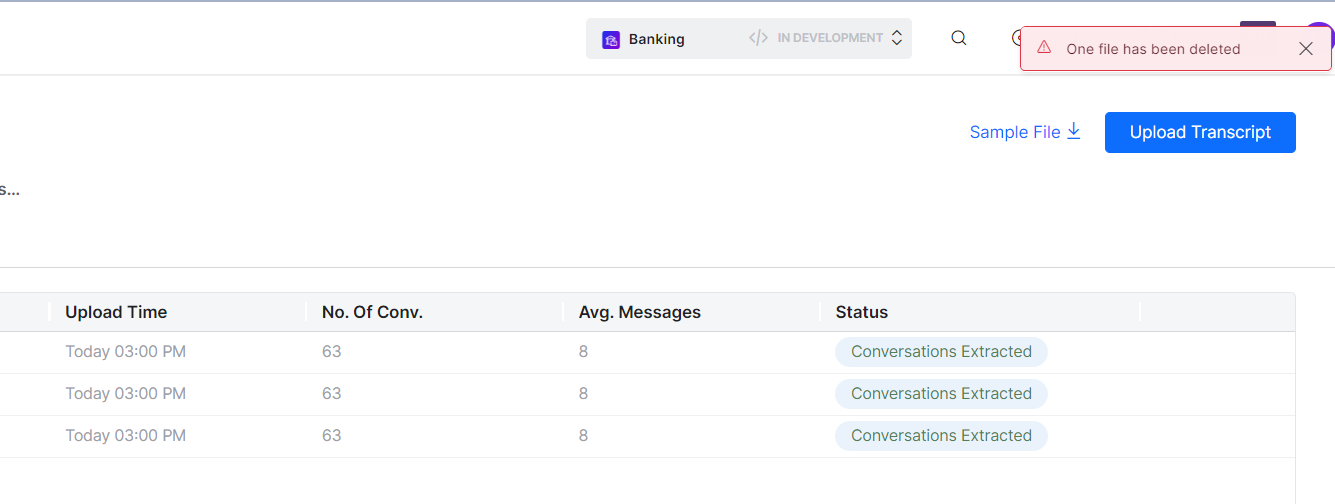
Upon successful upload of the transcript(s), the platform extracts the conversations from the uploaded files. You can view all the conversations, and the chat messages exchanged between the end user and the VA/agent.
The platform displays the conversation session summary, which includes the count of the VA messages and user messages. You need to select a Date Filter under Contents to display the details.
![]()
If a conversation is not useful or is not contributing to the intent, you can delete the specific conversation. Deleting a conversation also impacts the conversation count and average message count in the columns.
Delete Transcripts
You can delete the uploaded transcript file if the file is not required anymore, in case the upload was incorrect, or if the conversation has been extracted but the file is not useful.
On hovering any row, the delete icon is displayed, which is used to delete that specific Transcript.
Extract Intents
The next step is intent extraction.
Click the Extract Intents button on the Transcripts dialog box. You can see a message about intents being extracted. This process may take a few minutes depending on the number and size of the transcript files.

After the intent extraction is completed, you can see the list of extracted intents along with session count, qualified utterances, and actions.

You can view the details of the intent action by clicking the View icon under the Actions column next to the text.


Extracted Intent Details
Clicking anywhere on the extracted Intents row displays a pop-up dialog box to view the details of the extracted Intent. The title of the dialog box is the extracted Intent name.

The dialog box shows a table with individual rows for each session. The table has below columns:
- Session ID: The session ID and the Date and Time of the Session.
- Utterances: The list of utterances qualifying the extracted Intent.
- The platform shows only 3 utterances per session (row). The remaining count of the utterances is shown as a chip.
- On clicking the chip, you see all the utterances for the corresponding session.
- You can bookmark the utterances.
- Status: A dropdown that shows whether the session item has been reviewed. By default, it shows Yet to Review. You can change it to Reviewed.
- View Transcripts action button: This button is present in the Status column of each row, next to the drop-down. It helps you view the detailed conversion of the Session. On clicking the icon, The Session Details dialog box is displayed on clicking the icon.
Session Details
The Transcript dialog box shows the summary of the session. The detailed chat is displayed below the summary.

Train the Utterances
In a scenario where the utterances cannot be mapped to the existing intents, you can create a new intent. Once the intents are listed, you can perform the following actions for the intents:
- Add a new Dialog Task or FAQ
- Train them for an existing Dialog Task or FAQ
- Change the status of utterances
Add a new Dialog Task intent
- Click the Add/Train dropdown across the intent, then select the Dialog Task option under Add. The Add Dialog Task dialog box for the intent is displayed.

- Provide a name and description for the new intent.
- All the utterances qualified for the extracted intent are displayed in a table. The bookmark icon appears if you have bookmarked this utterance in the Extracted Intent Details dialog box.

- Select all the required utterances and click the Add to Bot button. A confirmation message is shown on adding a new Dialog Task.


The Actions column text for the intent will reflect the addition of a dialog task. For example:
- If Added ‘n’ new Dialog Tasks text/tag is existing, then the count increases by 1. For example: Added 1 new Dialog Task will be changed to Added 2 new Dialog Tasks.
- If there are no intents created so far, then the text becomes Added 1 new Dialog Task.
Additionally, this change will reflect under the Results column against the project name on the Intent Discovery homepage. For example:
- If Added ‘n’ new Dialog Tasks tag/text is existing, then the count is increased by 1. For example: Added 1 new Dialog Tasks will be changed to Added 2 new Dialog Tasks.
- If there are no Dialog tasks created so far, then the text becomes Added 1 new Dialog Task.
Train a Dialog task
- Click the Add/Train dropdown across the intent, then select the Dialog Task option under Train. The Train Dialog Task dialog box for the intent is displayed.


- Select the dialog task to be trained from the Intent drop-down and select all the required utterances from the table below. Click Add Utterances.

- Once the existing Dialog task is trained with the selected Utterances, a confirmation message is shown.


The Actions column text for the intent will reflect the training of a new dialog task. For example:
- If Trained ‘n’ new Dialog Tasks text/tag is existing, then increase the count by 1. For example: Trained 1 new Dialog Task will be changed to Trained 2 new Dialog Tasks.
- If there are no intents created so far, then append the text with Trained 1 new Dialog Task.
Additionally, this change will reflect under the Results column against the project name on the Intent Discovery homepage. For example:
- If Trained ‘n’ new Dialog Tasks tag/text is existing, then increase the count by 1. For example: Trained 1 new Dialog Tasks will be changed to Trained 2 new Dialog Tasks.
- If there are no Dialog Tasks trained so far, then append the text with Trained 1 new Dialog Task.
Add a new FAQ intent
- Click the Add/Train dropdown across the intent, then select the FAQ option under Add. The Add FAQ dialog box for the intent is displayed.

- Provide a name and description for the new intent.
- All the Utterances qualified for the Extracted Intent are displayed in a table. The bookmark icon appears if the user has bookmarked this utterance in the Session summary dialog box.
- Select all the required utterances and click Next.

- On the next dialog box, provide the FAQ question text to be created as an FAQ, along with the required Bot Response to be shown. All the selected utterances from the previous screen are added as alternative questions for this FAQ.
- Provide or select other features of the FAQ, like Bot response channel, Display name, reference ID, etc. as per your need and preference, and click the Add to Bot button.

- A confirmation message is shown on adding a new FAQ.


The Actions column text for the intent will reflect the addition of an FAQ. For example:
- If Added ‘n’ new FAQs text/tag is existing, then the count increases by 1. For example: Added 1 new FAQ will be changed to Added 2 new FAQs.
- If there are no intents created so far, then the text becomes Added 1 new FAQ.
Additionally, the adding will reflect under the Results column against the project name on the Intent Discovery homepage. For example:
- If Added ‘n’ new FAQs tag/text is existing, then the count increases by 1. For example: Added 1 new FAQs will be changed to Added 2 new FAQs.
- If there are no Dialog tasks created so far, then the text becomes Added 1 new FAQ.
Train an FAQ
- Click the Add/Train dropdown across the intent, then select the FAQ option under Train. The Train FAQ dialog box for the intent is displayed.

- Select the FAQ to be trained from the FAQ drop-down. A label box showing the current Bot Response appears. Select all the required utterances from the table below and click Add Utterances.

- Once the existing FAQ is trained with the selected Utterances, a confirmation message is shown.


The Actions column text for the intent will reflect the training of an FAQ. For example:
- If Trained ‘n’ new FAQs text/tag is existing, then the count increases by 1. For example: Trained 1 new FAQ will be changed to Trained 2 new FAQs.
- If there are no intents created so far, then the text becomes Trained 1 new FAQ.
Additionally, the training will reflect under the Results column against the project name on the Intent Discovery homepage. For example:
- If Trained ‘n’ new FAQs tag/text is existing, then the count increases by 1. For example: Trained 1 new FAQs will be changed to Trained 2 new FAQs.
- If there are no Dialog tasks created so far, then the text becomes Trained 1 new FAQ.
Change the status of utterances
You can change the status of utterances between Yet to Review and Reviewed on the Extracted Intent Details dialog box.
Reusing an existing project
There may be instances where you may need additional intents in an existing project and can achieve the same by adding transcript files to the project. The steps to upload additional transcript files are the same as uploading transcripts to a new project. Intent extraction can be performed multiple times based on need. For example, if, after having extracted intents previously, there is a need to add more intents, you can upload additional transcripts and extract intents again. Also, existing but no longer relevant transcript files can be deleted from a project. These two features ensure that an existing project becomes reusable.
The number of files and the file size limitations remain the same.
Uploading new transcript files will cause deletion of below data from the project:
- Extracted intents
- Summaries generated
- Utterances segregated for each session
- Status flag for each session
- Bookmarks of the utterances
Please note that the previously loaded transcript files will not be deleted while uploading new ones. Hence, performing intent extraction on the project again will restore the above-deleted project data.
Deleting a project
You can also delete the project if it is no longer required. Since a maximum of 10 projects can be created within a bot, you may need to delete a past, unwanted project to make a place for a new one.


When you delete a project, all the corresponding data in the project is automatically deleted, which includes:
- Transcripts
- Extracted intents
- Summaries generated
- Utterances segregated for each session
- Status flag for each session
- Bookmarks of the utterances
Note: Deletion of a project will have no impact on the Dialog Tasks/FAQ’s that have been trained using the intents extracted from the deleted projects.