You can use the Test Editor to view the test cases and their metadata. This section explains the steps to access the test editor and use the available options:
- On the Conversation Testing page, click on any Test Suite to go to the Test Editor.
- In the Test Editor, the platform shows the validated chat along with its metadata and assertions for each test case.
- To see the details, choose a test case in the right side pane – Test Suite Details, or click the test case in the Validated Chat of the left pane.


- A test case consists of:
- One user input
- One or more VA responses for a user input

- If the VA response is from a dialog intent, the following details are displayed:
- Intent name
- Node name
- Transitions
- User Input
- Expected Output
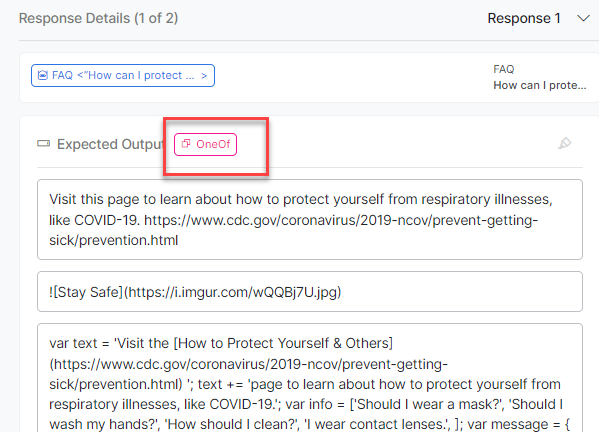
- All the variations of the node prompt are added as expected output
- If a node has more than one variation, then the OneOf operator is added by default
– Error Prompt/User Prompt for Entity node. For more information, see Entity Node.
| Note: The OneOf operator is used to test randomization scenarios where a node can have multiple bot responses. For any node in which multiple responses are configured, the operator is activated by default. If one of the multiple responses is obtained from the VA during the test execution, then the assertion will be passed. |
You can add dynamic texts by annotating a section of the expected output. To know more information, see Dynamic Text Marking.
Flow and Text Assertions are added by default for all responses from dialog nodes.
- If the VA response is from FAQ/Small Talk/Standard Responses, the following details are captured:
- Intent Name (FAQ Name, Small Talk Pattern, Standard Response)
- User Input
- Expected Output: It has the same details displayed as in Dialog Intent.
- Assertions
- Flow (Enabled by default)
- Text (Enabled by default)
- Context


| Note: To understand more about assertions, see Test Case Assertion. |
- You can export the entire test suite to your local directory as a JSON file. The downloaded test suites include the user inputs and VA responses.
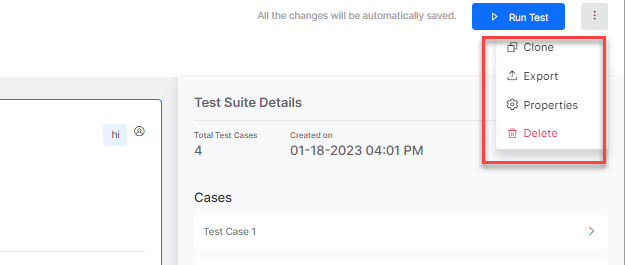
| Note: You can also clone the test suite or delete it as per the requirement. |