
To add Twilio Voice as a channel to your Kore.ai bot, you will need to get a Twilio phone number and setup webhook integration to communicate with the bot. Adding the Twilio Voice channel to your Kore.ai Bot allows end users for your bot to interact with your bot using their Twilio Voice accounts. To add the Twilio Voice channel to your Bot, you will need to:
- Get a Twilio Number- To enable Twilio Voice channel, you will need to create a Twilio phone number to be associated with this bot.
- Setup Integration- To setup integration, you will need to create a TwiML App and get Webhook URL details from Configurations tab of Twilio Voice channel page to enter in the ‘Request URL’ for Voice to activate channel.
- Associate TwiML App with Twilio Phone Number– To associate TwiML App with Twilio Phone Number, you will need to configure your preferred active Twilio number with TwiML App.
- Optional Configuration for Setting-up Agent Transfer- To use Agent Transfer functionality you will need to setup the Kore.ai Agent Transfer SDK.
- Enable Channel- Once you setup integration and complete configuration, you will need to enable channel.
Note: Twilio Voice should ideally be enabled for bots that are specifically built to work on voice based channels. Please review the following constraints before enabling Twilio Voice as a channel for this bot:
- Enterprise Bots that require user’s authorization to communicate with the bot are not supported on Twilio Voice.
- Tasks that require user’s authorization to communicate with external systems should ideally be not included.
- Webhook Nodes work asynchronously and are currently are not supported on Twilio Voice.
- Use only dialog tasks for best user experience on Twilio Voice channel.
- Ensure that the bot responses you are going to configure for Twilio Voice are brief, plain text messages only.
- Bot receives user’s voice response from Twilio Voice only after few moments of silence at user’s end and this could appear as a lag to end user.
To add the Twilio Voice Channel
- In the Bots section of the Bot Builder, click the Bot that you want to add the Twilio Voice channel to.
- On the Channels tab,click the Twilio Voice icon. The Twilio Voice Channel page gets displayed.
- In a new browser tab, login to your Twilio Voice account to create a new Twilio number to be associated with your bot. To enable Twilio Voice channel, you must create or have a Twilio account. Navigate to Products and Services menu and select Phone Numbers.Create a new Twilio phone number to be associated with this bot. If you already have a Twilio phone number that you want to associate with this bot, then you can proceed to the next steps.
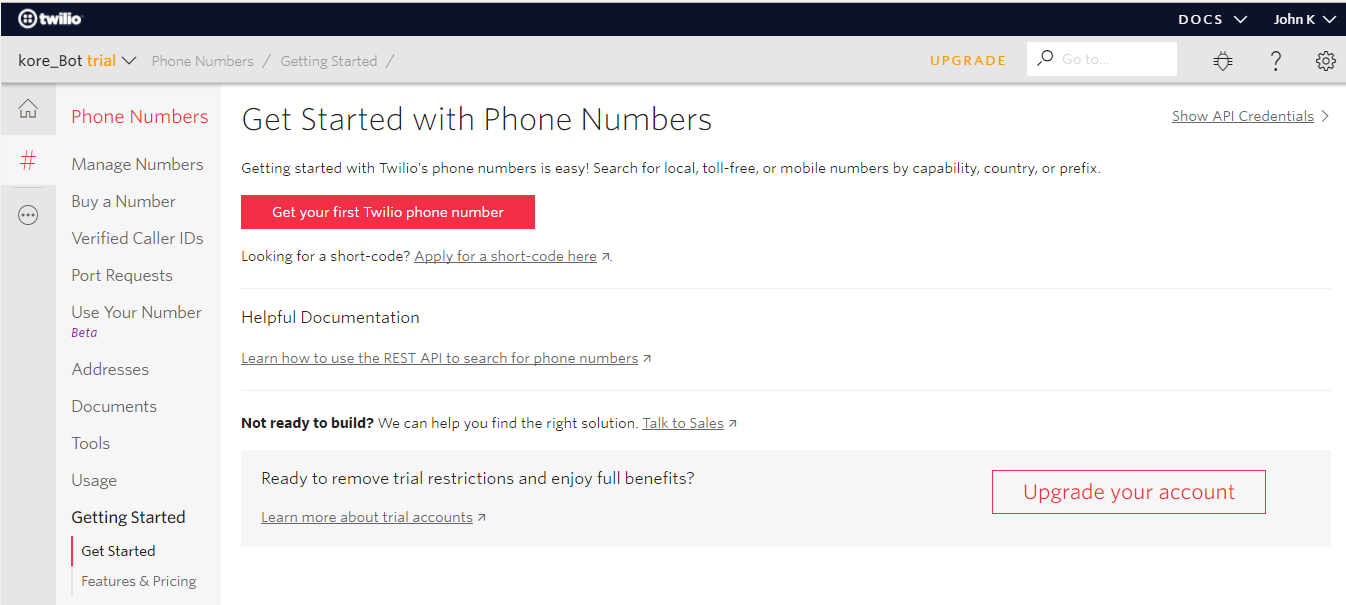 Please note that the image may change depending on your Twilio account type.
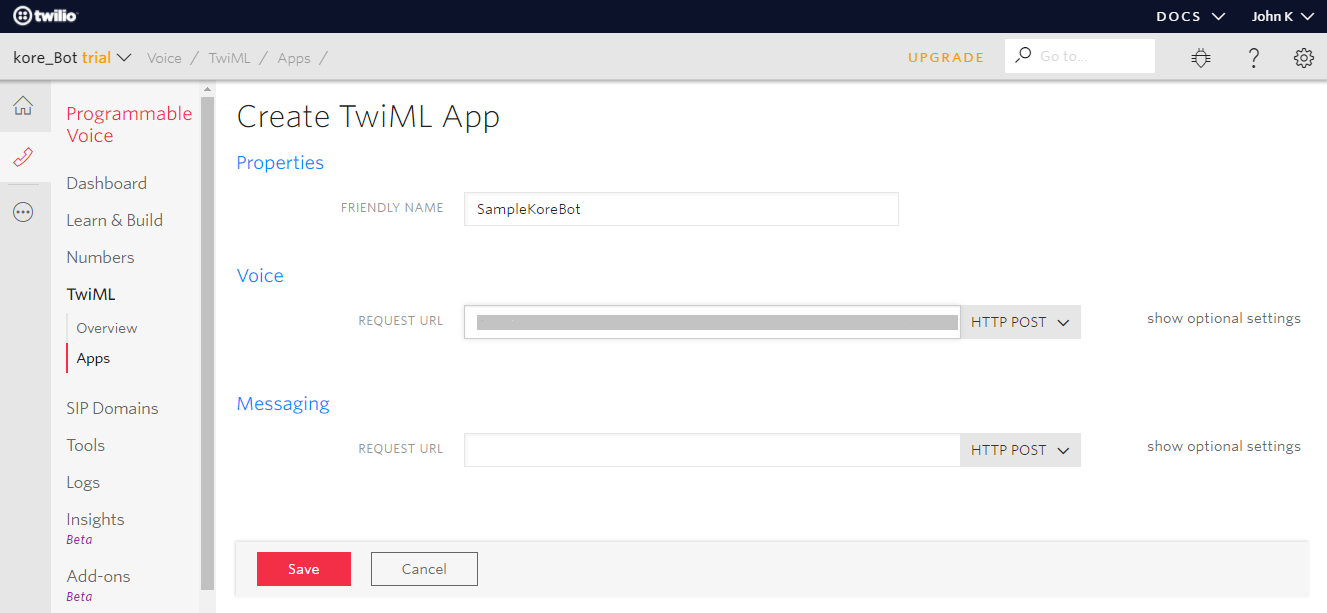
 - To setup integration, navigate to the Tools section of Phone Numbers menu. Select TwiML Apps to create a new TwiML App. Provide a name for the app and copy the Webhook URL provided in the Configurations tab of Twilio Voice Channel page and enter in the Request URL for Voice. Click on Save to complete the app creation.
- Navigate to Manage Numbers menu under Phone Numbers to associate TwiML App with Twilio Phone Number. From Active Numbers section, select the number you would like to associate the TwiML App.
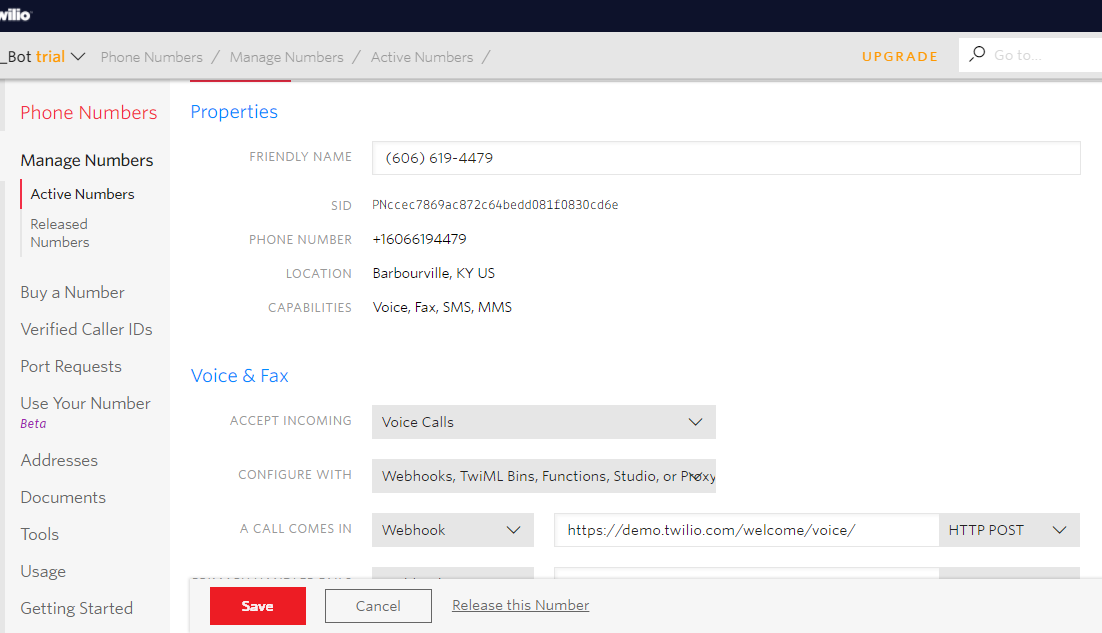
- Under Voice & Fax section, select TwiML App as the choice in Configure With field. A new field TWIML APP will be displayed and from this, select the app you have configured in the previous steps. Click on Save to complete this app association.
- Optionally, you can also setup Agent Transfer functionality to transfer user’s call conversation to another Twilio number. For this, you need to configure the Kore.ai Agent Transfer SDK.You may download the Agent Transfer SDK from Kore.ai GitHub repository and define ‘data.message’, ‘transferCallToAgent’ and ‘agentPhonenumber’ parameters.
- ‘data.message’: Define the message to be read out to the end user when call is transferred to agent is initiated.
- ‘transferCallToAgent’: Set this flag to True to enable Agent Transfer and False to disable.
- ‘agentPhonenumber’: Provide your Twilio phone number to which the user call conversation is to be transferred to.
- To complete the Channel setup, navigate to the Configurations tab. Enter your Twilio Number to be associated with Kore.ai bot.
- Select a Language to be used for communication with the bot by end-users.
- In the Enable Channel section, select Yes, and then click Save to complete user creation process and channel activation.
Editing the Twilio Voice Channel
To edit the Twilio Voice channel, hover your mouse over the channel to modify, and then click the Settings icon to display the command menu as shown in the following illustration.
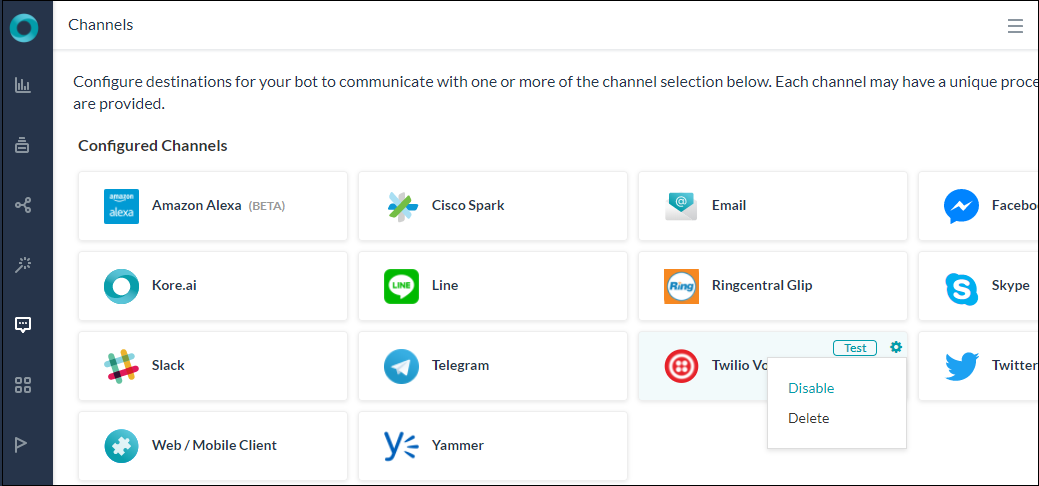
Select one of the following commands to modify the channel:
- Disable/Enable – Click Disable to temporarily disable use of the Twilio Voice for your Bot.To enable use of the Twilio Voice channel, Click Enable.
- Delete – Click Delete, and then click OK in the Delete Confirmation dialog to permanently delete the Bot channel configuration.
Warning: This operation is permanent, and cannot be undone.