Chatbot Overview
Conversational Bots
Intents & Entities
Intelligent Bots
Kore.ai's Approach
Kore.ai Conversational Platform
Bot Concepts and Terminology
Natural Language Processing (NLP)
Bot Types
Bot Tasks
Starting with Kore.ai Platform
How to Access Bot Builder
Working with Kore.ai Bot Builder
Building your first Bot
Getting Started with Building Bots
Using the Dialog Builder Tool
Creating a Simple Bot
Release Notes
Latest Updates
Older Releases
Bot Builder
Creating a Bot
Design
Develop
Storyboard
Dialog Task
User Intent Node
Dialog Node
Entity Node
Supported Entity Types
Composite Entities
Supported Time Zones
Supported Colors
Supported Company Names
Message Nodes
Confirmation Nodes
Service Node
Custom Authentication
2-way SSL for Service nodes
Script Node
Agent Transfer Node
WebHook Node
Connections & Transitions
Managing Dialogs
Prompt Editor
Alert Tasks
Alert Tasks
Ignore Words and Field Memory
Digital Views
Knowledge Graph
Terminology
Building
Generation
Importing and Exporting
Analysis
Knowledge Extraction
Small Talk
Action & Information Task
Action Tasks
Information Tasks
Establishing Flows
Natural Language
Overview
Machine Learning
ML Model
Fundamental Meaning
NLP Settings and Guidelines
Knowledge Graph Training
Traits
Ranking and Resolver
NLP Detection
Bot Intelligence
Overview
Context Management
Session and Context Variables
Context Object
Dialog Management
Sub-Intents
Amend Entity
Multi-Intent Detection
Sentiment Management
Tone Analysis
Sentiment Management
Default Conversations
Default Standard Responses
Channel Enablement
Test & Debug
Talk to Bot
Utterance Testing
Batch Testing
Record Conversations
Publishing your Bot
Analyzing your Bot
Overview
Dashboard
Custom Dashboard
Conversation Flows
Bot Metrics
Advanced Topics
Bot Authorization
Language Management
Collaborative Development
IVR Integration
koreUtil Libraries
Universal Bots
Defining
Creating
Customizing
Enabling Languages
Smart Bots
Defining
Sample Bots
Github
Asana
Travel Planning
Flight Search
Event Based Bot Actions
Bot Settings
Bot Functions
General Settings
PII Settings
Customizing Error Messages
Bot Management
Using Bot Variables
API Guide
API Overview
API List
API Collection
SDKs
SDK Overview
SDK Security
SDK App Registration
Web SDK Tutorial
Message Formatting and Templates
Mobile SDK Push Notification
Widget SDK Tutorial
Widget SDK – Message Formatting and Templates
Web Socket Connect & RTM
Using the BotKit SDK
Installing
Configuring
Events
Functions
BotKit SDK Tutorial – Agent Transfer
BotKit SDK Tutorial – Flight Search Sample Bot
Using an External NLP Engine
Bot Administration
Bots Admin Console
Dashboard
User Management
Managing Users
Managing Groups
Managing Role
Bots Management
Enrollment
Inviting Users
Bulk Invites
Importing Users
Synchronizing Users from AD
Security & Compliance
Using Single Sign-On
Security Settings
Cloud Connector
Analytics
Billing
How Tos
Creating a Simple Bot
Creating a Banking Bot
Transfer Funds Task
Update Balance Task
Context Switching
Using Traits
Schedule a Smart Alert
Configuring Digital Views
Custom Dashboard
Custom Tags to filter Bot Metrics
Patterns for Intents & Entities
Build Knowledge Graph
Global Variables
Content Variables
Using Bot Functions
Configure Agent Transfer
  1. Home
  2. Docs
  3. Bots
  4. Advanced Topics
  5. Universal Bot
  6. Enabling Additional Languages for the Universal Bot

Enabling Additional Languages for the Universal Bot

Like standard bots, you can enable more than one language for universal bots, but the functionality is completely different.

When you enable a new language for a standard bot, you need to upload language packs consisting of the entire bot definitions. Whereas to enable a new language for a universal bot, you just need to set up the corresponding default dialog.

Universal bots do not obtain the enabled languages of the linked bots. You must enable default and additional languages for the universal bot. When user utterances are made in an enabled language, the universal bot routes it to only those linked bot tasks that have the same language enabled. For example, if German is enabled for the universal bot and a user utters in German, the NLP engine looks for all the linked bot tasks that support German and sends the utterance only to those tasks.

Note: If a user interacts with the universal bot in a non-enabled language, it sends a standard response in the default language requesting the user to interact in one of the supported languages. Also, if none of the linked tasks have a relevant response, the bot triggers the language-specific default dialog.

Before you Begin

This article assumes that you understand the fundamentals of multi-language bots in Kore.ai and therefore focuses on the aspects specific to the universal bots. For the fundamentals of multi-language bots in the Bots Builder, refer to Building Multi-Language Bots.

Enable Language

Follow these steps to enable an additional language for a universal bot:

  1. Open the universal bot for which you want to configure new channels.
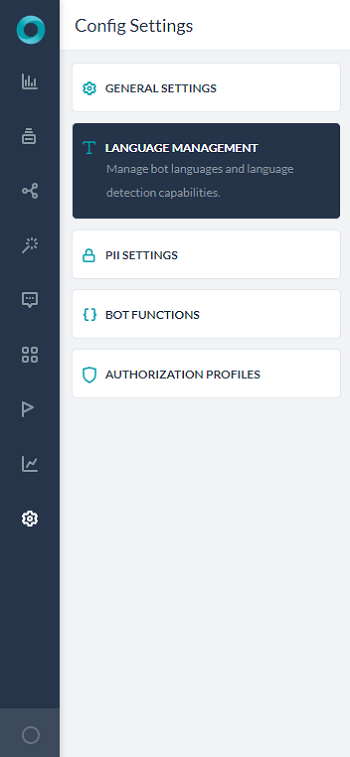
  2. Hover over the gear icon on the left navigation panel and click Settings -> Config Settings.
  3. Below the General Settings tab, click Language Management.
  4. On the Language Management window, click Enable next to the language you want to.

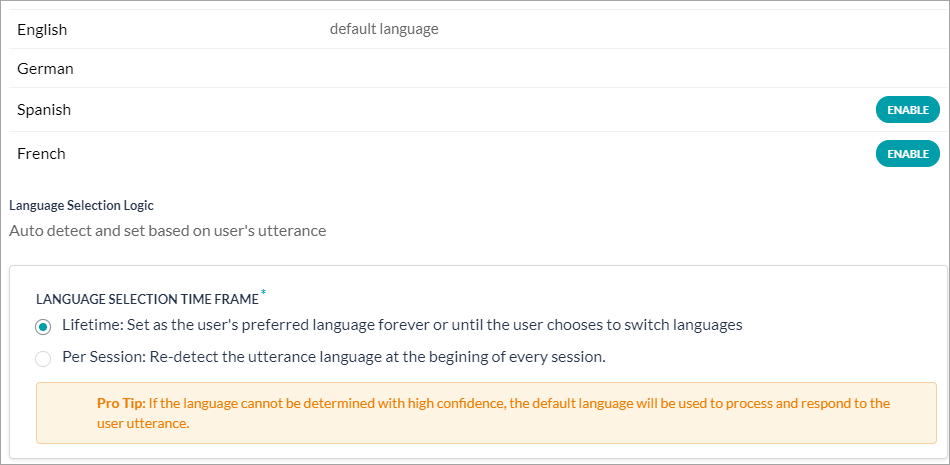
    Note: If a language is already enabled, you won’t be able to see the Enable button for that language.
  5. Under the Language Selection Time Frame (scroll down to view this option) select one of these options:
    • Lifetime: The auto-detected language or the language preference selected by the user will be set as the user’s preferred language.
    • Per Session: Detects the user’s language at the beginning of every session and responds accordingly.
      Note: If the language cannot be determined with high confidence, bot requests the users to select their preferred language. The default language is used to communicate with the user during language preference selection.
  6. Click Save.

Customizing Default Dialog

If the Kore.ai NLP engine cannot recognize the user intent, the universal bot responds to the users with the default dialog. You must create language-specific versions of the default dialog for each enabled language so that such bot responses go in the users’ preferred language. Otherwise, the universal bot responds applies the default bot language regardless of the user’s preferred language.
Follow these steps to open the language-specific default dialog:

  1. Open the universal bot whose language-specific default dialog you want to change.
  2. On the top-right side of the bot window, click the name of current bot language, and select any of the enabled languages. It switches the bot language as per your selection.

Once you switch the language, go to the Default Dialog of the bot and make the necessary changes as explained in the Customizing the Default Dialog article.

Menu