
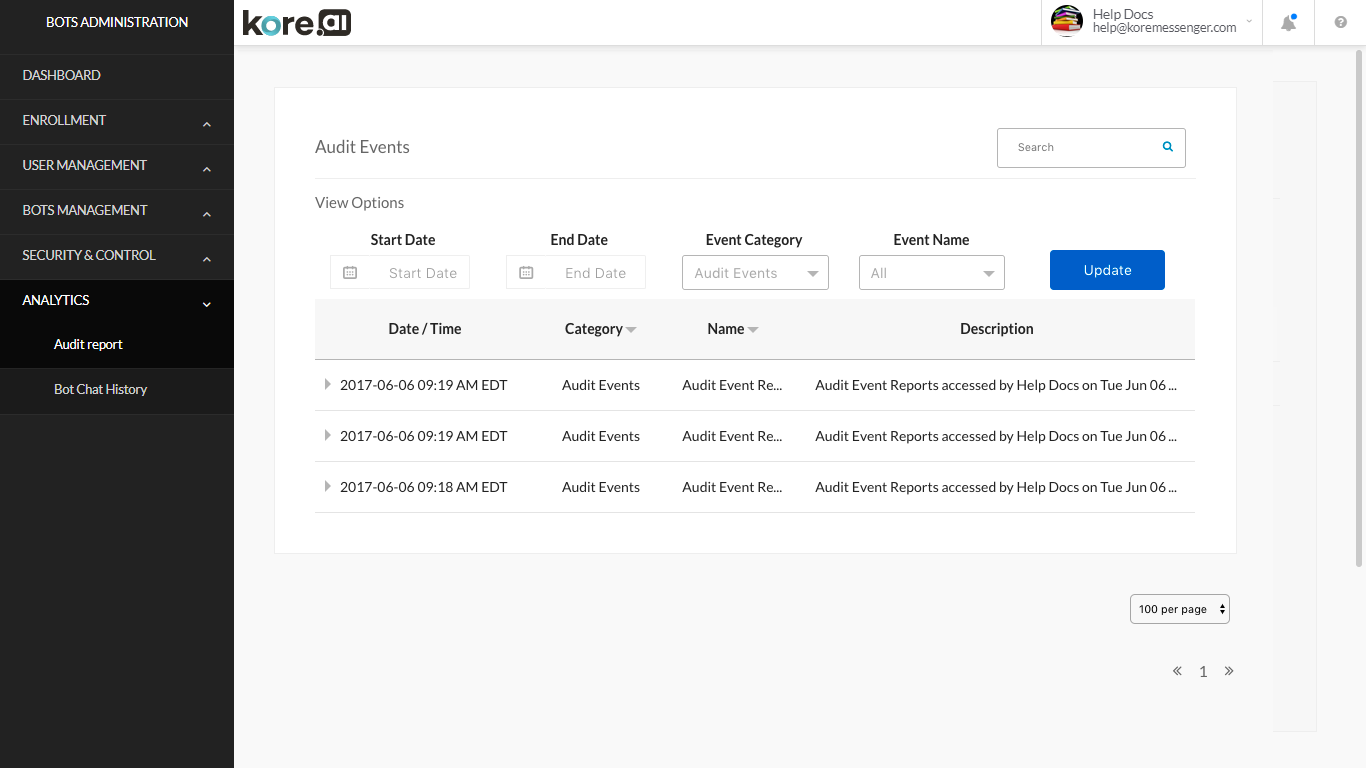
The Analytics module provides the history of all administrative tasks with attributes such as User, Date/Time, and Description for an event. You can review the Audit Report page to analyze admin users, custom admins, and user events such as log on, log off, and changes to system settings.
The following illustration shows an example of the Analytics module with the Audit Report page displayed.
Viewing System and User Events
On the Audit Report page in the Kore.ai Bots Admin Console in the Analytics module, you can view Kore.ai system and user-generated events. For example, a system-generated event could be a periodic Microsoft® Active Directory® Sync. An example of a user-generated event could be the addition of a new user.
Using the controls on Audit Report page you can select event categories, events and time periods to drill-down and filter events as needed. Kore.ai audit reports also list error messages that can help you to troubleshoot system issues or when you create a Kore.ai service request.
Clicking any row expands giving more details of that event.
Audit Report Page Columns
To sort the list of column values, click the Arrow Up ![]() icon or Arrow Down
icon or Arrow Down ![]() icon to the right of a column name. The following list describes the columns displayed in the admin console table.
icon to the right of a column name. The following list describes the columns displayed in the admin console table.
| COLUMN | DESCRIPTION |
|---|---|
| Date/Time | The date and time of the system or user event in YYY-MM-DD HH:MM AM/PM Time Zone, for example, 2015-09-11 02:10 PM EDT. Click the row for more details of the event. |
| Category | The system category of the system or user event. Results can be filtered on this field. |
| Name | The system name for the user or system event. |
| Description | The description for the user or system event. |
About the Action Bar
This section describes the controls on the Action bar on the Audit Report page:
Using the Search Field
The list of entries in an admin console table can be very large depending on the size of your company, for example, a list of users. To find one or more specific users or groups, in the Search field, enter at least three characters to begin find-as-you-type.
Note: The number of search terms in a search query is unlimited, however, no more than the first 20 characters of each search term is used to return search results.
To view all entries, clear the search field, and then press the Enter key.
About the View Options Section
In the View Options section, you can narrow the list of events by date range, category, and name.
To set a date range i.e to specify the start and end date, click the Calendar ![]() icon in the start/end date fields to display the Date Picker.
icon in the start/end date fields to display the Date Picker.
In the Event Category field, you can show All events, or select a specific category from the drop-down list.
Based on the Event Category field selected, you can choose All or a specific event by name in the Event Name filter.
Viewing Chat History
On the Bot Chat History page in the Kore.ai Bots Admin Console in the Analytics module, you can view Chat History for all deployed Bots.
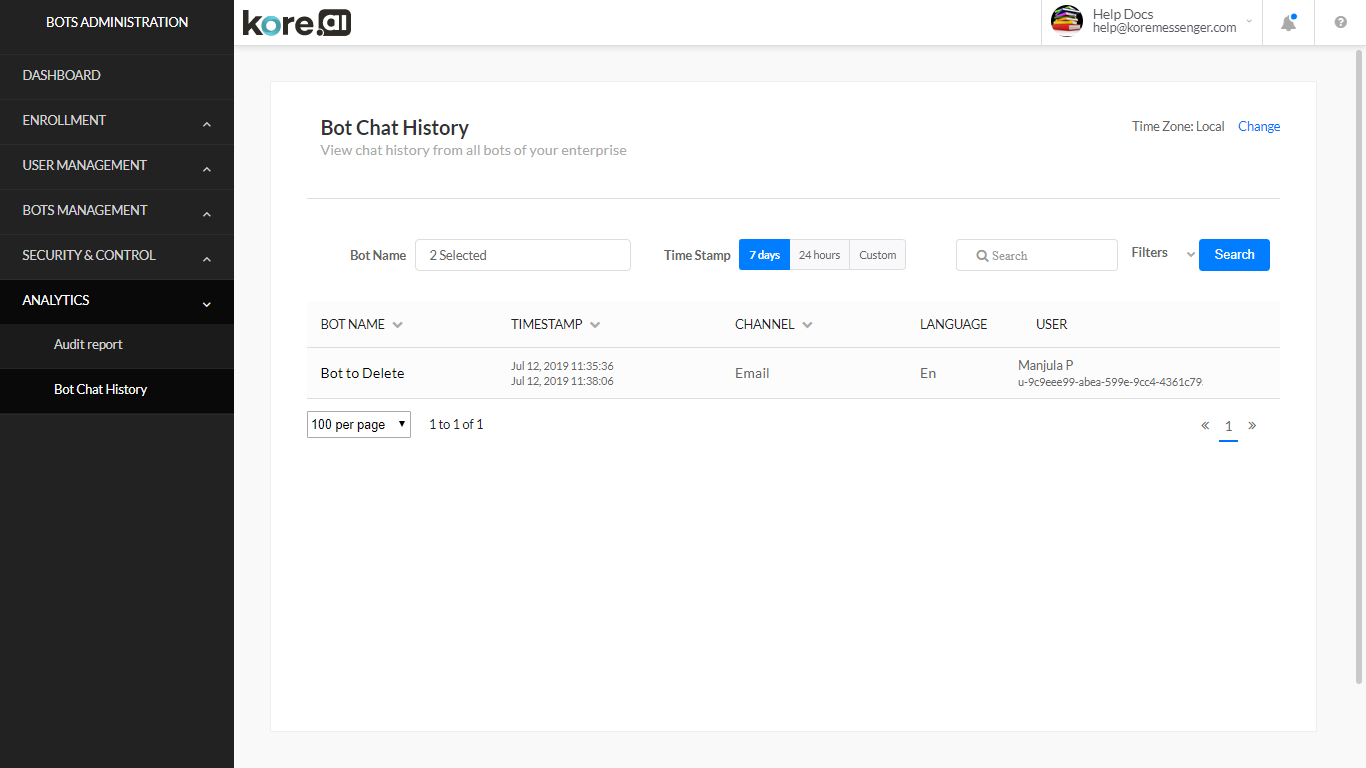
To view specific Chat, click on the chat and the chat conversation will be displayed.
Bot Chat History Page Columns
To sort the list of column values, click the Arrow Up ![]() icon or Arrow Down
icon or Arrow Down ![]() icon to the right of a column name. The following list describes the columns displayed in the admin console table.
icon to the right of a column name. The following list describes the columns displayed in the admin console table.
| COLUMN | DESCRIPTION |
|---|---|
| Bot Name | Name of the Bot in chat. |
| Timestamp | The date and time (start and end) of the chat in YYY-MM-DD HH:MM AM/PM Time Zone, for example, 2015-09-11 02:10 PM EDT. |
| Channel | Channel on which the Chat took place |
| Language | Language of the Chat |
| User | User name and id who initiated the chat |
| Export | Option to Export the Chat in Excel or PDF format |
About the Action Bar
This section describes the controls on the Action bar on the Chat History page:
Select Bot Name
Select the Bot for which you want to view the Chat History.
Select Timestamp
Set the duration for which the Chat History needs to be retrieved:
- 7 Days
- 24 hours – default setting
- Custom – define the start and end date range
Set Filter
Filter based upon the
- User initiating the Chat
- Channels of Chats
- Language of Chat
- Meta tags added at a message, user or session levels. Multiple tag filters can be applied in a ‘AND’ condition.This option is available only when at least one bot is selected.
The export file of Chat History (session-level) will include the details of the applicable tags.
Using the Search Field
The list of entries in an admin console table can be very large depending on the size of your company, for example, a list of users. To find one or more specific users or groups, in the Search field, enter at least three characters to begin find-as-you-type.
Note: The number of search terms in a search query is unlimited, however, no more than the first 20 characters of each search term is used to return search results.
To view all entries, clear the search field, and then press the Enter key.