On the Groups page in the User Management module, you can create and manage logically related groups of users, as well as import groups, such as your company Active Directory groups.
If the enterprise has varied and distinct Bot requirements for various departments or lines of business, creating groups, adding developers and assigning bots to the groups would be the recommended option. You can create a custom group of users, for example, by geographical location, department title, or common interest.
Groups are automatically created when you import organizational units using Active Directory.
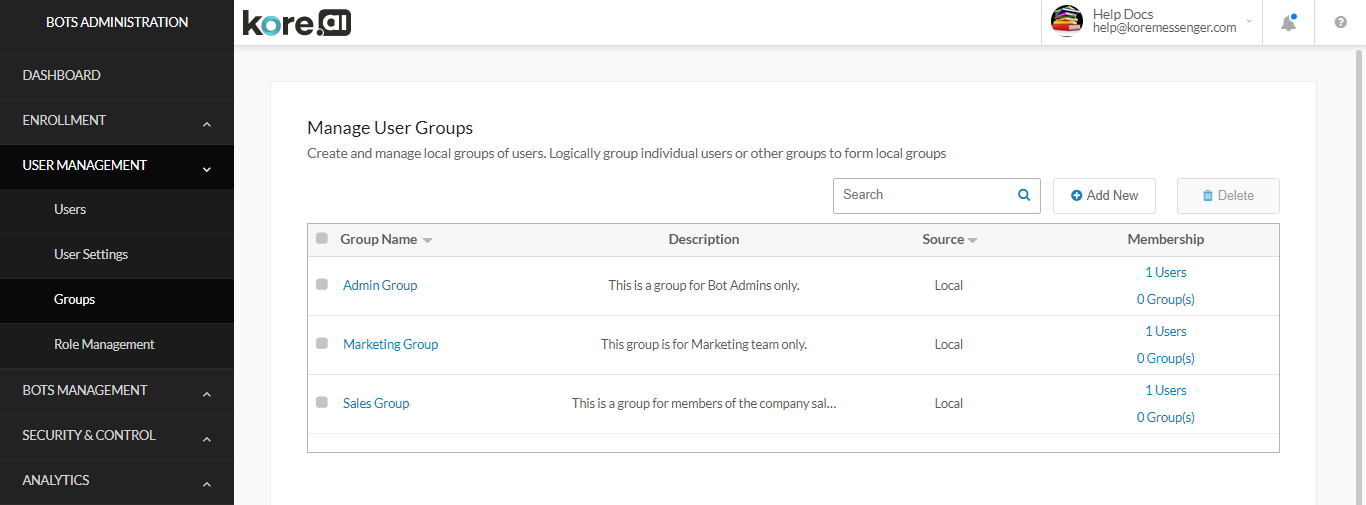
The following illustration is an example of the Groups page in the User Management module.
Details
To sort the list of column values, click the Arrow Up ![]() icon or Arrow Down
icon or Arrow Down ![]() icon to the right of a column name.
icon to the right of a column name.
The following list describes the columns displayed in the Groups listing.
| COLUMN | DESCRIPTION |
|---|---|
| Group Name | Displays the group name. Click a group name to edit the the selected group – name, description & members. |
| Description | Displays the description of the group. This is an optional field. |
| Source | The source used to create the group. One of:
|
| Membership | Displays the number of group members as users, and the number of groups as child members of the parent group. Click the link to edit the list of Kore.ai users and child groups for the selected group. |
Using the Search Field
The list of entries in an admin console table can be very large depending on the size of your company. To find one or more specific users or groups, in the Search field, enter at least three characters to begin find-as-you-type.
Note: The number of search terms in a search query is unlimited, however, no more than the first 20 characters of each search term is used to return search results.
To view all entries, clear the search field, and then press the Enter key.
Creation
You may want to create one or more groups of users in your account for users with, for example, a related interest, department, or location. Groups created by the admin are not visible to the user and are for administrative purposes only. This topic describes how to define a new group and add users, or existing groups of users to that group.
- In the User Management module, select the Groups section.
- Click the
 button to display the Create New User Group dialog to add a new Kore.ai group to your account.
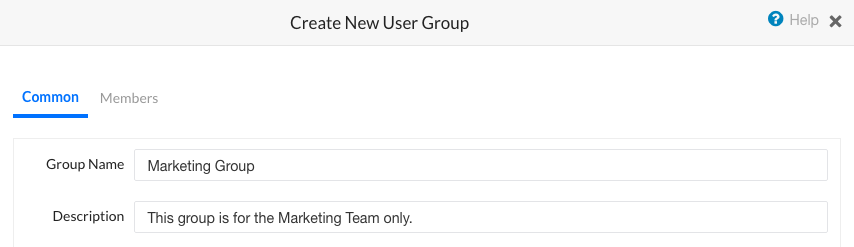
 - The Create New User Group dialog is displayed.
- In the Common tab,
- in the Group Name field, enter the name for the group.
- Optionally, in the Description field, enter a description for the group.
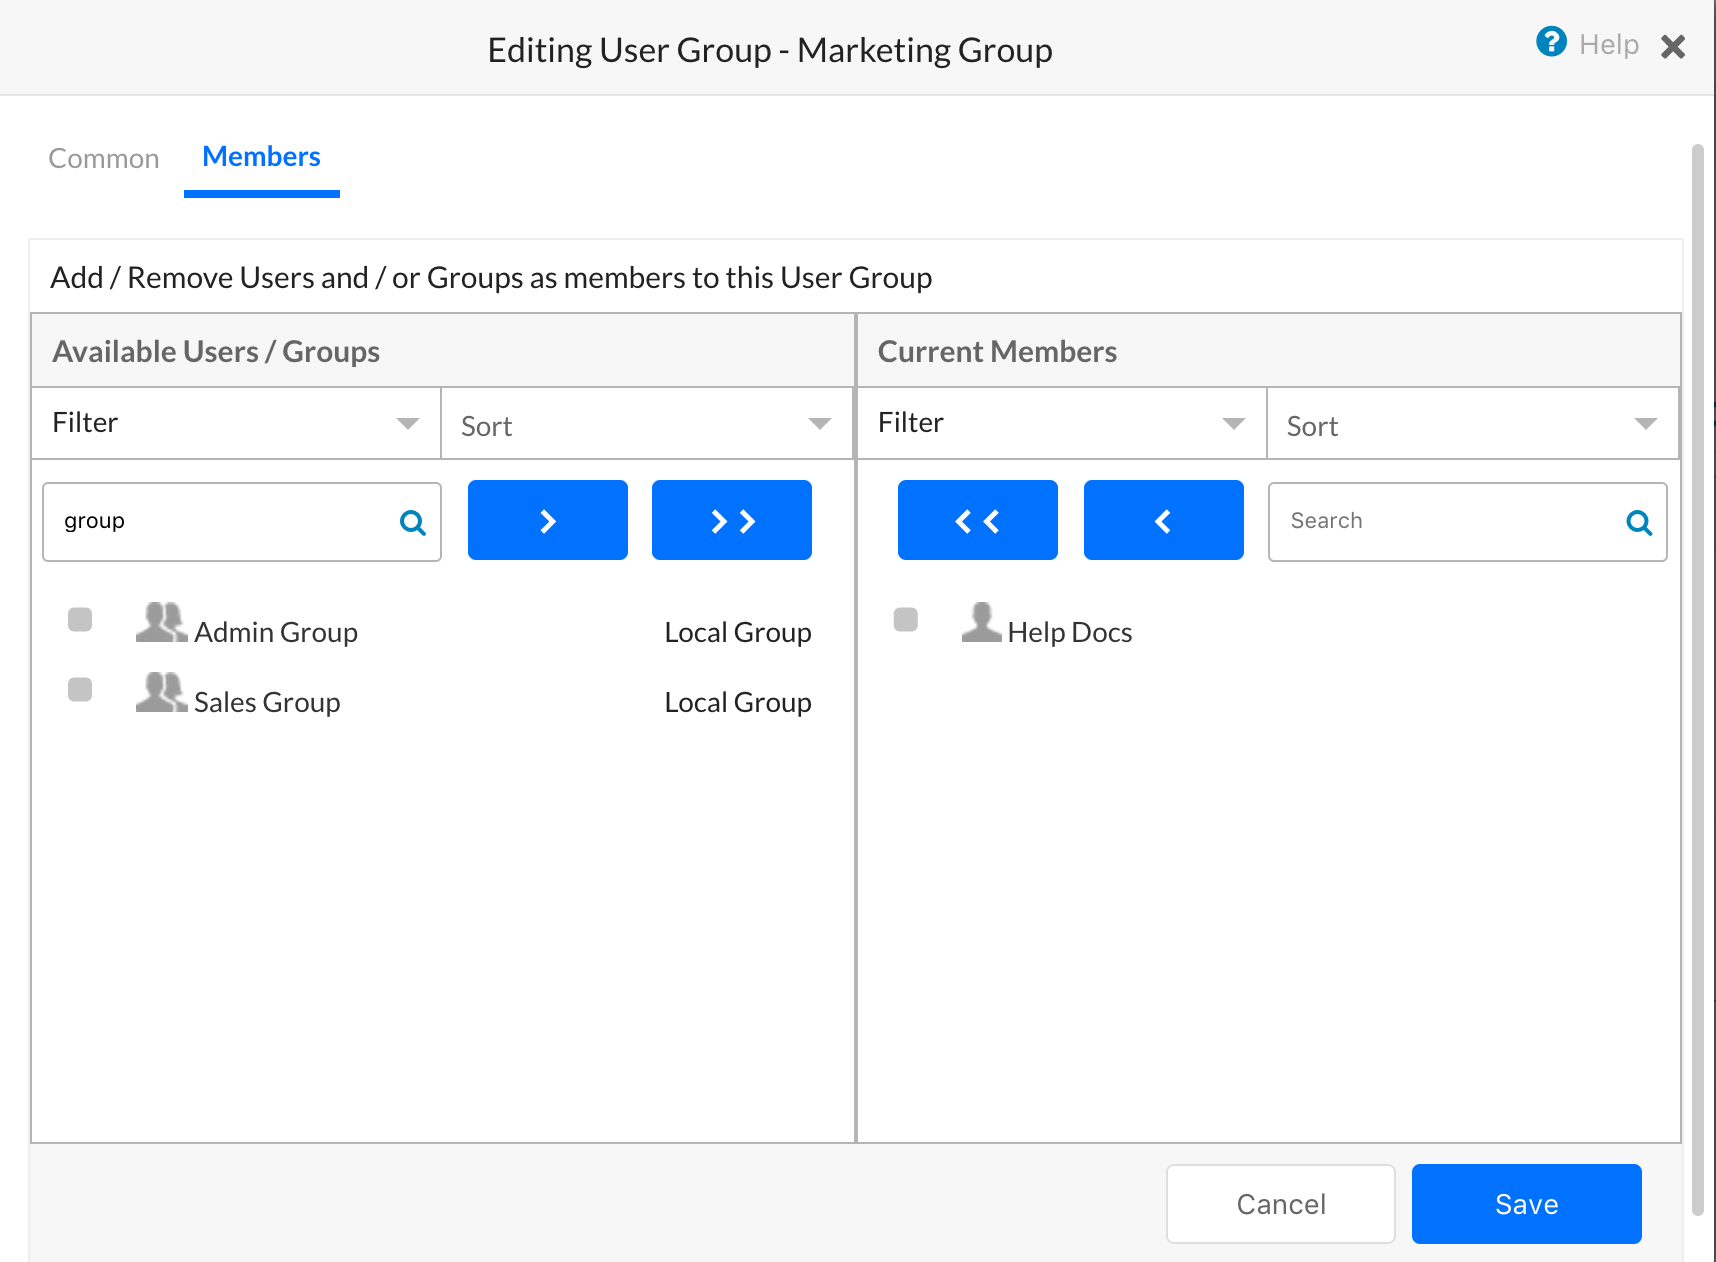
- Navigate to the Members tab, and select the user(s) and/or group(s) to be added to this group. You can locate the needed users/groups from the the Available Users/Groups section by
- using Sort and then selecting a Filter to display users and groups that can be added to the new group.
- entering a name in the Search field, or
- scrolling to select one or more Kore.ai users and Kore.ai groups,
- Then click
 , to move the selected list to the Current Members section.
 - To add all available users and groups, click


- Click Save. The group is created and the Groups page is displayed.
- The Group Updated message is displayed at the top of the page.
Modification
You may need to modify the members of a group. This topic describes how to modify the common group properties and the membership of an existing group.
- In the User Management module, on the Groups page, in the Group Name column, click the name of the group to modify.
- The Editing User Group – < Group Name > dialog is displayed.
- On the Common tab, you can modify the Group Name and Description field.
- On the Members tab, in the Available Users/Groups and Current Members sections, optionally Sort, and then select a Filter to display users and groups to add or remove.
- To modify the members of the group, you can:
- Enter a name in the Search field, or scroll to select one or more users and groups, and then click to add new group members, or click
 to remove the selected group members.
 - Click to add all available group members, or click
 to remove all current group members.
- Enter a name in the Search field, or scroll to select one or more users and groups, and then click
- Click Save. The group is modified and the Groups page is displayed.
Deletion
You may no longer need a group of users in your account. You must remove all users from a group before you can delete a group. Complete the steps in the following procedure to delete a group.
Instead of deleting a group, you can also modify the common settings as well as the membership of an existing group. For more information, see Modify an Existing User Group.
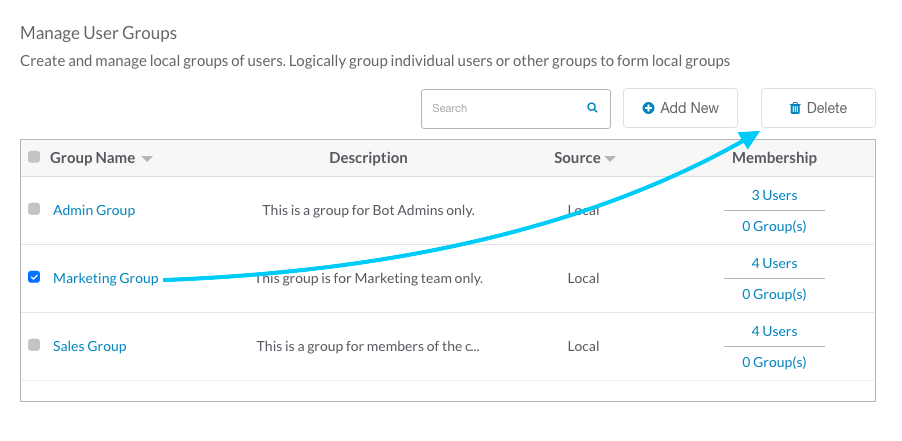
- In the User Management module, on the Groups page, in the Group Name column, select the name of one or more groups to delete.
- On the Action bar, click
 .
. - In the Delete Group(s) confirmation dialog, click Delete.
Warning: This operation is permanent and cannot be undone.
The group is deleted.