
Custom Dashboards allow you to design your own reports and dashboards to meet business needs using a combination of built-in metrics as well as custom KPIs based on user demographic or context information.
Custom Dashboards are in addition to the out-of-the-box dashboard reports available in the Bot Builder. See here for more on the Default Dashboard.
This feature was introduced in the ver7.1 of the platform.
Custom Dashboards can be built using the following three simple steps:
- Identify the data points that you need to capture for deriving the metrics. This will be based on your business requirements and needs.
- Define suitable Custom Meta Tags to emit these data points in the Bot definition. See here for how to add custom meta tags to your bot.
- Design widgets, preview and update the dashboard with these widgets. The rest of this document walks you through this step,
You can use the Custom Dashboards under Dashboard from the Left Navigation Menu to add multiple custom dashboards for your bot.
- Each of these dashboards can have one or more widgets.
- Each of these widgets can be associated with a set of predefined datasets.
- Datasets can be used to define queries (similar to SQL) for extracting the required data to be represented by the widgets.
- Information related to messages, sessions, analytics and meta tags can be used to generate the data.
We will be seeing how to build a Custom Dashboard using each of the above-mentioned components.
Dashboards
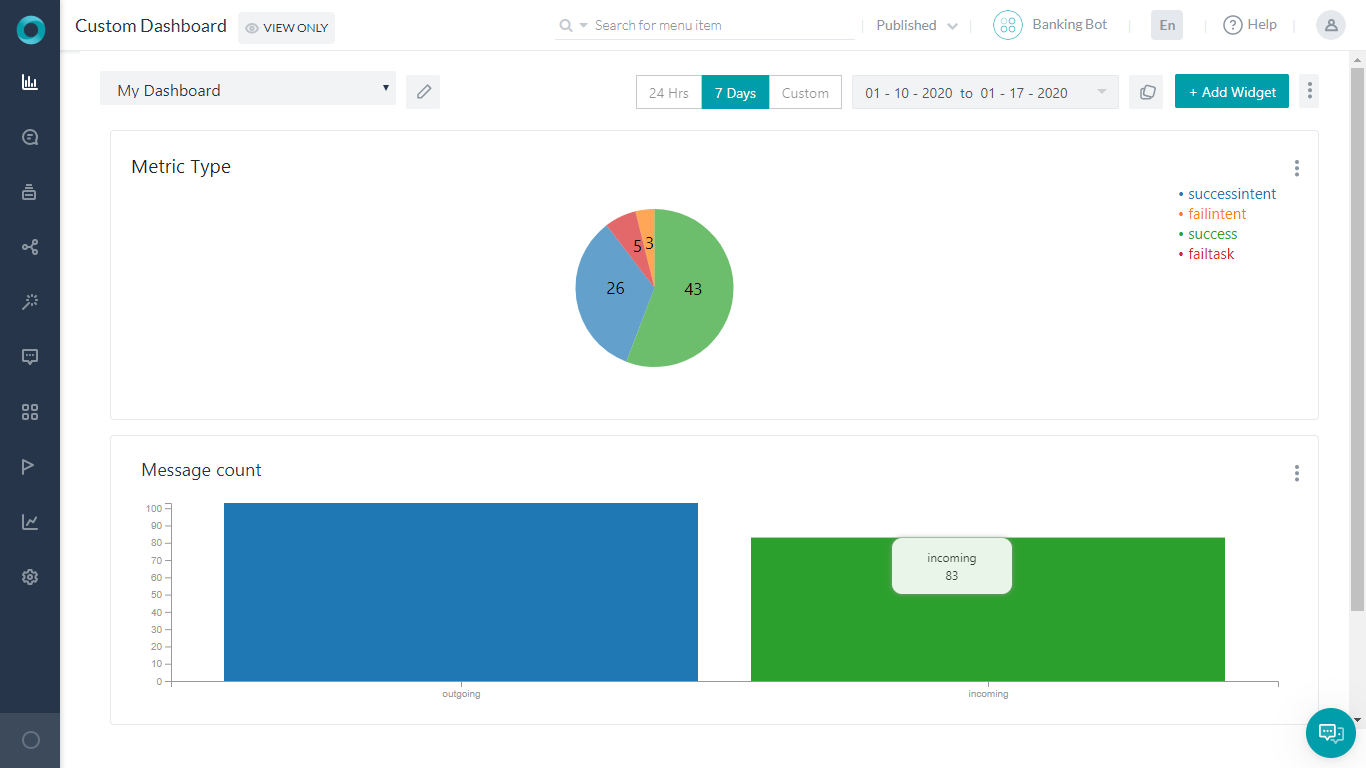
You can add one or more Dashboards by providing basic details of the Dashboard.
- You can edit and modify the Dashboard Name anytime.
- Every Dashboard comes with Date Range which is a filter that can be set to 24 Hrs, 7 Days or custom range and this will be applicable for all widgets in the Dashboard.
- You can choose a color theme for your dashboard.
- You can Add Widget to a given Dashboard (see below for details).
- You can reorder the widgets within a dashboard using the move cursor, visible on mouse hover over the widget, to drag and reorder the widget anywhere on the Dashboard.
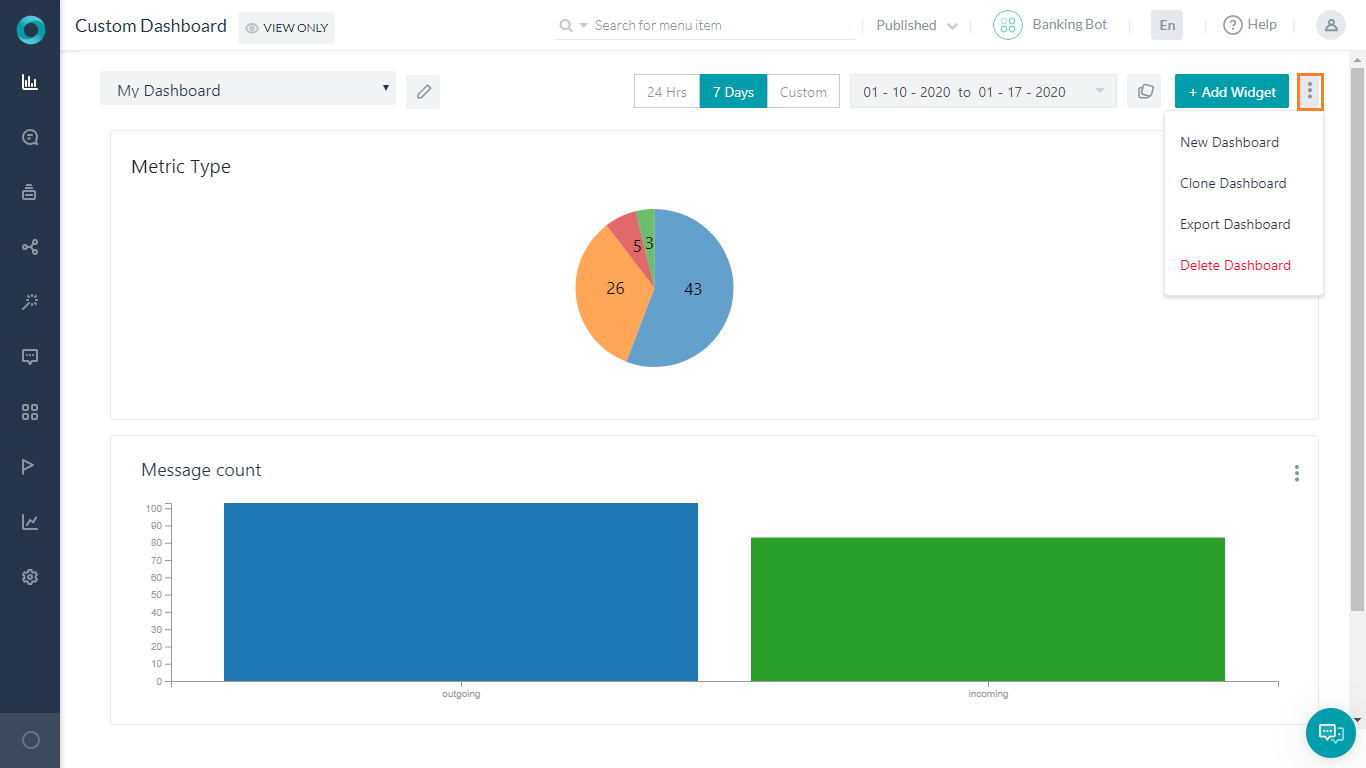
- Using the more (verticle ellipses) icon, you can either create a New Dashboard, Clone Dashboard, Export Dashboard or Delete Dashboard.
- Dashboard data can be exported in JSON format.
Widgets
You can add one or more widgets to a Dashboard. Use the Add Widget option to add widgets to a Dashboard. Widget configuration involves two steps:
- Data Definition, and
- Data Representation.
Data Definition
Every widget should be associated with a query definition to specify what information should be retrieved and represented on a Widget. Following are the configurations used to generate the query definition:
- Dataset defining the source of data. This can be:
- Analytics: Analytics gives access to data pertaining to Success Intents, Failed Intents, Success Tasks, and Failed Tasks associated with your bot. You can choose to view key fields like MetricType, Channel, UserId, etc. or any custom fields added against the metrics records.
- Message: This dataset provides Bot and User messages for your Bot. You can choose to view key fields UserId, Channel, etc. or any custom fields added against the messages.
- Sessions: Use this dataset to provide a listing of conversation sessions associated with your Bot. You can choose to view key fields like UserId, Channel, etc. or any custom fields added against the sessions.
- Date Range is provided by default, you can set the values for preview purposes. This is set by default to the past 7 days and can be customized to a range of 90 days up to 365 days in the past.
- Select fields to be depicted by the Widget.
- Depending upon the Dataset selected the Fields will vary. See the table below for detailed listing. For example to list the success & failed intents, metricType
- You can apply on these fields the aggregation functions like “min”, “max”, “sum”, “count”, or “avg”“. For example to count the total triggered intents, count(metricType)
- You can give a display name as an alias. For example, count(metricType) as total
- Apart from these if you have defined any Custom/Meta Tags for your Bot, you can use them under the appropriate heading using the following notation:
userTag.tagname = value. That is if you have declared a Message level custom tag, select the Message Dataset and entermessageTag.TagName.
- Filter By fields (actual field names, not alias as give in the Select clause) can be used to define the criteria for filtering results. You can apply the following operators on these fields: “=”, “>=”, “<=”, “>”, “<“, “in”, “not in”. For example to list the dialogs both intents and tasks which were successful, metricType = successintents or metricType = successtasks and tasktype = dialog. Note while conjugating multiple conditions they would be evaluated left to right, and this ordering cannot be changed using parentheses ()
- Group By fields (actual field names, not alias as give in the Select clause) for applying the aggregating functions. For example in the above example to total based on the metric type, metricType
- Sort By fields (actual field names, not alias as give in the Select clause) to order the results in ascending or descending order – “asc”, or “desc”. For example to sort in the descending order of the metric type, metricType desc
Run the query to see the results in a tabular format.

Data Representation
The next step would be to render the data in a visually appealing way. The following options are available for data representation:
- Table will render the data in a simple row and column format. You can specify the Columns and their order from the Dimensions option.
- Bar Chart can be used to depict the data across the X- and Y-axis
- Line Chart can be used to depict the data across the X- and Y-axis. The results can be split into Data Series based on the Overlay field and get multiple lines plotted.
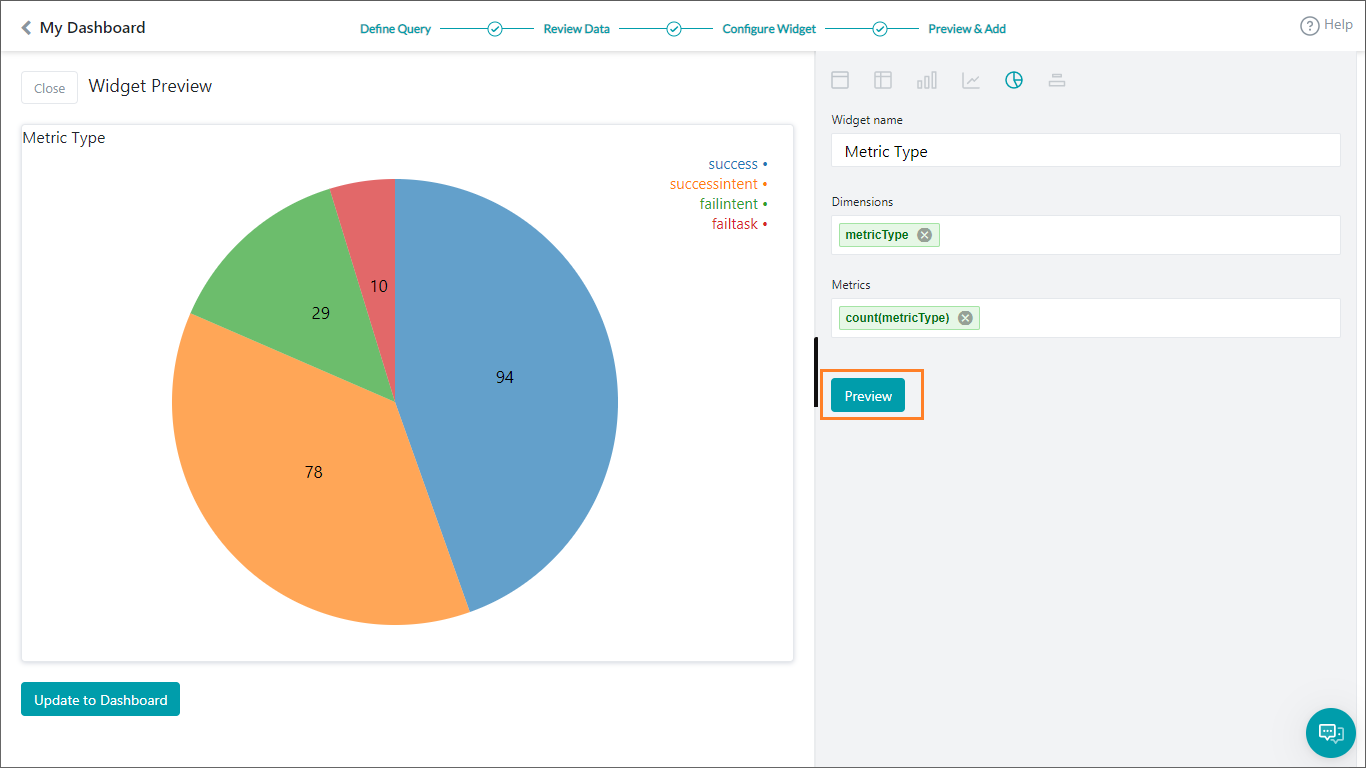
- Pie Chart can be used for aggregation data to depict part-of-whole scenarios. Use Dimensions to set the fields to be depicted and the Metrics to set the aggregation function to be depicted.
Use the Preview button to visualize the Widget. If it suits your purpose, add the widget to your to Dashboard to save the changes.
NOTE: You have to Run the query to be able to Preview it.
Widget Actions
Using the more icon (vertical ellipses) against each Widget, you can:
- Edit option will open the Widget definition page where you can make changes to an already defined Widget.
- Clone option can be used to duplicate the Widget definition and modify it.
- Export option can be used to export widget data in JSON format.
- Delete option can be used to delete the widget from the Dashboard.
Limitations
- You can define a maximum of 100 custom dashboards.
- Each dashboard can include a maximum of 100 widgets.
- A maximum of 3 metrics can be added to chart.
- Each chart can render 1 dimension.
- The custom date range can be set to a range of 90 days upto 365 days in the past.
Dataset & Fields
Note that the field names are case sensitive and should be used as indicated in the tables below.
Analytics
| Field Name | Data Type | Possible Value |
| metricType | Text |
|
| taskName | Text | Name of the Task being executed |
| taskType | Text |
|
| isDeveloper | Text |
|
| failurereason | Text | |
| failurepoint | Text | |
| language | Text |
|
| channel | Text |
|
| sessionId (not allowed as dimension in widget representation) | Text | of the form:
5d8361063b790ae15727d75f |
| trainingStatus | Text |
|
| pinStatus | Text |
|
| matchType | Text |
|
| userId | Text | email id or enterprise assigned user id |
| channeluserid (not allowed as dimension in widget representation) | Text | |
| timestampvalue | Number | |
| date | Date |
Messages
| Field Name | Data Type | Possible Value |
| messagetype | string |
|
| isDeveloper | number |
|
| messageId (not allowed as a dimension in widget representation) | string | of the form:
ms-35bb7391-edc9-5a7a-859c-5682f787a684 |
| channel | string |
|
| sessionId (not allowed as a dimension in widget representation) | string | of the form:
5daecb96e79dbaabb87fd4c4 |
| language | Text |
|
| userId | Text | email id or enterprise assigned user id |
| timestampvalue | Number | the timestamp of the message |
| date | Date | Creation date on the message |
| username | string | user name |
Sessions
| Field Name | Data Type | Possible Value |
| streamid (not allowed as a dimension in widget representation) | string | Bot id |
| sessionid | string | of the form:
5daecb96e79dbaabb87fd4c4 |
| userId | string | email id or enterprise assigned user id |
| username | string | User Name |
| channel | string |
|
| language | Text |
|
| timestampvalue | Number | Timestamp value |
| date | Date | mm-dd-yyyy |