
Your bot can have many dialog tasks with related components. You can use the Dialog Editor to create, review, and edit a single dialog task for a bot. However, to better visualize and understand relationships and settings for all dialog tasks in a bot, you should use the Manage Components feature.
Managing Task Components
To start managing your dialog tasks, follow these steps:
- Open the bot for which you want to manage the dialog task components.
- Hover over the side navigation panel and click Bot Tasks.
- In the Dialog Tasks section, click Manage Components.

Dialog Components
The Dialog Components window shows all of the components used in any dialog task of the bot. To view or modify the settings of a component, click its name. The Properties panel of the node opens.
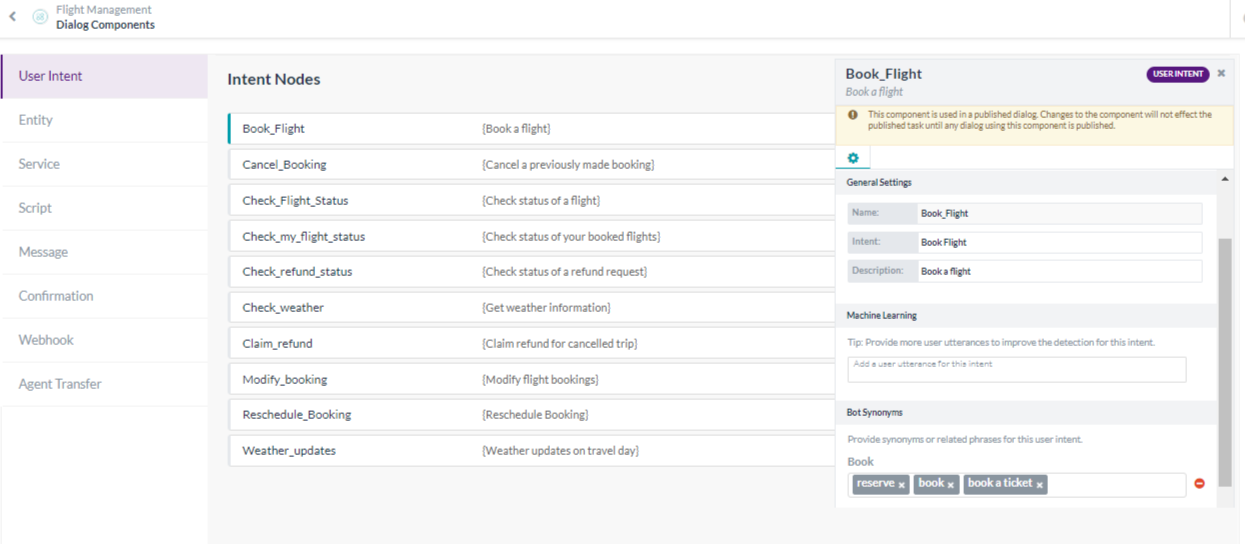
The following table lists the details included in the window for each component type
| Component Type | Details |
|---|---|
| User Intent |
|
| Entity |
|
| Message |
|
| Script |
|
| Service |
|
| Confirmation |
|
| Webhook |
|
| Agent Transfer |
|
Upgrading Tasks
After you publish a task, and the Bots Admin approves and deploys the task, to make changes in the published bot, you will need to upgrade the bot, and then publish the upgrade for Bots Admin approval and deployment to users. However, you can make some minor changes, such as task descriptions, Task Demo link, custom error messages on the General tab for a task.
Some changes, for example, bot Name, can only be changed if the bot is not published. To change the name of a published bot, the Bots Admin would have to suspend the bot by removing all assigned users and marking the bot task as inactive.
Editing Basic Settings
This section describes how to make changes to a published task. Basic settings can be changed and saved without upgrading the bot because the end-user experience is not changed. Only limited settings can be changed for a published bot.
To edit settings for a published task
- Open the bot whose task you want to edit.
- Hover over the left-hand navigation panel of the bot, and click Bot Tasks.
- Point to the task you want to edit, and click the Settings
 icon that is displayed. The General tab for the published task is displayed with both read-only and editable fields.
 - Click Save to save the modified settings and close the General tab.
You cannot access other tabs for a published task for editing. However, you can click the Settings ![]() icon, and then select View to view all tabs of a published task. Editing a published task using the Edit Basic Settings command does not require Enterprise Admin nor end-user approval or action, and the Version number of the task is unchanged.
icon, and then select View to view all tabs of a published task. Editing a published task using the Edit Basic Settings command does not require Enterprise Admin nor end-user approval or action, and the Version number of the task is unchanged.
Upgrading Tasks
If you need more than a minor change to the published task, you will have to upgrade the task to a new version.
Upgrade Types
There are two types of upgrades for a task:
- Mandatory – A mandatory upgrade generally does not require end-user action, and users are only informed that the task was upgraded with an auto-upgrade. If a mandatory upgrade does require end-user action, for example, new authentication requirements, the end-user is notified to take the action for a manual upgrade, sent reminder notifications, and finally, expiration of the original task after 15 days.
- Optional – An optional upgrade is not required and is not auto-upgraded for users. End-user action is required to complete the manual upgrade and the user can choose whether or not to upgrade.
Task Upgrade Definitions
A Version Type is either a major or minor update.
Depending on the changes for the bot task, you may be able to specify the version type as a minor or major update for the revision number. All published tasks begin with Version set to 1.0. A major update would set the Version to 2.0, while a minor update would set the Version to 1.1.
As part of the end-user upgrade experience, you must define the messages shown to the user to describe the upgrade and other messages that describe what the upgrade will change.
Verify Flows
And finally, if the upgraded task is mapped in a flow, you must review, update, and confirm existing mapping values defined in the flow. If the flows are not verified, mapped action tasks will not be displayed in the upgraded task for the end-user.
Upgrading a Task
Using the Upgrade command, a duplicate of the original task is created where you can make your modifications without affecting the published version. Then, when ready to deploy, you can decide if the upgraded task is mandatory or optional for users that are already using the originally published task.
To upgrade a task
- Open the bot whose task you want to edit.
- Hover over the left-hand navigation panel of the bot, and click Bot Tasks.
- Point to the task you want to edit, and click the Settings icon that is displayed.
- In the Action Tasks or Alert Tasks section, click the Settings icon for the published task you want to upgrade, and then click Upgrade.
- A duplicate of the published task is created with a Status set to Upgrade In Progress and the General tab is displayed.
- Modify the task as needed, and then click Finish Setup.
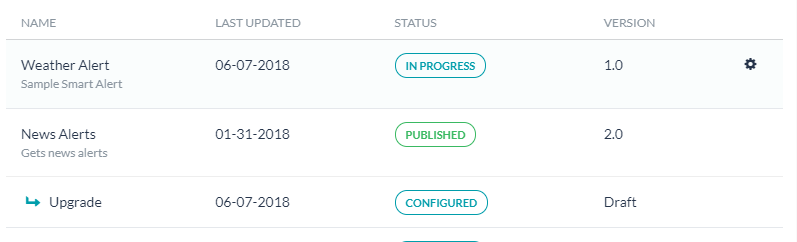
When you are complete with the modifications to the upgraded task, the task Status is set to Configured, and the Version is set to Draft.
Deleting and Recalling Tasks
As a developer, you can create, modify, upgrade, publish, and when needed recall a task approved for publishing, and delete a task if no longer needed. This topic describes how to recall or delete a task.
After you publish a task and the Bots Admin approves the task, the task becomes available to users, either employees or end-user customers, after the Bots Admin assigns the approved Bot to users. Once a task is made available to users, it is like a book that has been printed, published and distributed for the general public, and cannot be deleted by the developer or the Bots Admin. However, a Bots Admin can suspend usage of a Bot by users. When a task is suspended by the Bots Admin, the Status of that task is displayed as Suspended in Bot Builder. For more information about task Status, see Getting Started with Building Bots.
When you publish a task, the Status for that task is displayed as Awaiting Approval in Bot Builder. Tasks with this status can be Recalled before the Bots Admin approves the task. When a task is successfully Recalled, the Status reverts to Configured, and you can then edit or delete the task as needed.
To recall a task
To recall a task, the Status must be Awaiting Approval.
- In Bot Builder, on the left navigation menu, click the Bot that is defined with the task that you want to recall, and then on the Bot Tasks tab, click the Expand
 icon for the task type you want to recall.
 - Point to the task you want to recall, click the Settings icon that is displayed, and then click Recall.
- In the Recall Confirmation dialog, click Continue.
The task is recalled from the Bots Admin, and the Status is updated to Configured in Bot Builder.
To delete a task
To delete an unpublished task, the Status must be Configured, In Progress, or Rejected.
- In Bot Builder, on the left navigation menu, click the Bot that is defined with the task that you want to delete, and then on the Bot Tasks tab, click the Expand icon for the task type you want to delete.
- Point to the task you want to delete, click the Settings icon that is displayed, and then click Delete.
- In the Delete Confirmation dialog, click Continue.
The task is deleted from Bot Builder.