To launch your bot on Hangouts Chat, you would need to:
- Enable ‘Hangouts Chat API’,
- Create a Service Account, and
- Set up the integration.
Step 1: Enable ‘Hangouts Chat API’
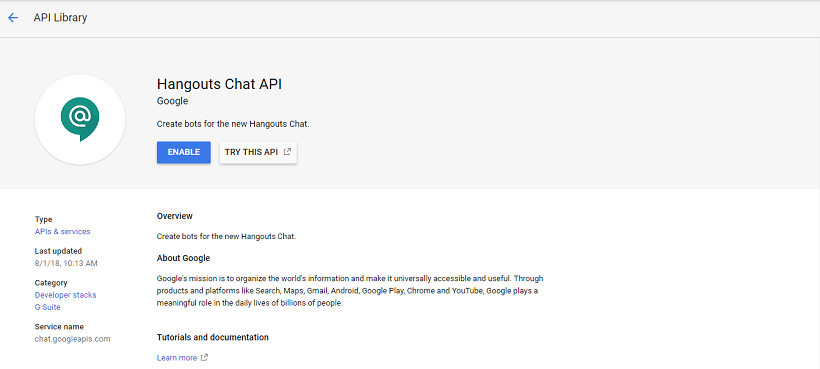
- Login to Google Developer Console.
- Click ‘Enable APIs and Services’.
- Search and select ‘Hangouts Chat API’.
- Click the ‘Enable’ button.
- On enabling the API, you would be redirected to the ‘Overview’ page of the ‘Hangouts Chat API’.

Step 2: Setup API Configurations
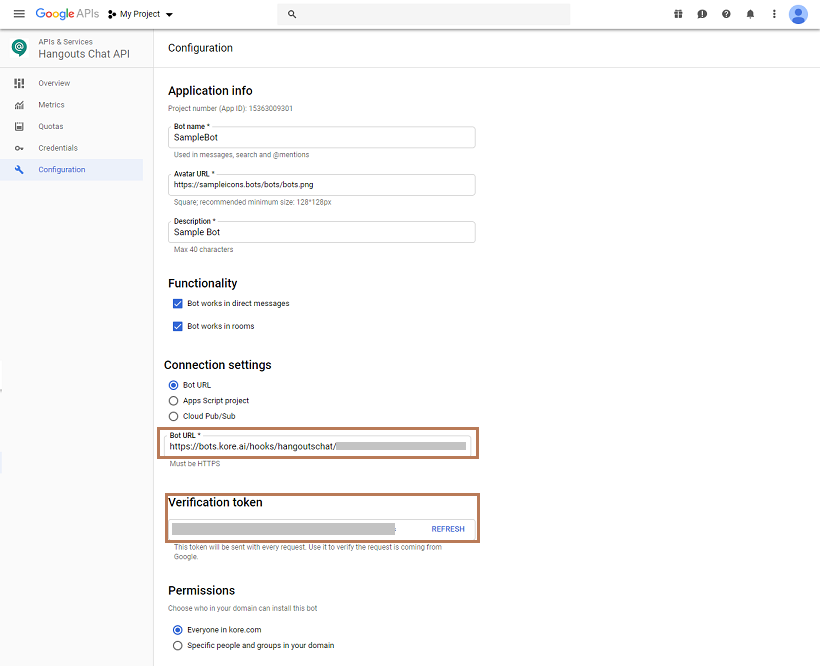
- Proceed to the ‘Configurations’ section from the left navigation panel and provide all the required details like:
- Bot name,
- Avatar URL, and
- Description.
- Under ‘Functionality’ choose both ‘Bot works in direct messages’ and ‘Bot works in rooms’ options.
- Under ‘Connection Settings’,
- select ‘Bot URL’ option, and
- enter the Webhook URL provided by Kore.ai from the ‘Configurations’ tab of the channel setup page.
- Select appropriate option under ‘Permissions’.
- Copy the ‘Verification token’ and enter it in the ‘Verification Token’ field present in ‘Configurations’ tab of Hangouts channel setup page of the Bot Builder.

Step 3: Create a Service Account
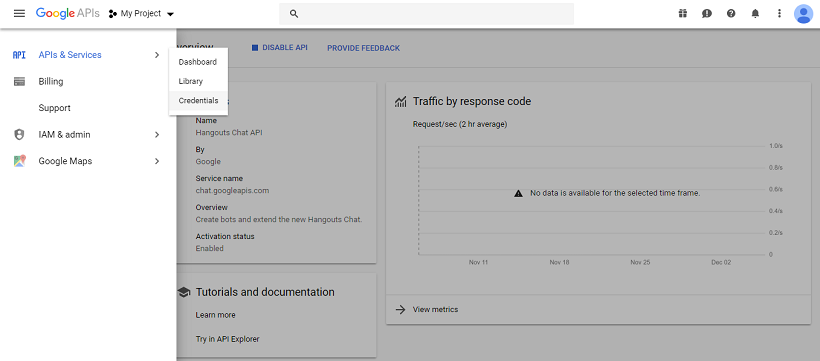
You need to set up the credentials for facilitating the integration.
- From the Credentials page, click the ‘Create credentials’ button and select ‘Service account key’.

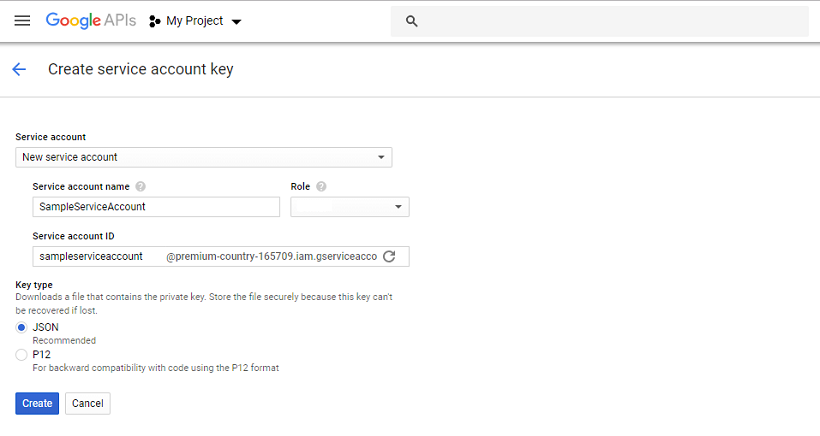
- From the ‘Service account’ dropdown, select ‘New service account’ option.
- Provide a name for your service account.
- Select ‘Key type’ as JSON, and click the ‘Create’ button.
- After the creation is completed, a JSON file containing the credentials will be downloaded to your computer.
- From the downloaded file, capture ‘client_email’ and ‘private_key’ values and provide them in the ‘Configurations’ tab of Hangouts channel setup page of the Bot Builder.

Complete the Hangouts Chat Configuration from the Bots platform and publish the Bot to access the Bot from Hangouts.
