
Kore.ai Knowledge Graph helps you turn your static FAQ text into an intelligent, personalized conversational experience. It goes beyond the usual practice of capturing FAQs in the form of flat question-answer pairs. Instead, Knowledge Collection enables you to create an ontological structure of key domain terms and associate them with context-specific questions and their alternatives, synonyms, and Machine learning-enabled classes. This Collection, when trained by the platform, generates a Knowledge Graph that enables an intelligent FAQ experience.
Creation
To generate a Knowledge Graph, you need to add a Knowledge Collection to an existing or new Bot. If you have n’t already created a bot, refer to Creating a new Bot.
Creating a Knowledge Collection involves the following steps:
Step 1: Add Knowledge Collection to Bot
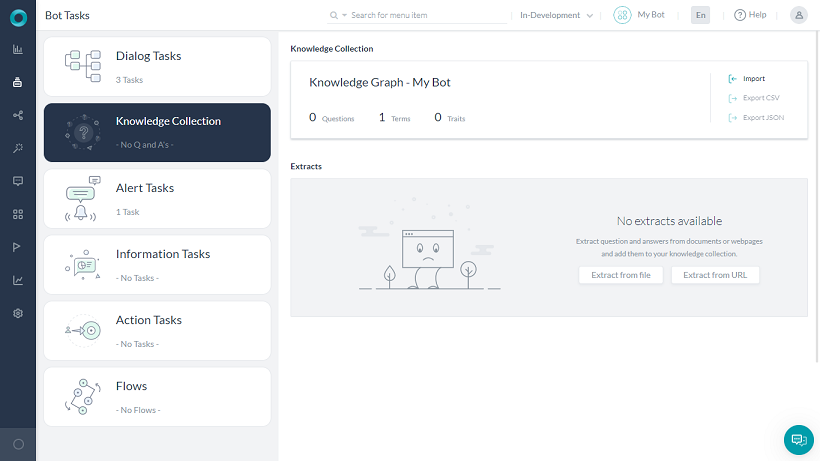
To open the Knowledge Collection builder:
- Log in to Kore.ai Bot Builder and open the bot to which you want to add the Knowledge Collection.
- From the left navigation menu, select Bot Task and, click the Knowledge Collection tab and then click the Knowledge Graph – <Bot Name>.
Step 2: Create the Ontology
By default, the name of the bot becomes the root node of the ontology and you can edit this. Create the rest of the nodes below the root node.
To create nodes:
- On the top left side of your Bot Ontology window, hover the mouse over the root node.
- Click the plus icon. A box appears below to Add Node.
- Type the name of the node in the box and press enter.
 Note: This node becomes a child for the root node and can be referred to as a First level node.
 - Repeat steps 1 to 3 to create other First-level nodes.
- After you create First-level nodes, create child nodes as follows:
- Hover your mouse over any First-level node, and click the plus icon to create its child node.
- You can create a child node for any level nodes by hovering the mouse over it and clicking the plus icon.
Step 3: Add Question and Answers
The next step is to add relevant question-answer sets to the nodes in the ontology. As you enter these questions, pay attention to terms that you can further add to your ontology.
Adding Questions
To enter the question and answer for a selected node:
- From the left section of your Bot Ontology window, click the node to which you want to add questions.
- On the top right side of the Bot Ontology, click Add Q&A.
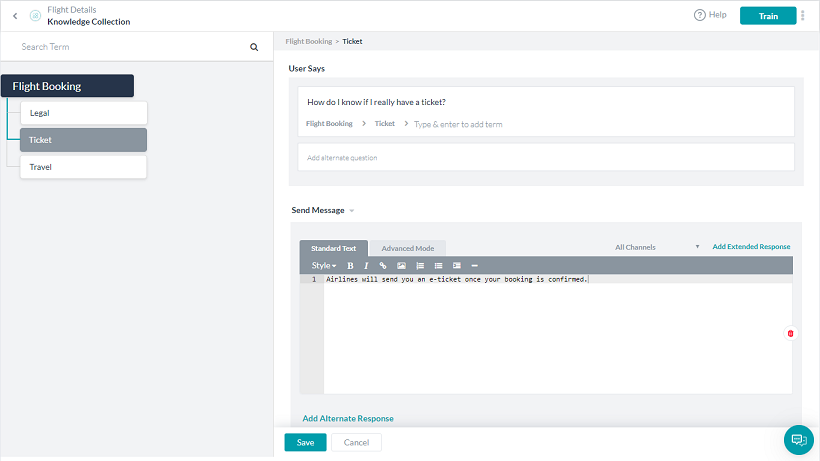
- In the User Says box, enter the question that describes the user’s query.
- Optionally, if there are alternatives to the same question, add the same in the Add alternate question field. Repeat the step for all the alternative questions you want to add.
- For each question, you can add terms which will serve as tags in better identifying the question by the KG Engine.
Adding Responses
For the Response, you can either invoke a bot task as the response or compose a simple or complex channel-specific reply.
Send Message
Use this option to compose a simple text or advanced formatted messages. You can use the editor like any other prompt editor in the platform like messages for dialog nodes etc., refer here to know how.
You can add channel-specific responses to questions in your Knowledge Collection. By varying the responses, you can make the language and formatting to leverage the strengths of the selected channels. To add a channel-specific response, select the channel from the channels list before typing the response.
Note: We recommend you to add one response for All Channels so that it can be used in the absence of a channel-specific response for a channel.
Sometimes the responses to FAQ can be quite lengthy or may include nice-to-have information along with the primary response. To improve the readability of such responses, you can split information into multiple responses that go as separate messages one after another by clicking Add Extended Response on the top right corner of the Send Message box.
Optionally, if there is an alternative response, click the Add Alternate Response to add the same. Repeat the step for all the alternative responses you want to add. At runtime, the platform will pick one response at random.
Run a Task
You can link a Dialog task as a response to an FAQ. It helps you to leverage the capabilities of the Knowledge Graph and Dialog tasks to handle FAQs that involve complex conversations.
Select Run a Task and select a task from the drop-down list to add it as a response to the question.

Building FAQs from an existing source
Chances are the Ontology you are trying to build it huge and complex. If you have all the FAQs in one place you can use Import or Extract process.
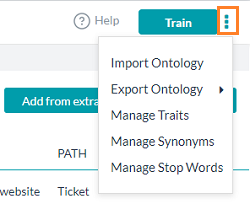
- You can use the Import option to import a Bot Ontology exported from another Bot. See here for more.
- You can use an existing list of Q&As from Knowledge Extraction to populate the Questions and Responses. See here for more.
Step 4: Traits, Synonyms and Stop Words
You can improve the performance of your Knowledge Task by adding tags, synonyms, traits and more. Refer here to know more.
Updation
Once created, there will be times when you want to make changes to the Knowledge Collection for better organization and presentation.
Note: After you make any changes to the Knowledge Collection, make sure to click the Train button to send the updates to the Knowledge Graph engine. If you do not train the bot, the changes are not reflected in the Bot responses.
By default, questions added to a child node are visible for all its parent nodes in the path, up to the root node. If you do not want the questions from child nodes to be seen beyond a certain parent node, click the following icon on the Questions panel of the selected parent.
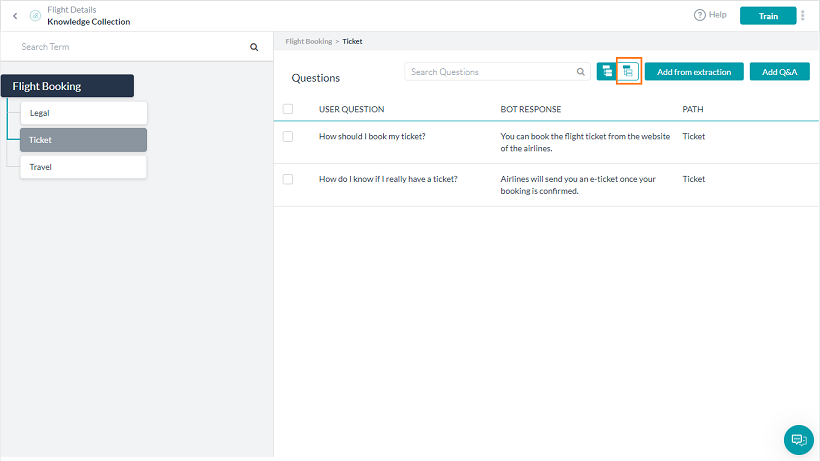
The questions from all its child nodes will be visible to the selected parent node and not to all its parent nodes.
Moving Question and Answers Between Nodes
You can move one or more question-answer sets between nodes in your Bot Ontology.
To move question and answers to the relevant nodes, follow these steps:
- On the Bot Ontology, click the name of the node from which you want to move the question-answer sets. The FAQs appear on the right-hand panel.
- Identify the set of questions that you want to move to, and select the checkboxes next to them.
- Drag the questions and drop them on the relevant node. The node is highlighted and the questions appear on the right-hand panel of the node.
Editing and Deleting Terms
- On the nodes hierarchy from the left panel, hover the mouse over the term/node you want to edit.
- Click the edit icon. The settings window opens.
- You can change the name of the term, add traits, add or remove synonyms, set term usage, and manage context from here (see here for more).
- To delete a term:
- On the nodes hierarchy, hover the mouse over the term you want to delete.
- Click the bin icon.
- On the confirmation dialog, you will be given the following options:
- ‘Delete the FAQs along with the term‘ – Choosing this option would delete the term and FAQs under it.
- ‘Delete the term and move FAQs to root term‘ –
Choosing this option would delete the term and move the FAQs under it to the root term.
Note: If the term has child nodes, all those nodes will be deleted.
- If your Bot is already published you need to Train the Bot for the deletions to be effective.
- If you have deleted the first level term you can selectively train to remove the deleted terms from the published copy.
- If you have deleted, say, the nth level child term, then you need to select the entire parent term for training.
Editing Questions and Responses
- From the nodes hierarchy, select the relevant term.
- Questions associated with the term appear on the right-hand panel.
- Hover over the question to be edited and click the edit icon.
- Make changes to the question or response, and then click Save.
- You can delete the question using the bin icon.
- Selecting multiple questions, enables you do delete them in bulk.