
This tutorial is an end-to-end walkthrough for setting up and running an instance of the Kore.ai Bots Web SDK which is a collection of libraries that you can use to integrate Kore.ai bots with your own web applications.
Web SDK Tutorial Overview
In this tutorial, you will install a Kore.ai sample bot, a test application to host the bot, and then a JSON Web Token (JWT) generation web service using your localhost server to communicate between the bot on your local server and the Kore.ai Bots Platform.
The following list describes the general steps you will take to install and configure the Web SDK.
- Build the Bot to be integrated – For this tutorial, you will install the Travel Planning Sample bot that uses open APIs to get flight and location information, along with weather reports.
- Configure Web/Mobile Client channel – To use the Travel Planning Sample bot with the Web SDK, you must configure the bot for the Web/Mobile Client channel.
- Create a new Client App – When you configure the Web/Mobile Client channel for the Travel Planning Sample bot, you must create a client app and select the JWT signing algorithm used to generate the authentication tokens.
- Publish the bot – After you have configured the Travel Planning Sample bot, you must publish the bot which sends the bot to the Bots Admin for approval.
- Approve and Deploy the bot – In the Bots Admin Console, the published bot and tasks must be approved to deploy.
- Download in install Node.js – You will need to install Node.js used to host the JWT token generation web service for the Web SDK to communicate between the bot in the test application and the Kore.ai Bots Platform.
- Download and uncompress the test application – The test application, SDKApp is used to simulate your application that will host the Kore.ai bot as a channel on a web page using your computer localhost server.
- Download and uncompress the Kore.ai Web SDK – The Web SDK contains the libraries used to communicate and run the bot in the test application using the Web/Mobile Client channel. You will need to configure settings in the index.html file for your computer.
- Start your application and view the bot in a web browser – In a Terminal window, you will start the JWT service, and then view the bot in a web browser.
Now let us see detailed step by step implementation.
Installing and Running the Kore.ai Web SDK
This section provides detailed steps on how to run a Kore.ai sample bot using the Web SDK and a test application running on your computer localhost server.
To get started, you will need to build a bot to run in the test application, and then configure the bot to run in the Web/Mobile Client channel. For this tutorial, we will be installing a sample bot (see here for detailed steps)
- Log on to Bot Builder, and click the down-arrow next to the +New Bot and select Install Sample Bots.
- Hover over Travel Planning Sample, and then click Install.
- The Travel Planning Sample installed successfully message is displayed and the sample bot is added to your Bots left-hand navigation menu.
In this next section, you will define the Web/Mobile Client channel for the Travel Planning Sample bot by creating a new client app and defining channel settings. See here for a detailed explanation of the steps.
- On the bot builder menu, click App Extensions > Web/Mobile SDK.
- In the Select App drop-down list, click Create App. The Create New Client App dialog is displayed.
- In the Name field, enter a name for your app, for example, My SDK Client App.
- In the JWT Signing Algorithms section, select HS256 to generate the authentication tokens.
- Click Create.
- The Web/Mobile Client Channel page is displayed with the following JWT credentials, make a note of all these details. We will be using them later in the Web SDK setup:
- Bot Name
- Bot ID
- Client ID
- Client Secret
- In the Allow Alert Task Setup section, select Yes, let the users set up alert tasks using the web client and then click Save.
- In the Bot Admin Approval dialog, click Ok.
Now that the bot is created and defined for the Web/Mobile Client channel, you are ready to publish and deploy your bot.
- On the Publish tab, click Publish Now.
- On Define Deployment tab, select all tasks, and then click Next.
- On the Review & Confirm tab, click Confirm, and then in the Deploy Standard Bot dialog, click Yes.
- In the Deployment Status dialog, click Close.
After an enterprise developer publishes a bot, it must be approved and assigned to the users for use.
- Complete one of the following bot deployments in the Bots Admin Console depending if your bot Target Audience is set to Enterprise Users or General Public. Complete one of the following:
- In the Bots Admin Console, in the Bots Management module, on the Enterprise Bots page, click the Ellipses
 icon for the Travel Planning Sample bot that you want to deploy, and then click Manage bot tasks. The Manage Bot Tasks dialog is displayed.
 - In the Bot tasks field, click the Expand
 icon to display the available and deployed tasks, select all tasks for this bot, and then click Confirm.
 - In the Manage bots tasks dialog, click Confirm. The Bot status changed successfully message is displayed.
- On the Enterprise Bots page, click the Ellipses icon for theTravel Planning Sample bot that you want to assign the users to, and then click Bot & task assignments.
- The Bot & task assignments dialog is displayed. Assign the bot to your users, for all tasks, including yourself.
- In the Bots Admin Console, in the Bots Management module, on the Enterprise Bots page, click the Ellipses
Now it is time to download, uncompress, install and configure the software packages required for the Web SDK and a test application to run the bot locally on your localhost server.
- To download and install node.js on your computer, go to https://nodejs.org/en/download/, and then select your OS as .pkg for Mac, and .msi for Windows.
- In a Terminal window, run the
node -vcommand to verify installation and version, for example,v6.10.2. - Locate the SDKApp/sdk folder of your web server hosting the app where you want to integrate the Kore bot. For this tutorial, to download the test application and JWT web service, click SDKApp, and unzip it.
- To download the Kore.ai Web SDK, go to https://github.com/Koredotcom/web-kore-sdk, and then click Download. Extract all files to the …/SDKApp/sdk folder mentioned in step 18 above.
- From the Bot Builder Web/Mobile Client Channel page on the Channels menu, copy the following (as mentioned in step 9 above):
- clientSecret
- clientId
- Bot Name
- Open the index.html file from the …/SDKApp/sdk/UI folder using a text editor:
- Update the following lines to add the path to the UI folder:
<script src="libs/jquery.js" type="text/javascript"></script>

<script src="libs/jquery.tmpl.min.js" type="text/javascript"></script>

<script src="libs/jquery-ui.min.js" type="text/javascript"></script>

<link href="libs/jquery-ui.min.css" rel="stylesheet"></link>

<script src="chatWindow.js" type="text/javascript"></script>

<link href="chatWindow.css" rel="stylesheet"></link> - Update the following parameters to run as localhost
“clientSecret”: “{client secret}”

$.ajax({

url: “http://localhost:3000/api/ /users/getJWT”,

//this is sample url of a localhost. This should include the url where you are hosting the bot.

botOptions.userIdentity = ‘ ‘;

// Provide users email id here

botOptions.clientId= "{client id} ";

// secure client-id

_botOptions.botInfo= {name:"{bot name}","id":"{bot id"};

// Kore bot name is case sensitive
Note: The URL mentioned in the above code snippet, refers to the location where your app (where you want the Kore.ai Bot to be integrated) is hosted. For this tutorial, we are using the JWT server (as setup i step 18) and hence using the same here. - Choose one of the following:
"isAnonymous": < false >;if bot is deployed for the enterprise users, and then setbotOptions.userIdentity = '< Your email ID >';
– or –"isAnonymous": < true >;if bot is deployed for Consumer Use
- Update the following lines to add the path to the UI folder:
- Save your changes.
You are ready to start the JWT token generation service and access the test application with the configured Web SDK in your local web browser. - Go to home directory
cd SDKApp - Install dependencies using the following command
npm install
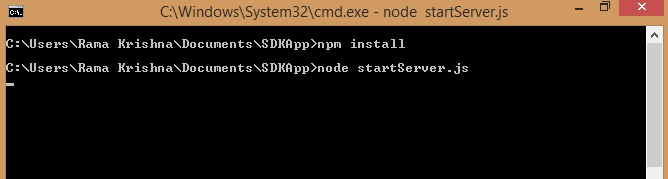
- Start SDKApp
node startServer.js - Access the application in any browser using localhost:3000
Some commonly encountered errors
- A wrong URL is given in index.html, users see a 404 error. Double check the URL. URL changes depending on whether you are hosting the bot on your own web SDK or on Kore’s web SDK. If its Kore web SDK, then the URL is
http://demo.kore.net:3000/users/sts 7.
If you are hosting on your in-house web SDK, then provide the respective URL. - missing/Invalid jwt.sub(): This error occurs for enterprise Bots, when the user’s email id is not given in the index.html file. Provide users identity as shown below in index.html
botOptions.userIdentity = ‘x@gmail.com’;// Provide users email id here. - Not found: User sees this error when either wrong clientID or no clientID is given. Check the correct ClientID from Bot – API Extensions option
botOptions.clientId = “{clientID}”; // secure client-id - error verifying the jwt: the Wrong clientSecret is given in index.html: Check the correct clientSecret you get from Bot – API Extensions option
“clientSecret”: "{clientSecret}” //provide clientSecret here
After you install and test the Web SDK using the test application and your localhost server, you can use the same concept to install and configure the Web SDK in your own enterprise application. You will just need to reconfigure the file paths and URLs in the index.html file of the Web SDK to point to your website and servers, and configure a Kore.ai bot for the Web/Mobile Client channel with JWT credentials for your enterprise.