To add Cisco Jabber as a channel to your Kore.ai bot, you must enable Webhook integration on your Jabber application. Adding the Jabber channel to your Kore.ai bot allows end-users of your bot to interact with your bot using their Jabber accounts. To add the Jabber channel to your bot, you must:
- Enable Webhook Integration – To enable Jabber as a channel for your bot, you must set up a webhook integration on your Jabber application. Copy the Webhook URL from the Configurations tab on the Jabber channel page and enter the required field in the Jabber app for integration.
- Enable Channel – After enabling webhook integration and entering configuration data in Bot Builder, enable the channel.
You must have or register for a developer account in the Jabber portal. To add the Cisco Jabber channel, follow the below steps:
- In the Bots section of the Bot Builder, click the bot you want to add the Jabber channel to.
- On the Channels tab, click the Jabber icon. The Jabber Channel page is displayed.
- To enable a webhook integration on your Jabber application, log in to your Jabber app. Copy the Webhook URL from the Configurations tab on the Jabber channel page and enter the Webhook URL field in the Jabber app for integration.
- Go to the Configurations tab on the Jabber channel page to complete the channel setup.
- Capture the POST URL details from your Jabber app and enter them in the POST URL field.
- You can also optionally generate and capture the Access Token details from your Jabber integration and enter in the Access Token field to enable secure communication between Jabber and bot.
- Select Yes and click Save to enable Jabber Channel.
Following are code snippets of the payload formats for verifying the integration.
Payload for Post URL
Below is the response message from the bot that must be accepted by the POST URL that is registered in the Configurations tab.
   {
                "message": {
                "text" : "Hi"
                }
                "to" : "<recipient-id/group-id>",
                "from" : "<sender-id>"
             }
Webhook Payload
Below is the Webhook payload format to post messages to Kore.ai Bots Platform from Jabber.
  {
                "message": {
                    "text" : "<Message>",
                    "attachments" : [<array of attachment links (optional)>]
                },
                "from" : {
                    "id": "<unique-id-of-sender(mandatory)>",
                    "userInfo" : {
                      "firstName" : "<first-name(optional)>",
                      "lastName" : "<second-name(optional)>",
                      "email" : "<email(optional)>"
                    }
                },
                "to" : {
                    "id": <unique-id-of-recipient(mandatory)>,
                    "groupInfo" : { //If message comes from a group/team/room conversations.
                        "id" : "<unique-id-of-group>",
                        "name": "<group-name(optional)>"
                    }
                }
            }
Edit Jabber Channel
To edit the Jabber channel, follow the below steps:
- Hover over the channel and click to modify. You can make necessary updates to your channel configurations and save them.
- You can also disable or delete the channel information by clicking the Settings icon.
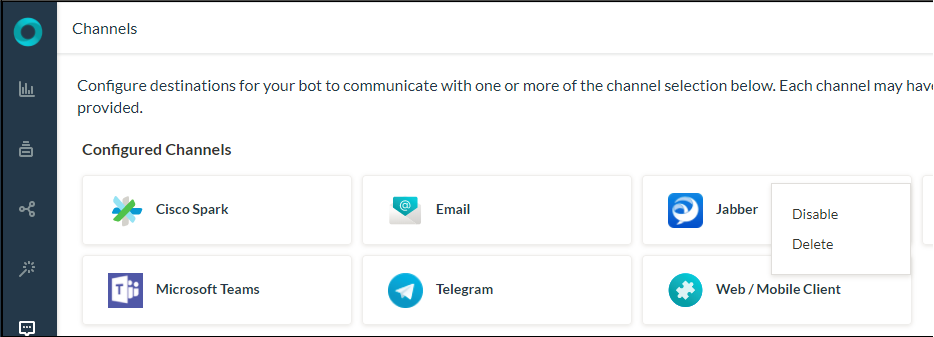
Select one of the following commands to modify the channel:
- Disable/Enable – Click Disable to temporarily disable the use of the Jabber channel for your bot. To enable the use of the Jabber channel, Click Enable.
- Delete – Click Delete. On the Delete Confirmation dialog box, click OK to permanently delete the bot channel configuration.