To set up RingCentral Glip as a channel, you must create an app in Ringcentral’s Developer Portal and enable a webhook for the platform to receive messages. To add RingCentral Glip as a channel for your bot, you must:
- Create RingCentral App – To enable RingCentral as a channel for your Kore.ai bot, you must create an app in RingCentral. Sign up for a RingCentral account if you do not have one already.
- Get App Details – Go to the Application Credentials in the Apps tab to capture the Application Key and Application Secret for channel configuration.
- Create Extension – Create a new extension for your bot in your RingCentral account.
- Authorize – Authorize your account to generate a developer access token that enables the Kore.ai bot platform to access Glip APIs.
- Apply for Production (Optional) – Once you have developed your app on the Sandbox environment and when your app is ready to work in production, you must follow the RingCentral app graduation process.
To add the RingCentral Glip channel, follow the below steps:
- In the Bots section of the Bot Builder, click the bot you want to add the RingCentral Glib channel to.
- On the Channels tab, click the RingCentral Glip icon. The RingCentral Glip page is displayed.
- Log in to RingCentral Developer Portal and go to the My Apps section.
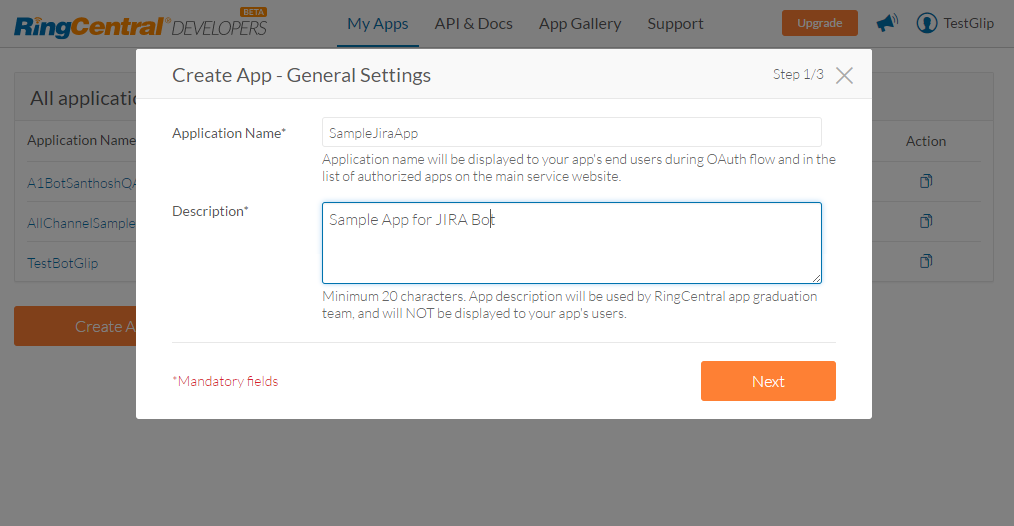
- Click Create App. Enter all the required details on the Create App – General Settings page and click Next.
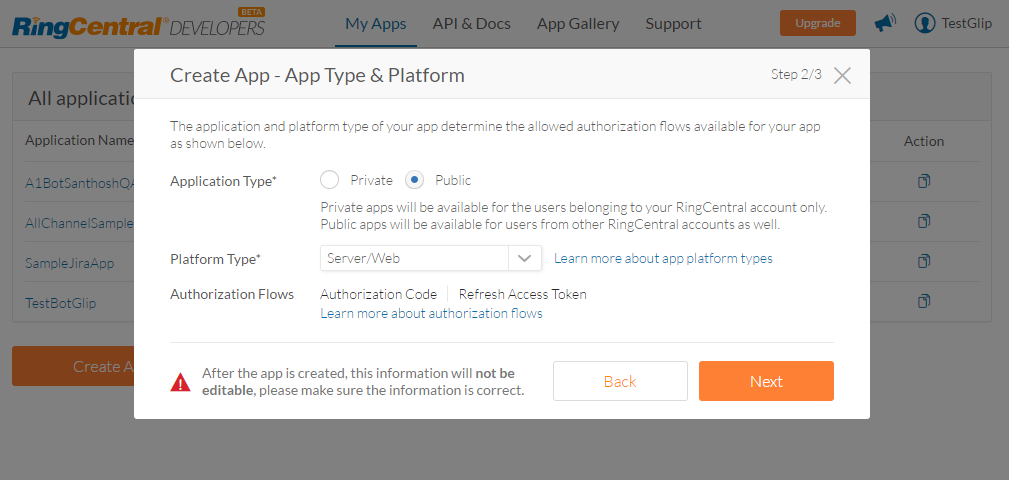
- Enter additional information of the app in Create App – App Type & Platform dialog box. Note that the options selected on this page are not editable once saved. After selecting the following options, click Next.
- App Type
- Private – If you are developing an app for your own RingCentral account use.
- Public – If you are developing an app for many RingCentral accounts.
- Platform Type – Select Server/Web as the option
- App Type
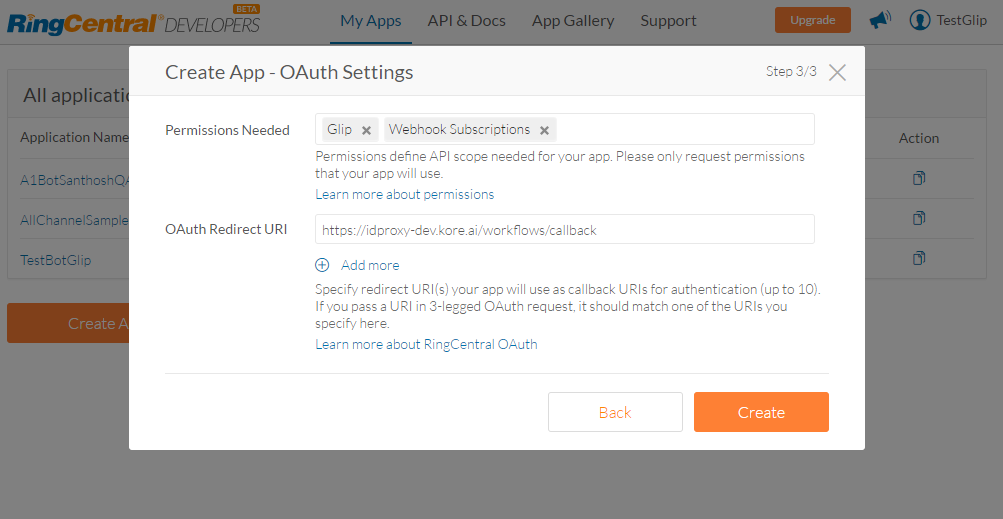
- You must define the permissions to associate with this app. Select Webhook Subscriptions and Glip permissions. If you do not see Glip under Permissions, get your app whitelisted by RingCentral.
- Copy the OAuth Redirect URI from the Configuration tab of RingCentral channel page and enter it in the OAuth Redirect URI field.
- Click Create.
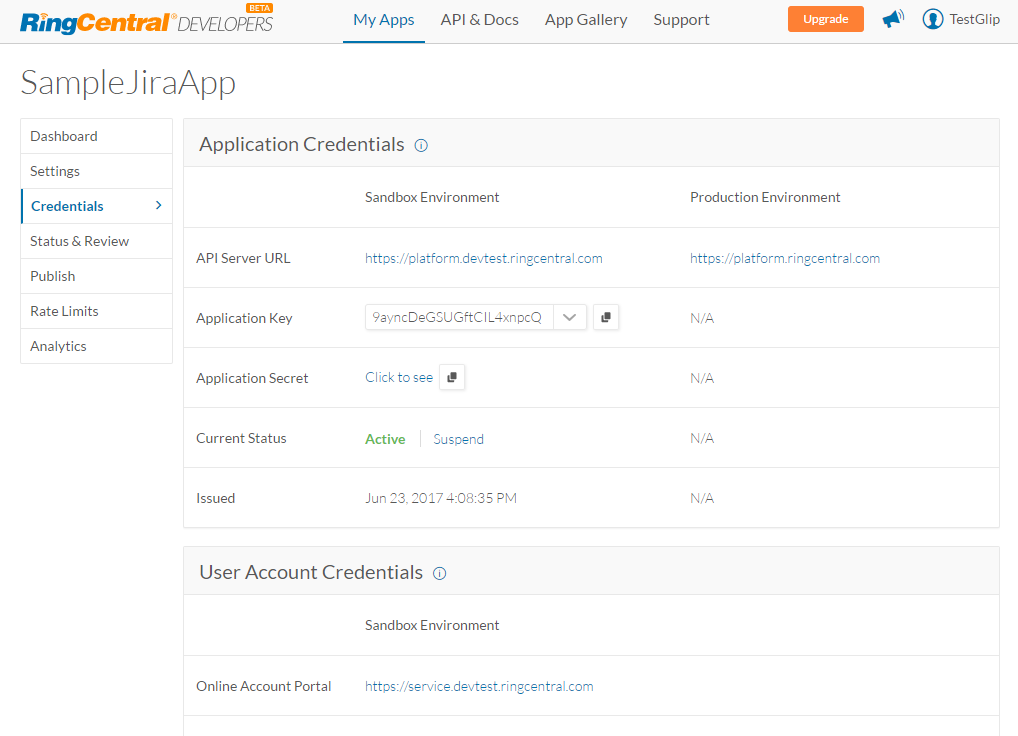
This completes the app creation process and you are redirected to App Dashboard page.
- Go to the Credentials tab of your app information. Copy the Application Key and Application Secret and enter them in the Configuration tab of the RingCentral Glip channel page.
 Note: Copy and paste Application Key and Application Secret in the Configurations tab based on the environment selected.
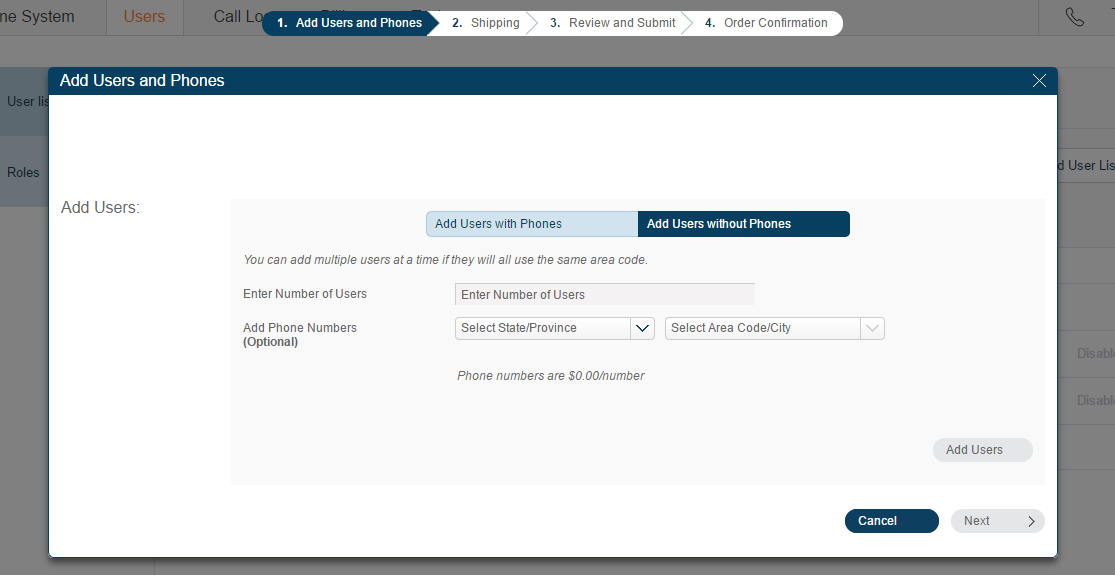
- The bot must be associated with a non-admin user on your Ringcentral account. For this, create a new extension (user) on your Ringcentral account. Log in to the RingCentral account (Sandbox | Production), go to the Users tab and select Add User option.
- On the Add Users and Phones dialog box, select Add Users without Phone option and follow the instructions.
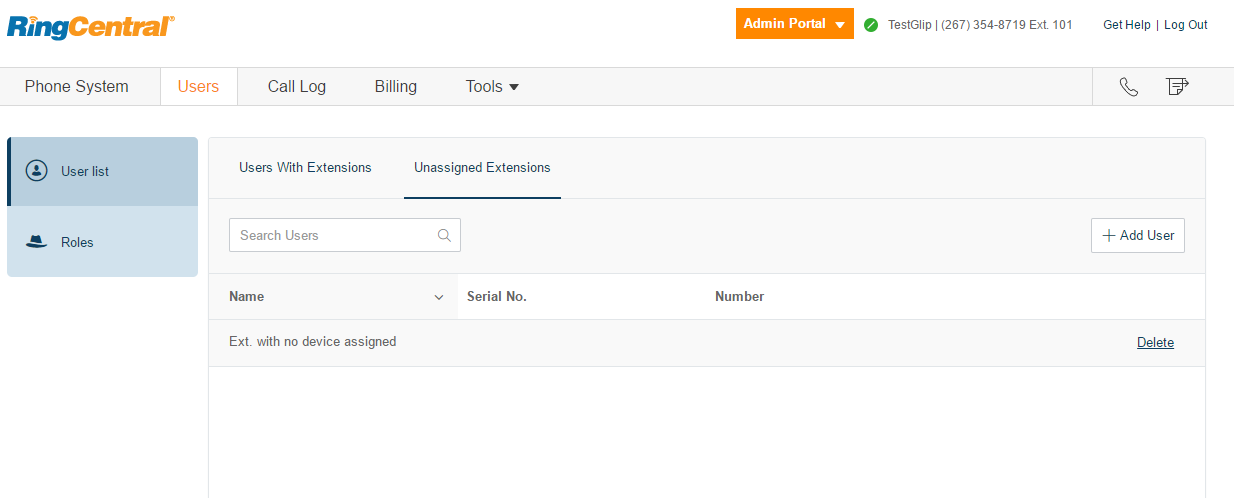
- After completing the user creation, click the Unassigned Extensions tab on the Users page. Click on any of the unassigned users and you are redirected to the user profile information page. Enter all the required information.
- Click Save & Enable.
 Note: The email address provided for this newly created user receives an introductory email with instructions to activate the user. Make a note of the username and password you have set for this new user. You must use these credentials to authorize the bot from the Configuration tab.
- The bot must be associated with a valid extension (user) on your RingCentral account. Use the credentials of the new extension created in the previous step and Authorize the bot using the Configuration tab of the RingCentral Glip Channel page. This step generates a developer access token which enables Kore.ai bot platform to access Glip API’s.
- If you have developed your app in Sandbox environment, and when your app is ready to work in production, follow the steps mentioned under Apply for Production section of the Getting Started guide of Ringcentral. Once your app is production ready, update the Environment, Application Key, and Application Secret according to your production app in the Configuration tab.
- In the Enable Channel section, select Yes and click Save to enable the channel.