The GitHub Sample bot contains the basic configuration for registering an app with GitHub, generating authentication tokens, and then adding those tokens to the bot in Bot Builder. After configuration, you can test the bot using the Talk to Bot feature to test any of the following configured alerts and actions.
- Alert Tasks
- Commit update
- Issue created
- Pull Request Notification
- Action Tasks
- Create Pull Request
- Comment Issue
- Create Issue
Installing the GitHub Sample Bot
The GitHub Sample Bot is only available in Bot Builder and must be added as a new bot. It has a limited design specifically configured to demonstrate certain bot features.
Step 1: Install the GitHub Sample Bot
- To view your sample bots, click the down-arrow next to the +New Bot and select Install Sample Bots.
- Hover over the GitHub Sample bot, and then click the Install button.

- On the GitHub Sample page, on the Instructions tab, note the callback URL https://idp.kore.ai/workflows/callback. You need to paste into your Github App registration later.
Step 2: Register your GitHub App
- To register your Github App, log on to GitHub at https://github.com/settings/developers.
- Select OAuth applications on the lefthand navigation menu, and then click Register a new application.
- In the Application name field, enter the name of your GitHub App, for example, My GitHub App.
- Optionally, add a Homepage URL and Application description.
- Paste the URL copied from Bot Builder, https://idp.kore.ai/workflows/callback, into the Authorization callback URL field as shown in the following illustration.
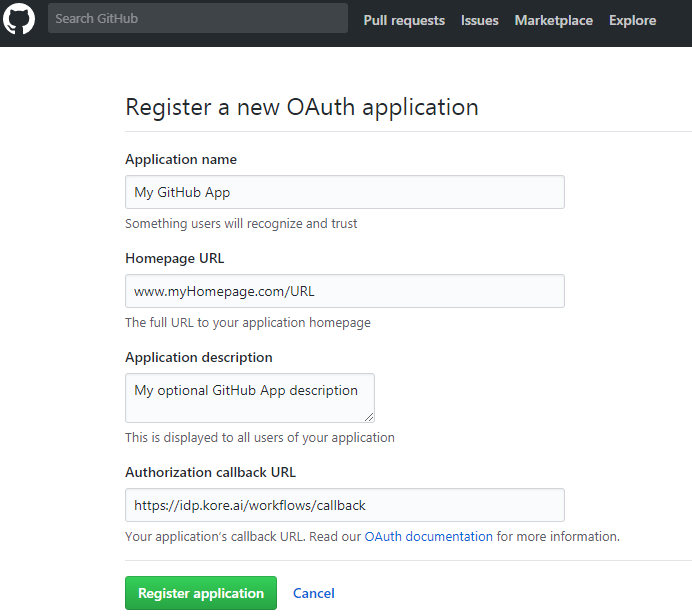
- Click Register application. The < My GitHub App name > page is displayed as shown in the following illustration with client credentials.
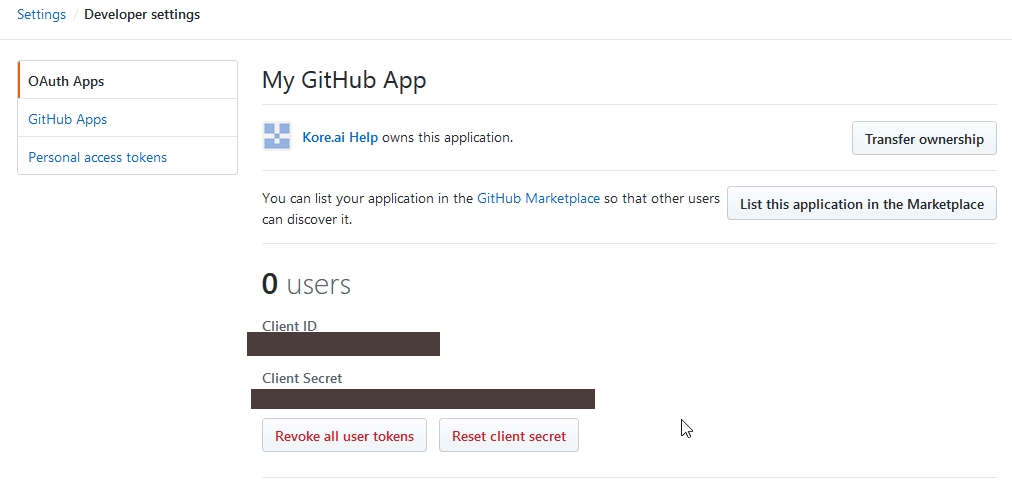
- Copy the GitHub Client ID and Client Secret
- Go back to the Bot Builder, Sample Bot Installation page.
- Copy the above values into the ClientID and ClientSecret fields on the Configuration tab, and click Done.
- The GitHub Sample successfully installed message is displayed.
Step 3: Authorize the Bot
- From the Bot Builder Home page, select your bot, and then click the Talk to Bot
 icon to test the GitHub Sample bot.
 - A link to authorize Kore.ai to access your GitHub repository is displayed on first use of the bot.
- Click the link, and then complete a one-time authorization for the user with GitHub.
Step 4: Customizing the Sample Bot
Try out your bot using Talk to Bot and test all the alerts and actions. Then review the configuration tabs of the bot in Bot Builder:
Bot Tasks – Add or modify tasks. This bot is configured with 3 alert tasks and 3 actions task. You can also add dialog tasks, information tasks, knowledge tasks, and configure flows. Know more
Natural Language – Review and optimize natural language processing and machine language understanding of your bot. Know more.
Channels – Enable this bot for one or more communication channels. This bot is enabled for the Kore channel by default. Know more.
Settings – Edit or define bot settings, such as name, icon, and other settings. Know more.
Publishing – You can publish alert, action, or dialog tasks for Standard Bots for an enterprise or to the Kore.ai Bot Store. For more information, see Publishing Tasks.
Analyze – You can review the full conversation between the Bots Platform and a user using Chat History. For more detail, you can review and analyze both successful, and unsuccessful interactions between a Bot and a user in the Chat Logs section. If necessary, based on the interaction, you can initiate Bot training to better handle future communication transactions. For more information, see Analyzing Your Bot.