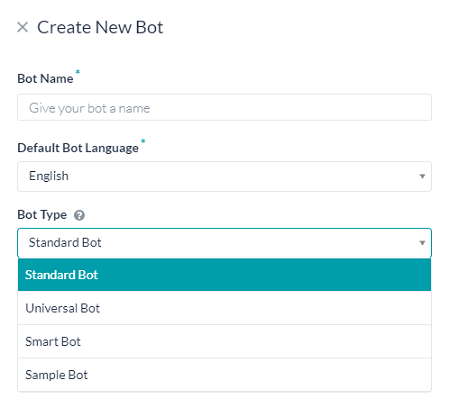
Standard Bots are the most common type of bots. Using these, you can create dialog, alert, action, information, and knowledge task, as well as flows that map one task to another.
This topic describes the basic settings required to create a new Standard Bot.
Step 1: Create a Standard Bot
Step 2: Define Bot Tasks
Once you have created a Standard Bot, you are ready to define how your bot will work. You can define your Bot by starting with the bot tasks.
Define one or more tasks or flows for your Bot in one of the following two ways:
- Using the + New Task button from the Tasks widget on the Bot Summary page.
- From the Bot Tasks tab by hovering over the required task and clicking the + icon.
Tasks are what your Bot does for the end-user, such as Book a flight, Get Weather Information, or Cancel a Ticket.
You can define the following task types from Kore.ai Bot Builder:

Note that the Knowledge Task and Flows are available from the Bots Tasks page
- Dialog Tasks – Consists of multiple intents and sub-intents and component nodes to conduct a complex conversational flow between a user and the bot.
- Alert Tasks – Monitors a web service for events and then sends a notification message to the user when the event occurs. You can use this task type for scheduled polling or near real-time notification using webhooks.
- Information Tasks – Provides a report of data by asking the user for input parameters and then executing a web service call. The formatted data is presented to the user as a link to a report that a user can click to display the data, for example, Show my tickets, or 3-day Weather Forecast.
- Action Tasks – Queries a user on demand for input parameters, and then executes a web service call along with a confirmation message, for example, Create New Ticket, or Get Weather for this Location.
- Knowledge Graph – Turns static FAQ pages into an intelligent, personalized conversational experience. Build an ontology of crucial terms, add questions to the right nodes in the hierarchy and leave the task of responding to users to the bot, thus enabling your Support staff to engage with more complex tasks.
- Creating Flows – Associates one task to another task of the same or different Bot. For example, flow for a Twitter tweet notification could be to Create New Follower.
Further Steps
- A chatbot’s ability to consistently understand and interact with a user is dictated by the robustness of the Natural Language Processing (NLP) that powers the conversation. Kore.ai’s Platform uses a unique Natural Language Processing strategy, combining Fundamental Meaning and Machine Learning engines for maximum conversation accuracy with little upfront training. Know more from here.
- On any tab, you can test your Bot tasks in a messaging window as long as the Bot has at least one task in Configured or Published Status if you click the Talk to Bot icon located on the lower rightmost side in Bot Builder. For more information, see Talk to Your Bot.
- Add delivery channels to your bot that end-users can use to access and interact with your bot when it is deployed. For more information, read Adding channels to your bot.
- Developers can initiate a publish request for administrators to review, approve or disapprove new or upgraded bots and tasks before deployment. Developers also have the option to publish a bot to the public bots store by contacting Kore.ai Support to initiate a review and approval process. For more information, see Publishing Tasks.
- After publishing the bot, open the Analyze page for insights into your Bot’s performance at identifying and executing tasks. It lets you view necessary information for user utterances that matched and didn’t match with intents. Also, it shows the tasks that failed to execute after matching an intent as well as the backend performance of the script and service nodes. For more information, see Analyzing your Bot.

