While analyzing your Bot performances, you might want to give preference to or discard a particular scenario. For example, you might want to track how many people are booking tickets to Chicago. Or you might want to track how a specific user, a premium customer, requests are being catered to.
By adding Custom Meta Tags to the conversation flows, you will be able to profile bot user conversations and derive business-critical insights from your bot usage and execution metrics. Tags can be defined as part of the bot definition at any point of interest. When users interact with your bot, the platform will dynamically resolve these tags and adds them to chat transcripts so that you can later filter your conversations, and flows using those tags.
Defining Meta Tags
Kore.ai Bot builder platform allows you to add tags to various nodes in a dialog task like dialog node, entity node, etc.
This option is available from the Instance Properties tab
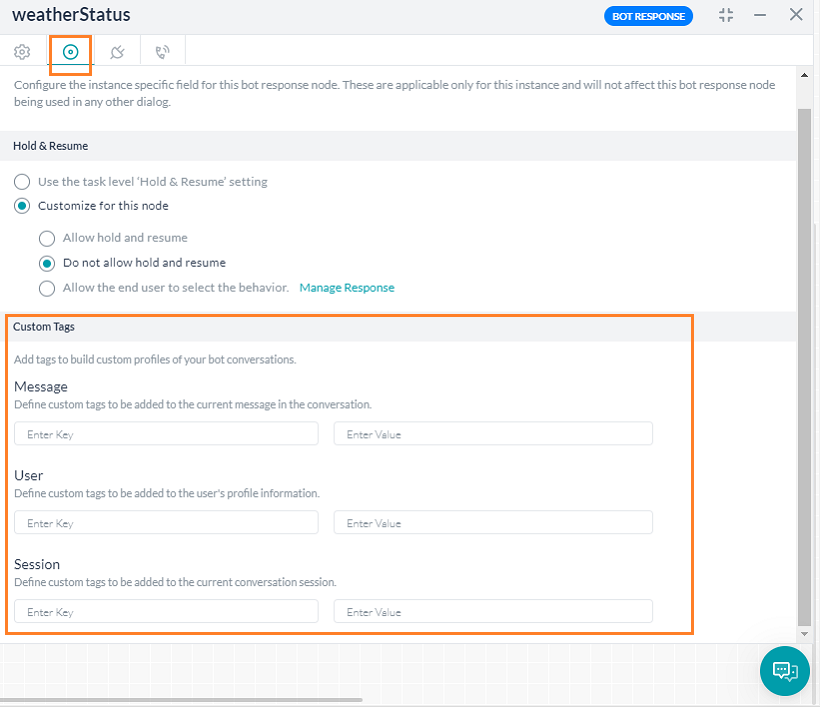
You can define these tags at three levels:
- User Level: These tags can be added to the user’s profile information to capture user information. For example, to track conversations with a premium customer you will define a user-level tag with the user name or some qualifier as the value.
- Message Level: These tags can be added to the message of the current node. If the current node is not associated with a message, then the tag gets added to the immediately previous node that has a message associated with it. From the above example, to track bookings to a specific city Chicago, you would be defining a Message Level tag.
The platform will roll-up these message level tags to task level. That is if a task ends up as ‘Success/Failed Task’, then all the ‘message level’ tags emitted anywhere during the task execution will be associated with the Success/Failed Task event. You can filter Success Tasks as well as Failed Tasks using the message level tags emitted anywhere during the task execution - Session Level: These tags can be added at the current session of the user. These can be used to track the conversation sessions from a specific time frame say holiday season or a geographic domain.
The tag values will be emitted at run time:
- For service, script, webhook and form nodes tags will be emitted on reaching the nodes;
- For entity, message, confirmation, and other nodes tags will be emitted on the successful execution of the nodes.
You can also define Tags as key-value pairs from Script written anywhere in the application like Script node, Message, entity, confirmation prompts, error prompts, Knowledge Task responses, BotKit SDK, etc. This would be useful if you want conditional tagging.
Be aware that Script tagging would work only if the prompt where you added the tag script is triggered during the conversation.
Following script can be used for adding meta tags:
- To add a User level tag:
tags.addUserLevelTag("tagname","tagvalue") - To add a Session level tag:
tags.addSessionLevelTag("tagname","tagvalue") - To add a Message level tag:
tags.addMessageLevelTag("tagname","tagvalue")
The tagvalue can be a value or a variable name containing the value.
Updating Meta Tag Values
Chances are the Meta Tag values, once assigned, may be modified, for either business or other reasons. In such cases following points need to be noted:
- The latest value assigned for a key will over-ride the previously assigned value.
- The updates to the tags follow the following rules:
- Message-level tags: You may set value for a tag multiple times within the script and the last set value will be assigned against the message. The value cannot be updated after the message is sent to the user
- Session level tags: Value for a given tag can be set any number of times throughout the session. The last value assigned will be retained and this is the value that you should be using for all analytics purposes. Value cannot be updated after the session is closed.
- User level tags: Value for a given tag can be set any number of times throughout the session. The last value assigned will be retained and this is the value that you should be using for all analytics purposes. Value can be edited at any time.
Using Meta Tags
Once you have defined the Meta Tags, you can:
- Use the filter option from Bot Metrics to filter the conversations based upon the Meta Tag values. The export file for the Bot Metrics would include the Meta tag information, too. See here for more.
- Use the filter option from Bot Builder Dashboard and Admin Console Dashboard to filter the Bot activity details based upon the Meta Tag values.
- Use to filter the Chat History. Export of Chat History will also include the Meta Tag values. See here for more.
- Filter the records from Conversation History API and Sessions API by meta tags.