This section describes the Kore.ai Bots Admin Console that you can use to manage Bots and users for your company. The Kore.ai Bots Admin Console is a one-stop destination to enroll and manage Kore.ai Bot users in your organization.
Prerequisites for a Bots Admin
To sign up for a Bots Admin account, you must meet the following requirements:
- A valid email address.
- A validated Kore.ai user account. If you do not have a user account, Kore.ai will create a user account for you, and you must validate that account before proceeding.
- Authorization to control the Bots Admin account. Only one user in an account can be the primary Bots Admin. The Primary bot admin can add multiple other users as admin with custom defined permissions.
Accessing Admin Console
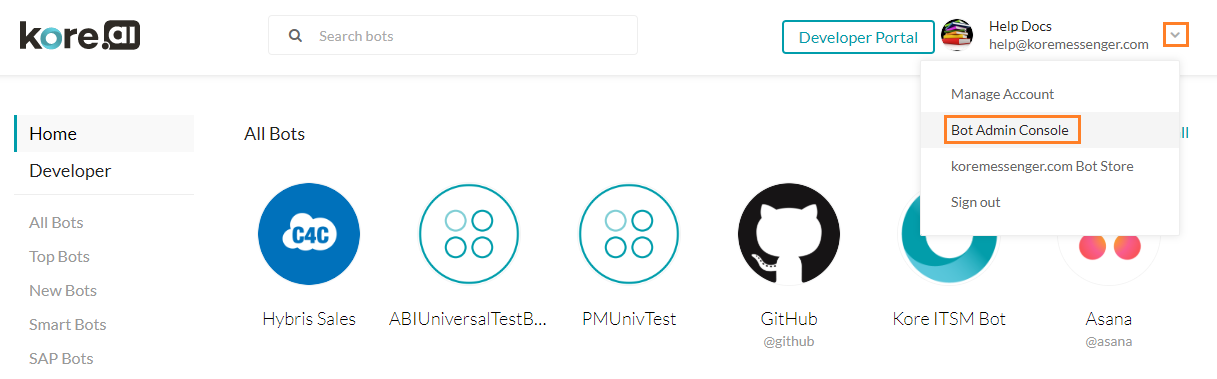
If you have already registered and set up your account, you can log on to the Bots Admin Console directly from the Kore.ai Bot Store. After you sign on to the Bot Store using your Kore.ai account, you can click Bots Admin Console on your user menu as shown in the following illustration.
You can also access the Bot Admin Console from the Bot Builder using the Got To Admin Console option.
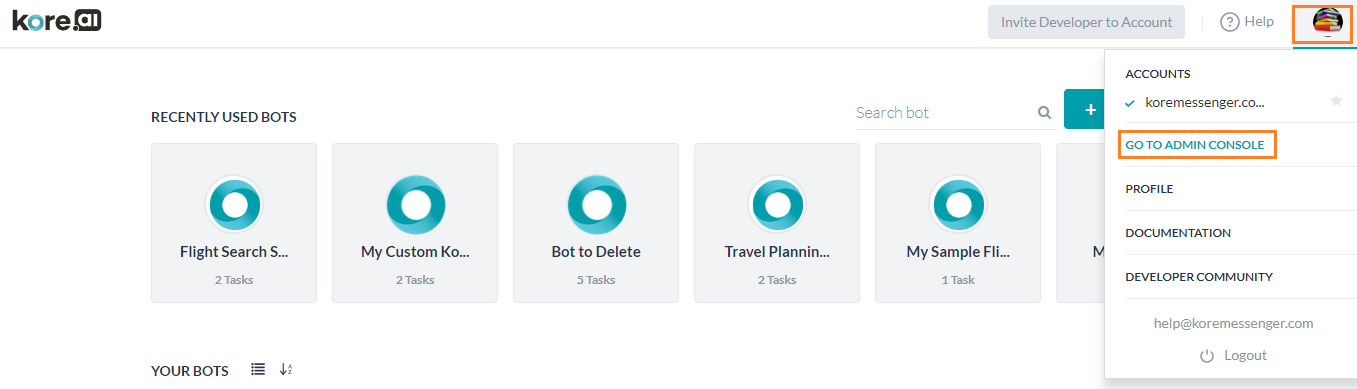
NOTE: These options are available only for Bot account Admin.
In case you have access to multiple accounts, the same will be listed for selection. You can set one as the default account.
Kore.ai applies an added level of security and as such the Bot admin session times out after 15 mins of idle time. In such scenarios, you will be taken to your account bot admin console and asked to sign-in again.
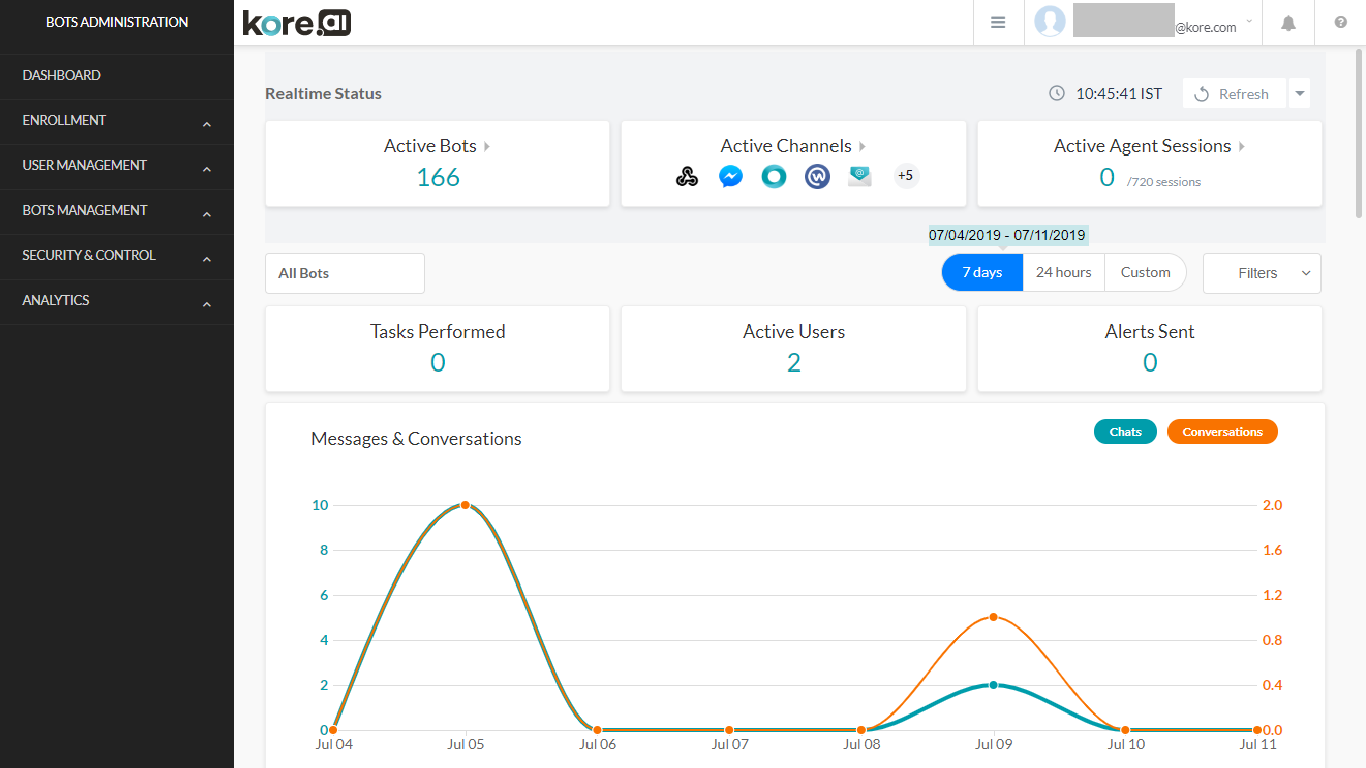
As a Bots Admin, you can enroll users, manage admin and custom roles, define security settings, and manage bots in your company. The following illustration is an example of the Bots Admin Console with the Dashboard page displayed. Refer here for more on Dashboard.
What Should I Do First?
When you first start using the Kore.ai Bots platform, using the Bots Admin Console, you should start inviting and adding users to join the Kore.ai Bots account for your company.
You can also control access to individual Bots in your enterprise account. For managing Bot access, see here.
If your enterprise has varied departments, with each having individual and separate Bot requirements, it is advisable to seggregate the Bot development into Groups. You can create groups of users and assign Bots to the groups as needed. For managing groups, see here.
Let us look at inviting and adding users to join your enterprise account. For this scenario, we will assume an example user, that Bob at bob@koremessenger.com has never signed up for Kore.ai Bots platform and is a company employee that you want to manage. To invite and allow Bob to use Bots, you’ll need to follow this process:
- Invite Bob to join Kore.ai by sending him an invite to join Kore.ai.
- Bob enrolls in Kore.ai using the link you sent in the invite. Using this link, Bob signs up and provides a password and other user info for his account.
- Once the sign-up process is complete, you can assign him to one or more bots.
- You can also assign various roles to the user.
How Do I Do It?
The following sections describe how to achieve the above-mentioned steps from the Bots Admin Console.
Step 1 – Inviting a New User
Let’s invite Bob to join Kore.ai.
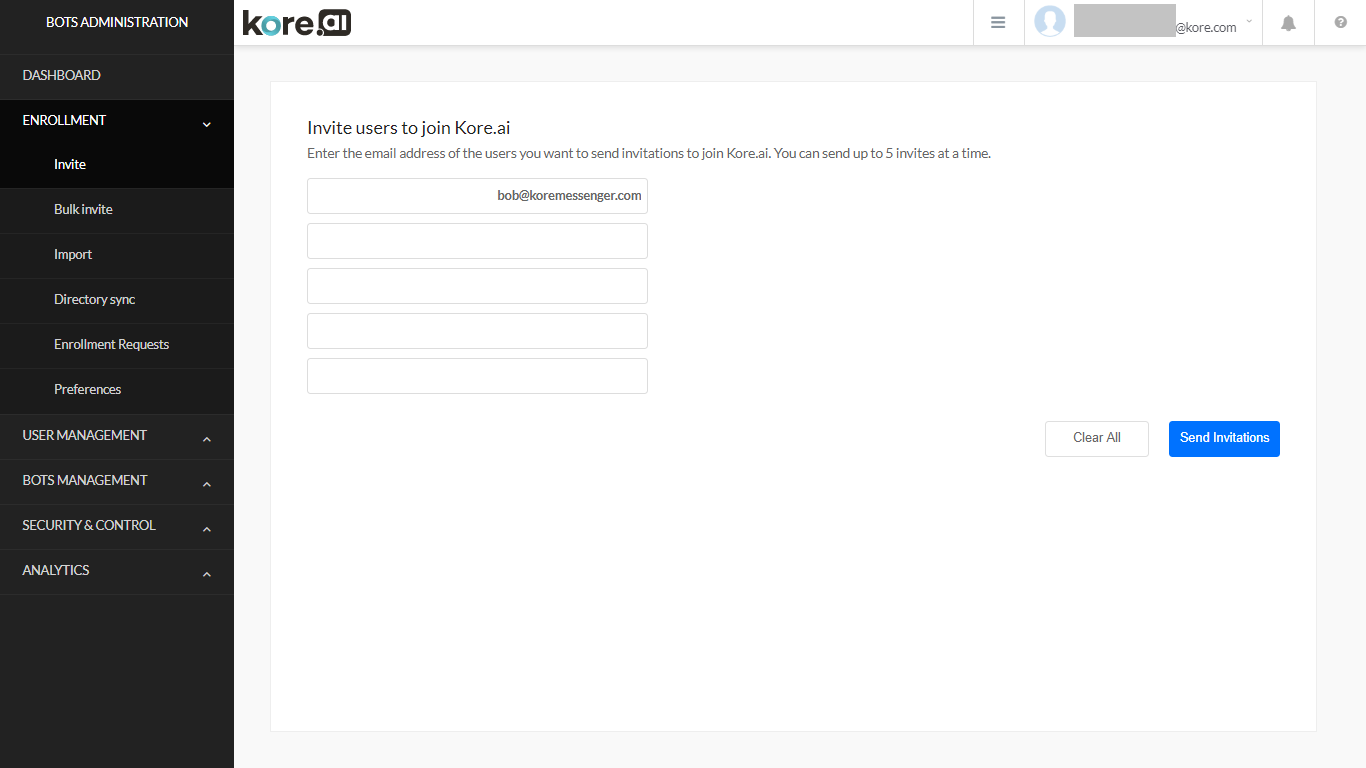
- On the left navigation menu, click to expand the Enrollment module, and then click Invite. The Invite users to join Kore.ai page is displayed.
- Enter the email address of the user, in this case bob@koremessenger.com. You can send invitations to five users at a given time.
- Click Send Invitations.
An email is sent to bob@koremessenger.com with a link to sign up for Kore.ai. Bob clicks the link, signs up for Kore.ai, and becomes a user in your Kore.ai bots platform account and is ready to be assigned bots.
Step 2 – Assigning a Custom Bot
As an Admin, you can assign users to custom Bots. Before you can assign a Bot to a user, the Bot should have been published to the enterprise.
For this example scenario, we assume that Bots have been published to your account.
- Since this Bot was deployed for Enterprise use, it is displayed on the Enterprise Bots page, as shown in the following image.
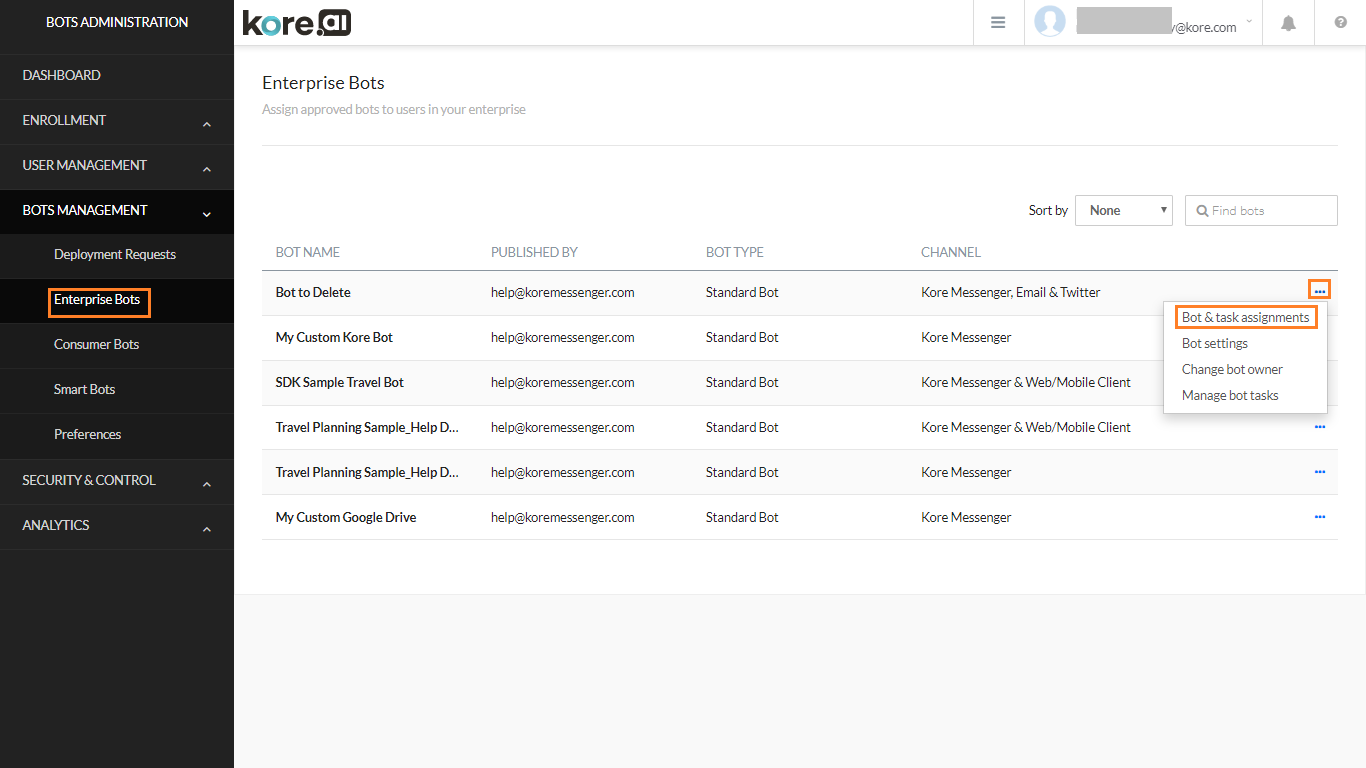
- In the Bot & task assignments dialog, select Assign Bot’s tasks and then choose Assign individual users, select Bob from the list of users (you will see Bob’s name only after he has accepted the invitation and joined Kore.ai) and then click Done.
- To save and apply the changes, in the Bot & task assignments dialog, click Apply.
- In the Bot Assignment successful dialog, click OK.

Step 3 – Assigning a Role
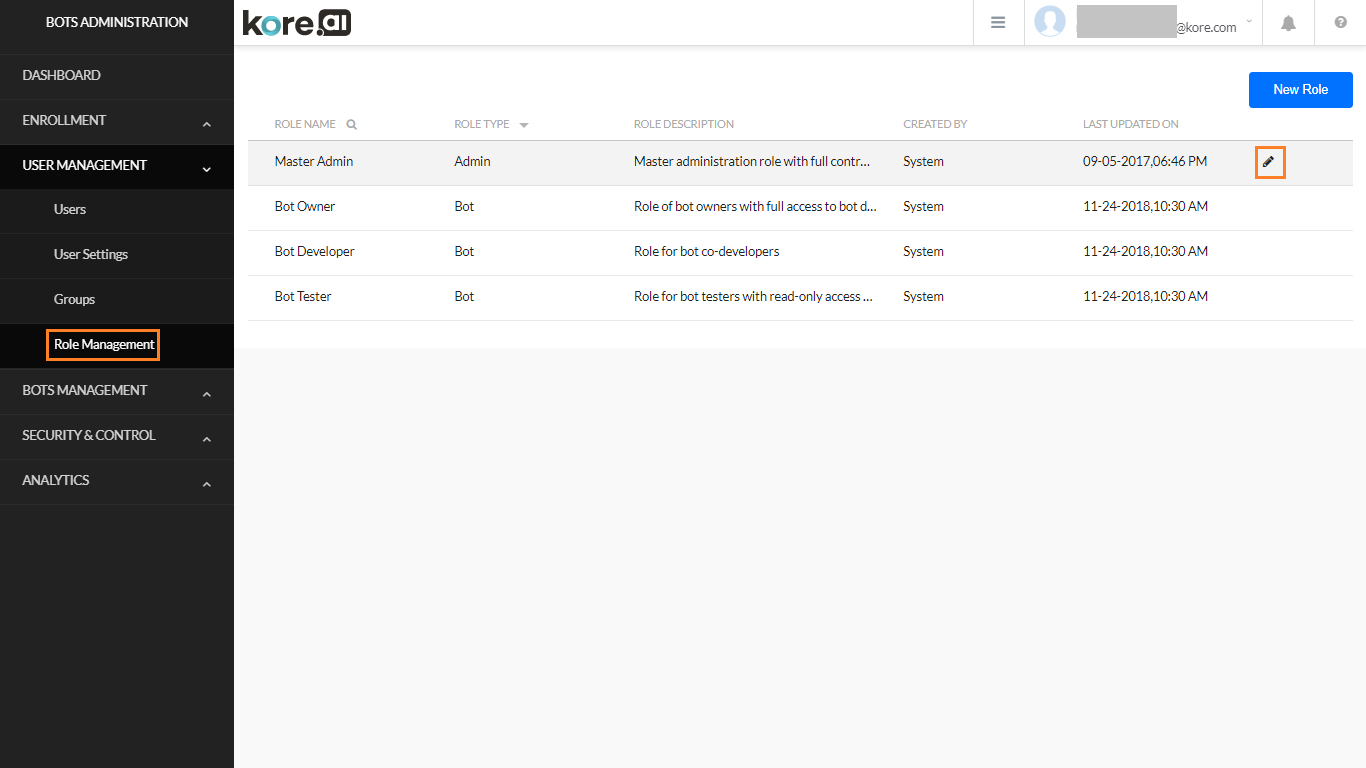
You can assign Roles to the user. By default the roles of Master Admin, Bot Owner, Bot Developer and Bot Tester are created by the platform. You can create your own custom roles, too (refer here for more).
To assign a role to a user follow these steps:
- From User Management, select Role Management.
- Hover over the role that you want to assign to the user and click the edit icon.
- From the Manage Role dialog, under Assignments tab click Assign Role button.
- Type and select the User Name you want to add (Bob in this case).
Note: The role of Bot Owner is assigned at the time of Bot creation and can be changed either from the Bots Management module or from the Bot Builder by the Bot Owner not from Role Management.