Adding the Cisco Tropo channel to your Kore.ai Bot is a 3-step process to allow end-users for your bot to interact using their Tropo accounts. To add the Cisco Tropo channel to your bot, you will need to:
- Create a Tropo App – Create and configure a new app in Tropo, and then copy the Tropo app data into Kore.ai Bot Builder.
- Access using API Key – Add Web API Details in Tropo, and then copy generated API keys from Tropo into the Bot Builder Cisco Tropo channel Access API Key tab.
- Enable the Channel – In Bot Builder, save the channel settings.
When you add the Cisco Tropo channel to your bot, end-users for your bot can interact with your bot using the Tropo client.
To add the Cisco Tropo channel to a bot
To complete this procedure, you must already have a Tropo account and be a member of a Tropo team.
- In Bot Builder, in the Bots section, click the Bot that you want to add the Cisco Tropo channel to.
- On the Channels tab, click the Expand
 icon for the Cisco Tropo section. The Cisco Tropo Channel page is displayed.
 - In a new browser tab, sign in to your Tropo account and then go to https://www.tropo.com/login/.
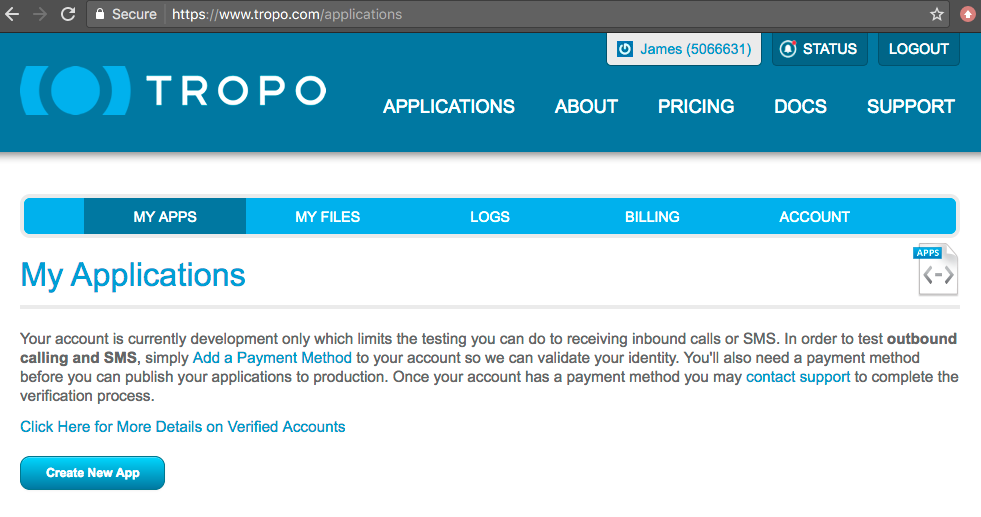
- On the My Apps page, click Create New App. as shown in the following illustration.

- In Bot Builder, on the Create your new app page, in the Basic information section, enter a name for your app, for example, My Kore.ai App.
- In the Type of Application section, select Web (HTTP) API, and then copy the Bot Builder Cisco Tropo Channel page Callback URL on the Access API Key tab into the Web (HTTP) API field in Tropo.
- In the Phone number section in Tropo, choose a country in the first field, select Standard:Voice and SMS in the next field, and then optionally change the phone number location in the third field.
- Click Create App. The < Your App Name > page is displayed.
- Copy the Number in the Numbers section in Tropo, for example, 307-555-1212, to the Phone Number field in Bot Builder on the Create Tropo App tab, and then select the country code.
- From the API Keys section in Tropo, copy the messaging key to the API Key field in Bot Builder, and then click Next. The Enable Channel tab is displayed.
- Click Save.
The Successfully added Cisco Tropo channel message is displayed at the top of the Bot Builder Home page. In Tropo, it is optional to submit your app to the Tropo App Directory.
Editing the Cisco Tropo Channel
To edit the Cisco Tropo channel, hover your mouse over the channel to modify, and then click the Settings ![]() icon displayed to show the command menu displayed in the following illustration.
icon displayed to show the command menu displayed in the following illustration.

Select one of the following commands to modify the channel:
- Edit – Click to open the Cisco Tropo Channel setup page.
- Disable/Enable – Click Disable to temporarily disable use of the Cisco Tropo channel for your Bot. When the channel is disabled, click Enable to enable use of the Cisco Tropo channel.
- Delete – Click Delete, and then click OK in the Delete Confirmation dialog to permanently delete the Bot channel configuration.
Warning: This operation is permanent, and cannot be undone.
