After creating an Entity, Confirmation, or Message node in the Dialog Builder, Kore.ai lets you do the following:
- Modify the default message or user prompt displayed to the end-user
- Add new prompts or messages
- Add channel-specific prompts or messages.
Prompt Types
Dialog Tasks support two types of user prompts:
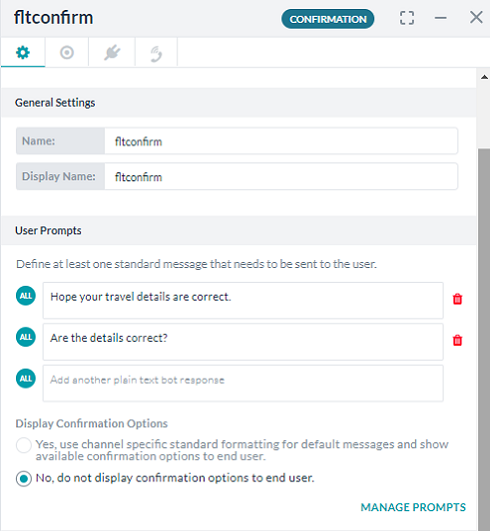
- Standard: The prompt defined when adding a node in Dialog Builder is the standard, or default prompt. When multiple standard prompts are defined for a node, the Platform chooses a random one to display to the end user.
- Channel-Specific: Optionally define user prompts for specific channels such as email, SMS, Twitter, and more. Different widgets can be used based on channels, such as a slider for numbers, date and time picker, and range selectors.
Prompt Editor
The prompt editor uses three tabs to offer the following features:
- Simple: Basic editor controls and HTML to define and format the user prompt. Enter text, and then format it using buttons for bold, italics, header styles, hyperlinks, ordered and unordered lists, and inserting lines.
- JavaScript: Advanced JavaScript editor to define, format, and render the user prompt.
- Preview: View a sample of the rendered output message, with markup, as displayed to the end-user.
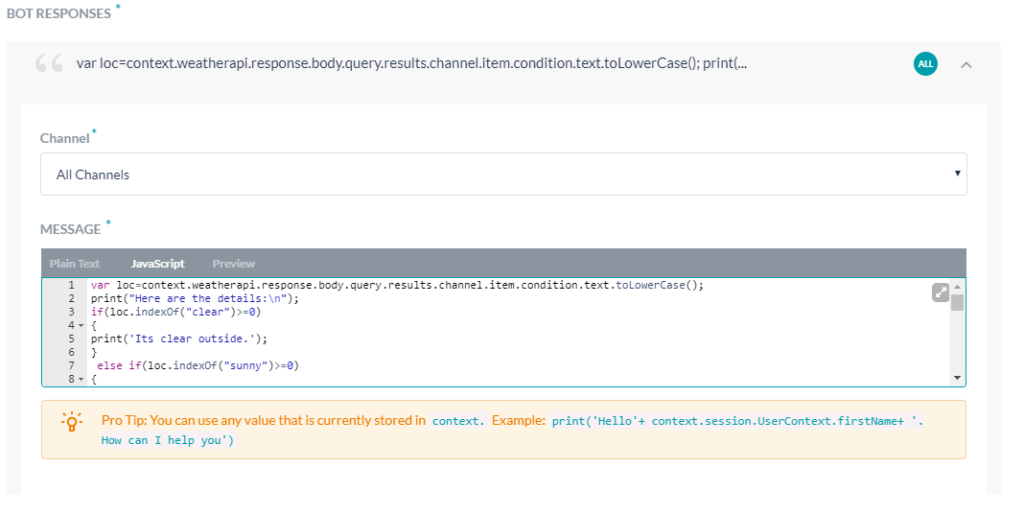
Below is the JavaScript message from the Book Flights bot that presents the response from a weather API to the users in a custom format:

Configuring the User Prompt
You can add or edit the prompts or bot messages from the Component Properties pane of an Entity, Confirmation, or Message node.
In case of Entity and Confirmation nodes, you refer to Prompts, whereas for the Message node, they are referred to as Responses.
- On the Dialog task builder, click the node for which you want to configure the prompts or responses.
- From the Components Property tab, under the User Prompts (or Bot Responses) section, click Manage Prompts (or Manage Responses).
Note: If you want to make text edits to the default sample message, modify the message directly in the text box and press enter, without clicking Manage Prompts (or Manage Responses).

- Do one the following:
- To edit the default sample message by adding context object variables or javascript code, click the sample message. The Message editor opens.
- To add a new prompt message, click Add Prompt Message/Manage Prompts. The Message editor opens.
- In the Channel drop-down list, All Channels is the default value. To create a channel-specific message, select the channel from the list.
- On the Message Editor, the Plain Text tab is the default selection. If you want to compose Javascript message, click the JavaScript tab.

Note: You can use stored context variables with {{variable brackets}}. Example: ‘Hello {{context.session.UserContext.firstName}}. How can I help you?’ - Compose the message and click Save.
To add any more bot responses, repeat from step 2b.
Plain Text Prompts
Use the Plain Text tab in the editor to compose the user prompts using basic editor controls and HTML. You can enter text, and then format the text using the formatting buttons for bold, italics, header styles, hyperlinks, ordered and unordered lists, and inserting a line.
The plain text tab supports the following markups:
| Markdown | Output |
|---|---|
| #h1 | Heading One |
| #h2 | Heading Two |
| #h3 | Heading Three |
| #h4 | Heading Four |
| #h5 | Heading Five |
| #h6 | Heading Six |
| “`Hello“` |  |
| *Bold* | Bold |
| ~Italic~ | Italic |
| [Link](http://www.google.com) | Link |
|  |  |
| Order 1. This is one 2. This is two |
Order
|
| Bullet * This is one * This is two |
Bullet
|
| Hi! This is>>indented |  |
| This is line ___ | This is line ___ |
Javascript Prompts or Responses
On the JavaScript tab of the Prompt editor, you can add custom code to handle the user prompt message using system and session variables. The following is a sample code for displaying the weather forecast for a location:
var loc=context.weatherapi.response.body.query.results.channel.item.condition.text.toLowerCase();
print("Here are the details:\n");
if(loc.indexOf("clear")>=0)
{
print('Its clear outside.');
}
 else if(loc.indexOf("sunny")>=0)
{
    print("Its sunny outside");
}
else if(loc.indexOf("cloud")>=0)
{
    print("Its very cloudy day");
}
else if (loc.indexOf('snow')>=0)
{
    print('Its snowy day');
}
else if(loc.indexOf('rain')>=0)
{
print('Yes, it looks like rainy day.');
}
else if(loc.indexOf('breeze')>=0)
{
    print("It's very breezy out there.");
}
else if(loc.indexOf('wind')>=0)
{
     print("It's very windy out there.");
}
else if(loc.indexOf('shower')>=0)
{
    print("It showering outside.");
}
print("Weather condition: " + context.weather +"\n");
print("Updated at: " + context.lastupdate+"\n");
print("Temperature: " + context.temp+"\n");
print("Wind: " + context.wind+"\n");
print("Pressure: " + context.pressure+"\n");
print("Visibility: " + context.humidity+"\n");
print("Humidity: " + context.visibility+"\n");
For more information, see Using Session and Context Variables in Tasks.
Previewing the Prompt or Response
On the Preview tab, you can view a sample of the rendered output message that is displayed to the end-user with markup. To render the output for the code involving context variables, define them use the Key and Value boxes in the tab to render a valid sample output for preview.

Channel-Specific User Prompts
By default, the Dialog Tasks configures the standard user prompts for all channels. However, you can define a specific response for one or more channels to display to the end-user in that channel instead of the Default response.
To define a channel-specific response, select a channel, for example, Kore.ai, and then define the user prompt on the JavaScript tab as needed. Only one response can be defined for each channel.
Note: Use the following keys to return default values for:
response.message – Returns the default message as a string.
response.message.choices – Returns the options choice or confirmation message types as an array.
- Slack Channel Override Example
var message = {}; var attachments = []; var attachment = { 'text': "Exception occurred during API execution", 'color': '#FFCC00', 'attachment_type': 'default' }; attachments.push(attachment); message.attachments = attachments; print(JSON.stringify(message)); - FaceBook Channel Override Example
var message = { text: response.message }; var buttons = []; for (var i = 0; i < response.choices.length; i++) { var choiceItem = response.choices[i]; if (choiceItem.length > 20) { choiceItem = choiceItem.substring( 0, 18) + '..'; } var element = { content_type: 'text', title: choiceItem, payload: choiceItem }; buttons.push(element); } message.quick_replies = buttons; print(JSON.stringify(message)); - Email Channel Override Example
var message = {}; var text = response.message + ' <br> '; for (var i = 0; i < response.choices.length; i++) { text = text.concat( '<u> + response.choices[i] + ' < /u> <br>'); } message.text = text; print(JSON.stringify(message)); - SMS Channel Override Example
var message = {};
    var indexArray = ['a', 'b', 'c',
        'd', 'e',
        'f', 'g', 'h', 'i', 'j',
        'k', 'l', 'm', 'n', 'o',
        'p', 'q', 'r', 's', 't',
        'u', 'v', 'w', 'x', 'y',
        'z'
    ];
    var text = response.message + '\\n';
    for (var i = 0; i < response.choices
        .length; i++) {
        text = text.concat(indexArray[i] +
            ') ' + response.choices[
                i] + '\\n');
    }
    message.text = text;
    print(JSON.stringify(message));
