To add the WhatsApp Business Messaging channel to your bot, you will need to create an account on Infobip and Karix to collect a number and provide the webhook URL as generated by Kore.ai.
Note: Ghushup, Infobip, and Karix are messaging service providers that enable the channel by providing a single API for exchange of messages between the client and WhatsApp Business Messaging.
Adding the WhatsApp Channel using Infobip Application
NOTE: To complete this procedure, you must already have a Infobip account. This is one of the messaging provider for enabling WhatsApp Business Messaging.
To configure Infobip, follow these steps:
- Login to Infobip developer portal.
- In the left navigation, click the Channels and Numbers menu and select the WhatsApp channel.

- To configure a new number for Infobip and WhatsApp messaging integration, you can either scan the QR code or enter the number that you wish to associate.Note: The mobile number should have the country code preceded with a plus (+) sign to activate the Infobip and WhatsApp connection.

- Once the number is associated, select the Senders tab to view or edit the numbers for WhatsApp messaging.

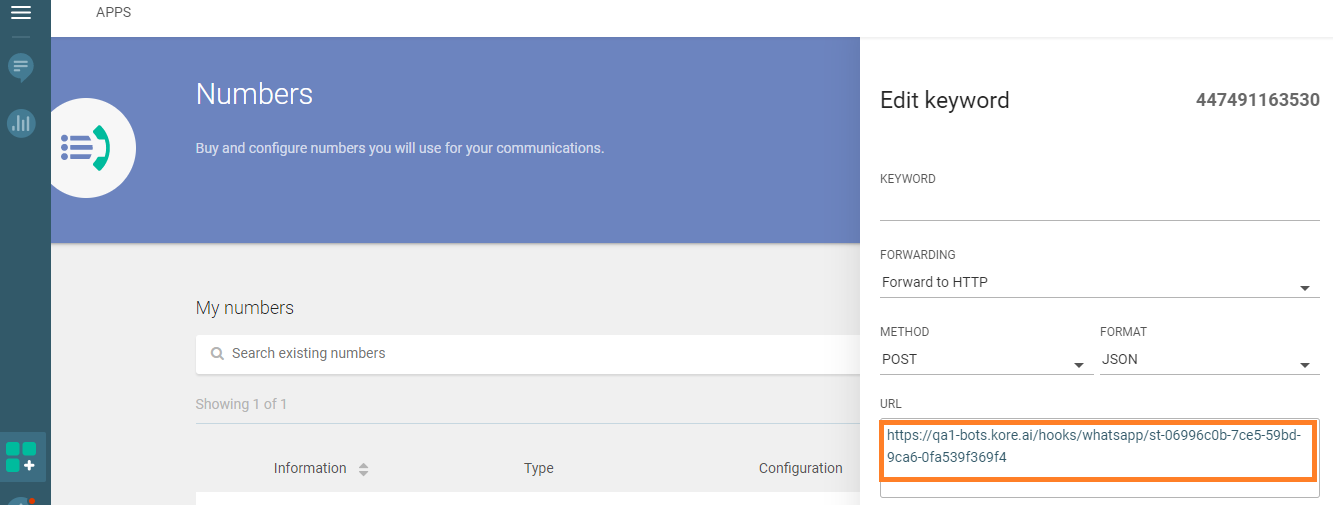
- Click the Ellipsis and select the Edit Configuration option.

- In the Configuration page, edit the URL for incoming messages and click Back.


Add Infobip’s Base URL:
- In the Bots section of the Bot Builder, select the virtual assistant for which you want to add the WhatsApp Business Message channel.
- On the Channels tab, click the WhatsApp Business Messaging icon. The WhatsApp Business Messaging Channel page gets displayed.
- Navigate to the Configurations tab and enter the following fields:
- Phone Number – use the Assigned Number from the Infobip account.
- Base URL: Get the Base URL here from Infobip to which Kore.ai should be sending the messages when the Whatsapp Business Messaging channel is enabled.


- Username and Password: Infobip’s API requires authentication and uses the basic authorization for sending and receiving messages over the API.
Make note of ‘Username’ and ‘Password’ of Infobip’s account holder and provide them in the configuration tab of this page. - Webhook URL: Copy the webhook URL provided in the configuration tab and update the same on Infobip developer portal for Infobip to send the received messages from the subscriber (Whatsapp Business Messaging).
- Enable Channel and complete the channel setup.

- Click Save to complete the WhatsApp channel setup for Infobip messaging integration

NOTE: If you are using the development sandbox on Infobip, once the channel is enabled and published, you will need to send messages in the format “<Keyword on infobip> <User input>” Ex: Kore Hi
Adding the WhatsApp Channel Using GupShup Application
NOTE: To complete this procedure, you must already have a GupShup account.
To create a GupShup application, follow these steps:
1. Log in to the GupShup portal and navigate to the Dashboard → Whatsapp section.
2. If this is your first app, click the ‘+’ (Create App) icon to create an app.
3. On the Create App screen, select the app type and enter the name. Click next to continue and follow the given steps to complete app creation.


Create a new WhatsApp Business Account
To create a new WABA (WhatsApp Business Account) when creating a Gubshup app, follow these steps:
1. Click Go Live to view the following popup screen.

2. Select the relevant option and submit the required details to Whatsapp to get the WABA created.
3. Once the account is created, you’ll get the WABA ID, Mobile number and Password.
4. Copy the Mobile number to the Phone Number field.
5. Copy the WABA ID to the userName or Id field.
6. Copy the Password to the Password field.
Please refer to this documentation link for more information.
Note: Webhook URL will be available on your channel configuration page. To configure the Kore.ai webhook URL in Gupshup, please reach out to the Gupshup customer support team that will configure the inbound messages to the bot on customer’s behalf.
Adding the WhatsApp Channel Using Karix Application
To integrate Karix to your WhatsApp Business Messaging channel and enable it for a bot, you’ll need to perform the following setup under the Configuration tab.
NOTE: To complete this procedure, you must already have a Karix account. This is one of the messaging provider for enabling WhatsApp Business Messaging.
Prerequisites
- Gather the following details from the the Karix support team.
- Vendor
- Account Key
- From
- Copy the Webhook URL from the Kore.ai Platform and share it with the Karix support team. The Karix support team will need to configure this URL on their platform for a successful handshake between Kore.ai and Karix.
Configuration Steps
On the WhatsApp Business Messaging platform, follow the below steps:
- Select Karix from the list for Messaging Partner.
- Enter the Phone Number to map to the WhatsApp Business Messaging channel.
- Provide the Account Key you’ve received from the Karix support team.
- Provide the Webhook URL shared with the Karix support team.
- Select “Yes” for Enable Channel.
- Click Save.

Editing the Channel
To edit the channel, hover your mouse over the channel and click to modify. You can make necessary updates to your channel configurations and save them. You may also disable or delete the channel information by clicking the Settings icon.
Select one of the following commands to modify the channel:
- Disable/Enable – Click Disable to temporarily disable use of the WhatsApp Business Messaging channel for your Bot. To enable the use of the WhatsApp Business Messaging channel, click Enable.
- Delete – Click Delete, and then click OK in the Delete Confirmation dialog to permanently delete the Bot channel configuration.