We have seen how an Alert task can be set up in Kore.ai virtual assistant platform here. In this section, we will see how to configure an API Request for a WebHook service.
For a task with the Connection Type specified as Webhook, you will need to define:
- Content Type – The type of data exchanged between Kore.ai and your web application.
Defining the Content Type
The Content Type describes the type of data exchanged between Kore.ai and your Bot website or application, and the key-value pairs expected in the task payload response. To define the Content Type for the API Request, expand the Content Type tab and select one of these options:

- JSON – JavaScript Object Notation is an open standard format using human-readable text to transmit data objects as attribute-value pairs. You can use JSON to transmit data between the Kore.ai servers and your Bot web application.
- RSS – Rich Site Summary, or Really Simple Syndication, is a family of standardized formats used to publish frequently updated information such as blog entries, news headlines, audio, and video.
- XML – Extensible Markup Language is a markup language that defines a set of rules for encoding documents in a format that is both human-readable and machine-readable. Oftentimes, web services use XML schemas to process the XML data.
- URL Encoded JSON – URLs using JSON encoding for reserved characters.
- CSV – Comma-separated value lists.
- Text – Text-based key-value pairs.
- Twitter Encoded JSON – URLs for Twitter using JSON encoding for reserved characters.
- Multipart/Form-data – An encoding type that allows files to be sent through an HTTP POST request method if you want to allow a user to upload a file from a form.
- Multipart/Related – Used when the same information is presented in different body parts in different forms. The body parts are ordered by increasing complexity.
- Oracle ADF – For Oracle Application Development Framework.
- Response Sample – Define key-value pairs that you expect to receive in the Alert task payload. The keys that you provide are available as drop-down choices for handling the data to display to the end-user.
Adding Response Sample Data
In the Response Sample section, you can enter or paste examples of the key-value pairs that you expect to receive in the task payload. When you define the response sample, the keys specified in the Response Sample section are available as drop-down choices for handling the output data.Add a Sample Response
- On the API Request tab, expand the Sample Response section.
- Enter your Response Sample that contains the key-value pairs from your JSON response payload. Do one of the following:
- To format the view of the response as a JSON structure with indentation as shown in the following illustration, click the Formatted
 icon.
icon.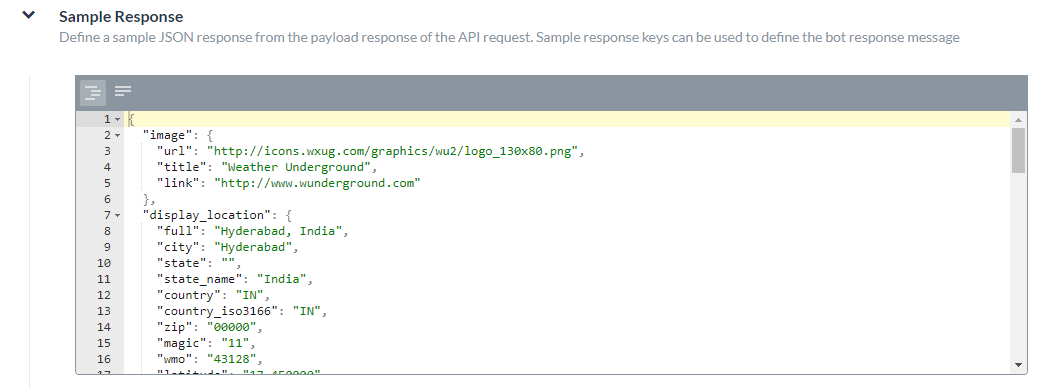
- To format the view of the response in serialized compact form as shown in the following illustration, click the Unformatted
 icon.
icon.
- To format the view of the response as a JSON structure with indentation as shown in the following illustration, click the Formatted
- Alert Tasks Path – Optionally define a specific path for data from the API.
Defining the Alert Tasks Path
The last section, Alert Tasks Path, is an optional field that you can specify if the Response Sample section contains a hierarchical tree structure of data and you only want a specific hierarchical level submitted for the task request object.
To define the Alert Tasks Path for an alert task using a webhook, on the API Request tab, click the Expand icon in the Alert Tasks Path section as shown in the following illustration.
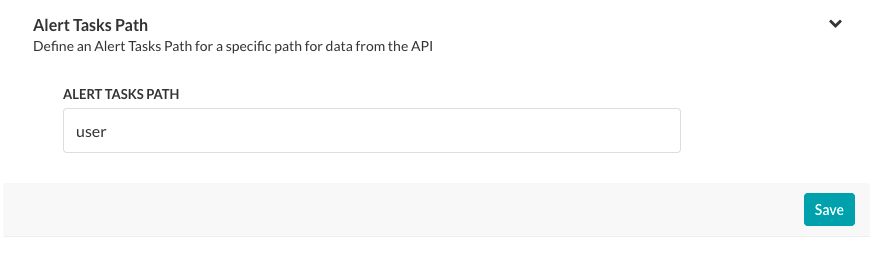
For example, in the following Response Sample, you may only want to expose the user data in the alert task response by defining the user in the Alert Tasks Path field.{ "user":{ "timeZone":"Asia/Kolkata", "active":"true", "displayName":"John Doe", "avatarUrls":{ "32x32":"https://koreteam.atlassian.net/secure/useravatar?size=medium&ownerId=john.doe&avatarId=11801", "16x16":"https://koreteam.atlassian.net/secure/useravatar?size=xsmall&ownerId=john.doe&avatarId=11801", "24x24":"https://koreteam.atlassian.net/secure/useravatar?size=small&ownerId=john.doe&avatarId=11801", "48x48":"https://koreteam.atlassian.net/secure/useravatar?ownerId=john.doe&avatarId=11801" }, "emailAddress":"john.doe@kore.com", "key":"john.doe", "name":"john.doe", "self":"https://koreteam.atlassian.net/rest/api/2/user?username=john.doe" }, "webhookEvent":"jira:issue_updated", "timestamp":"1438431826045", "user_key":"john.doe", "user_id":"john.doe" }After you enter the Alert Tasks Path field, click Save.