You can connect Kore.ai bots to your Mattermost account using either:
(NOTE: Before you begin, ensure that you have access to the administrative functions of your Mattermost account)
WebHook based Integration
Step 1: Setup Outgoing Webhook
- Login to your Mattermost account
- From the ‘Main Menu’ (hamburger menu from the left panel) choose ‘Integrations’.
- Select the ‘Outgoing Webhooks’ menu and click ‘Add Outgoing Webhook’.
- Provide required information as per the below image.
- Enter your preferred values for Title, Description and Bot Name fields.
- Choose ‘application/json’ as Content Type.
- If you would like your bot to be available only for a specific channel, then choose the required channel from the Channel dropdown.
- Provide your Kore.ai bot’s Bot Name in the Trigger Words field.
- Copy the Callback URL for the Kore bot (located in the ‘Configurations’ tab of Mattermost Channel enablement) and provide it in the ‘Callback URLs’ field.
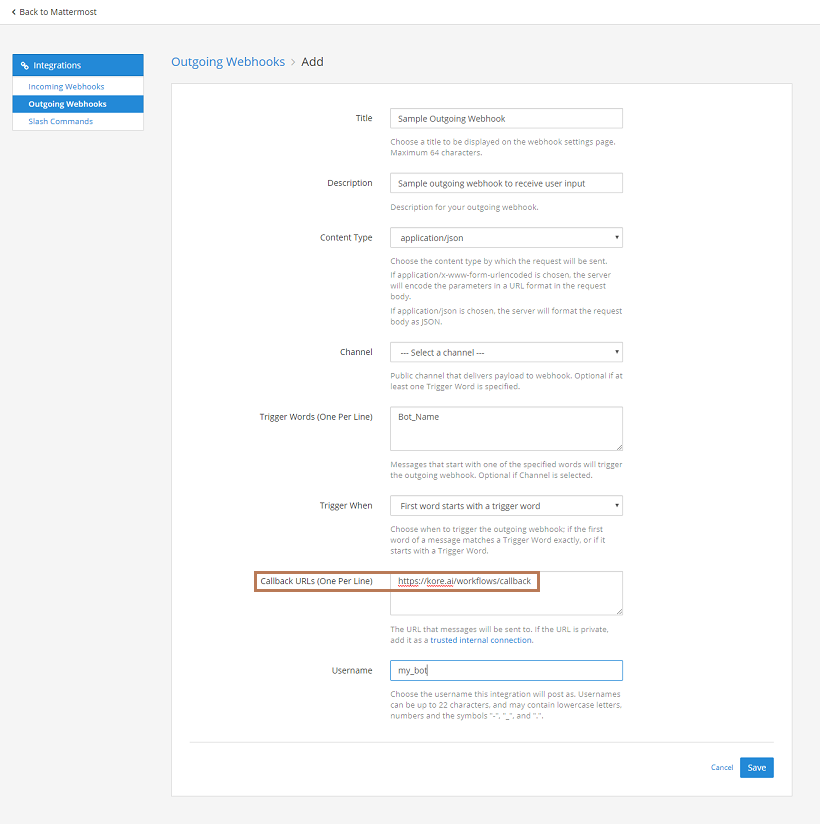
- Click on ‘Save’ to complete the Outgoing Webhook setup.
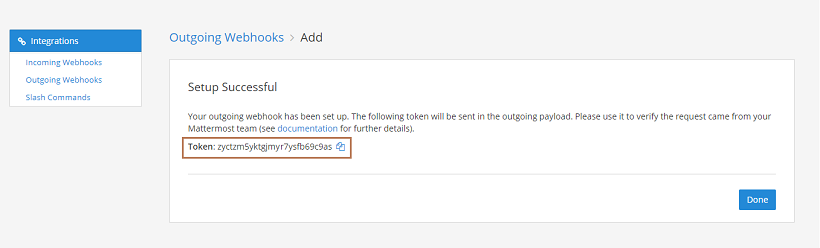
- You would be redirected to the confirmation page with the Token displayed.
- Copy this Token and provide it in the ‘Outgoing Webhook Token’ field present in the Kore Bot Channel Configurations section.
Step 2: Setup Incoming Webhook
- Select ‘Incoming Webhooks’ menu and click ‘Add Incoming Webhook’.
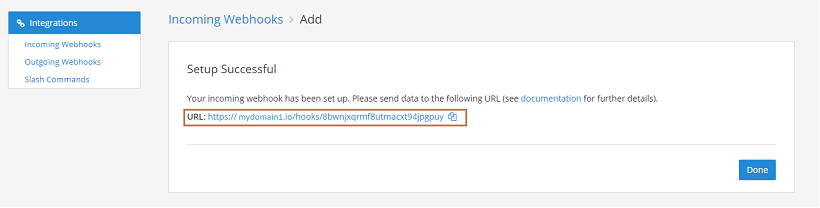
- Provide required information as per the below image.
- Enter your preferred values for Title, Description and Username fields.
- Choose a default channel. Kore.ai bots always respond back in the channel from which the user input is received.
- Do not select the ‘Lock to this channel’ option.
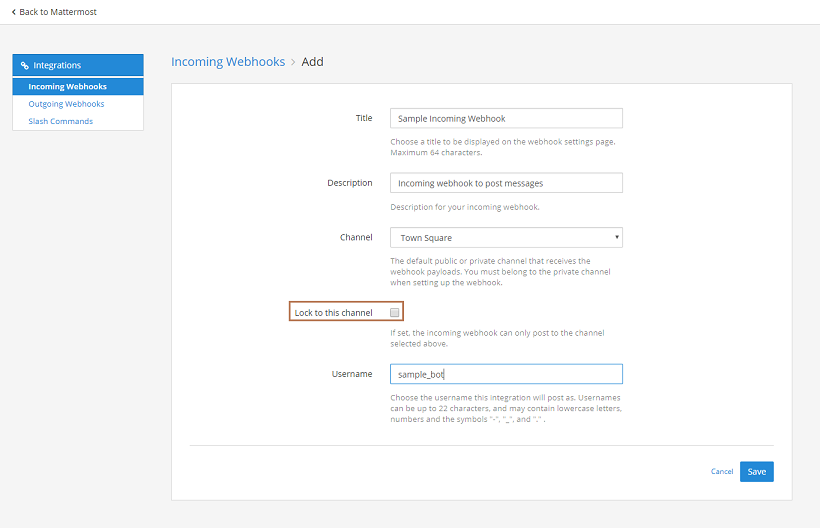
- Click on ‘Save’ to complete the Incoming Webhook setup.
- You would be redirected to the confirmation page along with the URL associated with this newly created incoming webhook.
- Copy this URL and provide it in the ‘Incoming Webhook URL’ field in the Kore Bot Channel Configurations section.
WebSocket based Integration
Step 1: Enable Personal Access Tokens
To enable WebSocket connection, you would need to create a Mattermost account to be provisioned as a bot.
- First, enable usage of Personal Access Tokens to allow your Mattermost users to generate personal access tokens.
- Personal access tokens are used to authenticate and provide full access to an account.
- Login to Mattermost from an account which has access to ‘System Console’.
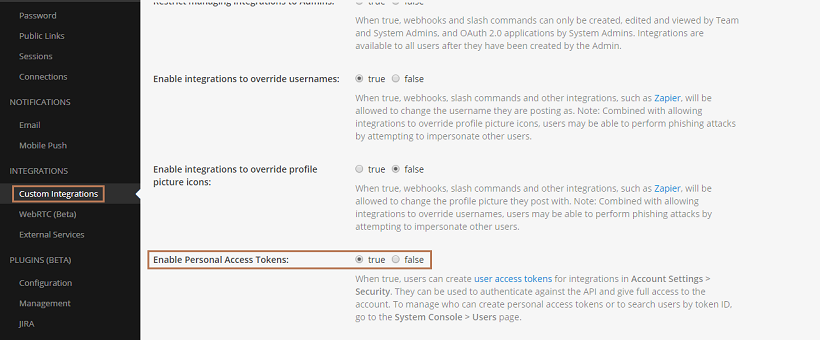
- From ‘System Console’, navigate to ‘Integrations – Custom Integrations’ menu.
- Locate the ‘Enable Personal Access Tokens’ setting, set it to ‘true’ and save.
Step 2: Create an Account to be Provisioned as a Bot
- Create a new account you intend to be presented as a bot for your Mattermost users.
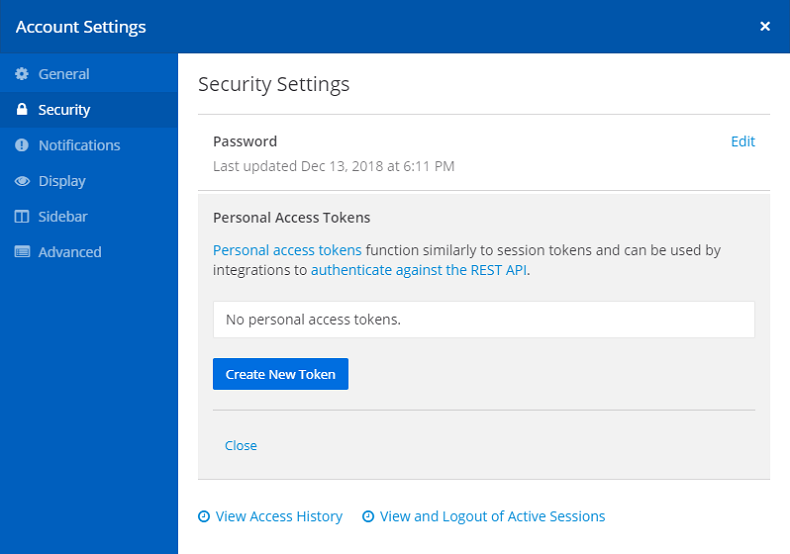
- Login to this new account and navigate to ‘Account Settings – Security’ section.
- Click on ‘Personal Access Tokens’ section and click ‘Create New Token’.
- Provide a description for your token and ‘Save’.
- Post-confirmation, you will be presented with the access token.
- Make a note of the ‘Access Token’ and provide it in the Kore Bot Channel Configurations section.