
To add the Facebook Messenger channel to your bot, you will need a developer Facebook account to configure the connection between Facebook Messenger and Kore.ai. Adding the Facebook Messenger channel to your Kore.ai Bot allows end-users for your bot to interact with your Bot using their Facebook accounts. To add Facebook Messenger as a channel, you need to:
- Create App– Create an App on the Facebook developer portal.
- Get Page Details- Associate your facebook page with the app and generate the Page Access Token. You need to create a facebook page if you do not have one already.
- Setup Webhook- To enable Facebook Messenger as a channel for your bot, you will need to set up a webhook integration between your app and the bots platform.
- Submit for Approval- Submit the facebook app for approval to enable the Facebook Messenger channel for your bot.
To add the Email channel
- In the Bots section of the Bot Builder, click the Bot that you want to add the Facebook Messenger channel to.
- On the Channels tab, click the Facebook Messenger icon. The Facebook Messenger page gets displayed.
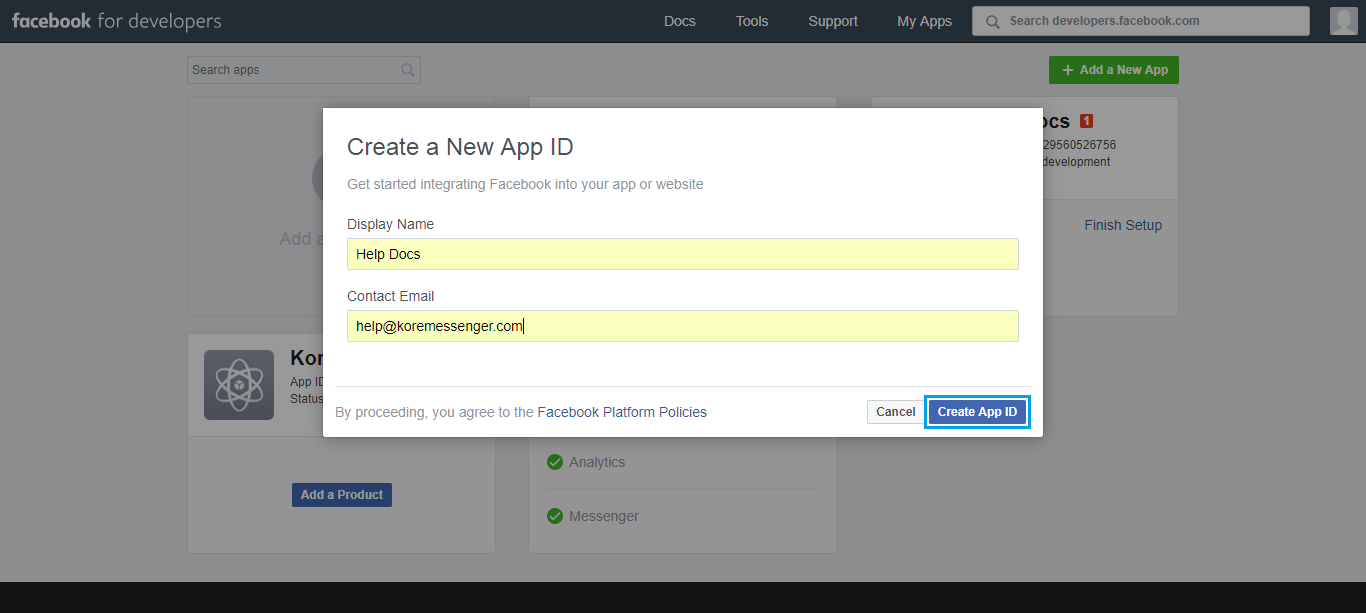
- In a new browser, log in to Facebook developer portal and choose Add a New App option from My Apps section. Enter all the relevant details for your App and click on Create App ID.
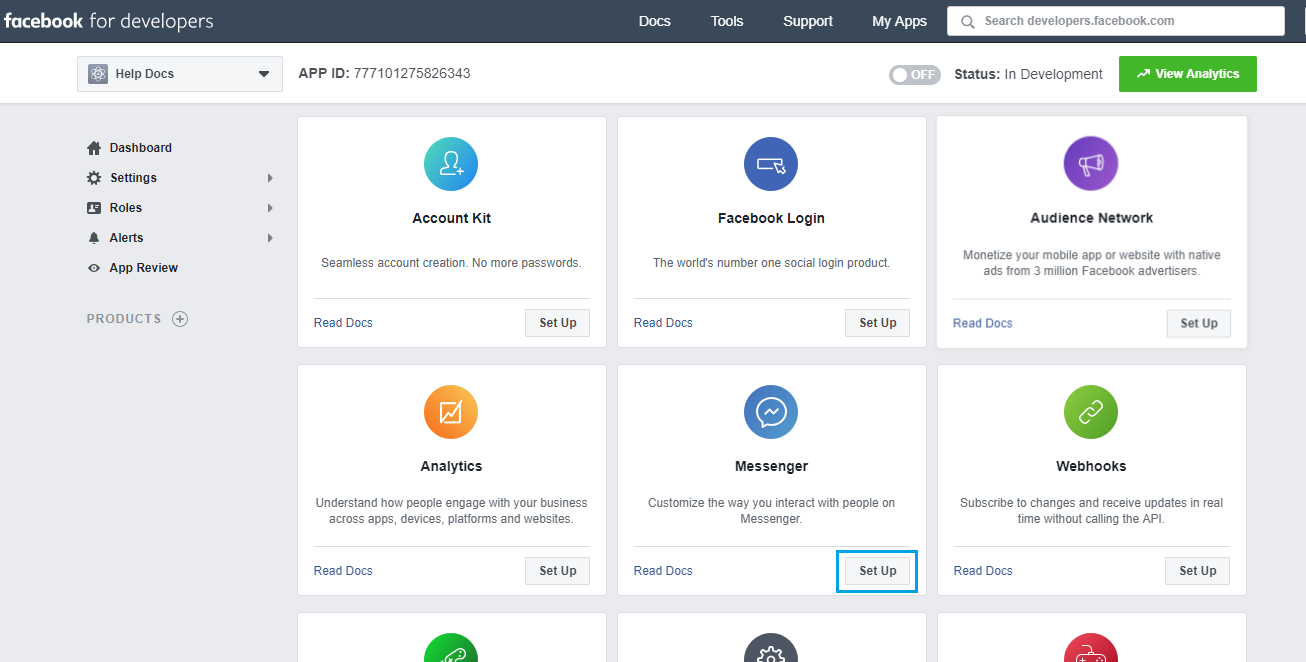
- Your App will be created and you will be redirected to the App setup page. Choose Messenger and click Set Up to continue. You will be redirected to the Settings page.
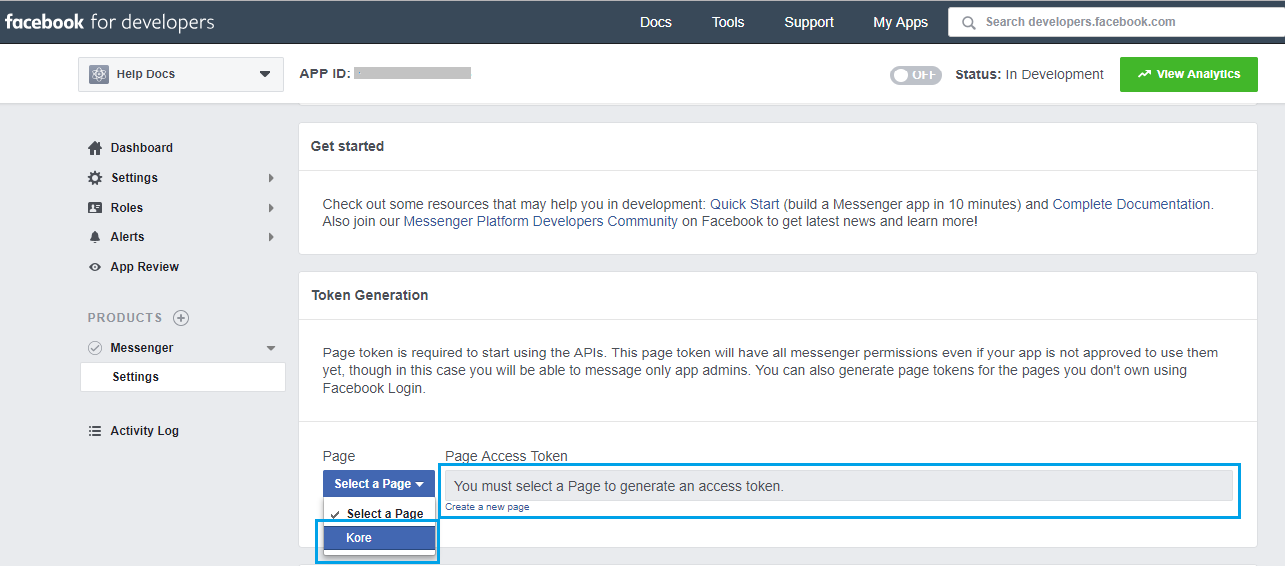
- You need to associate a page with the app and generate the Page Access Token from the Token Generation section. If you do not have a page, you can create facebook page here. Copy the Page Access Token and enter it in the Configurations tab of the Facebook Messenger channel page.
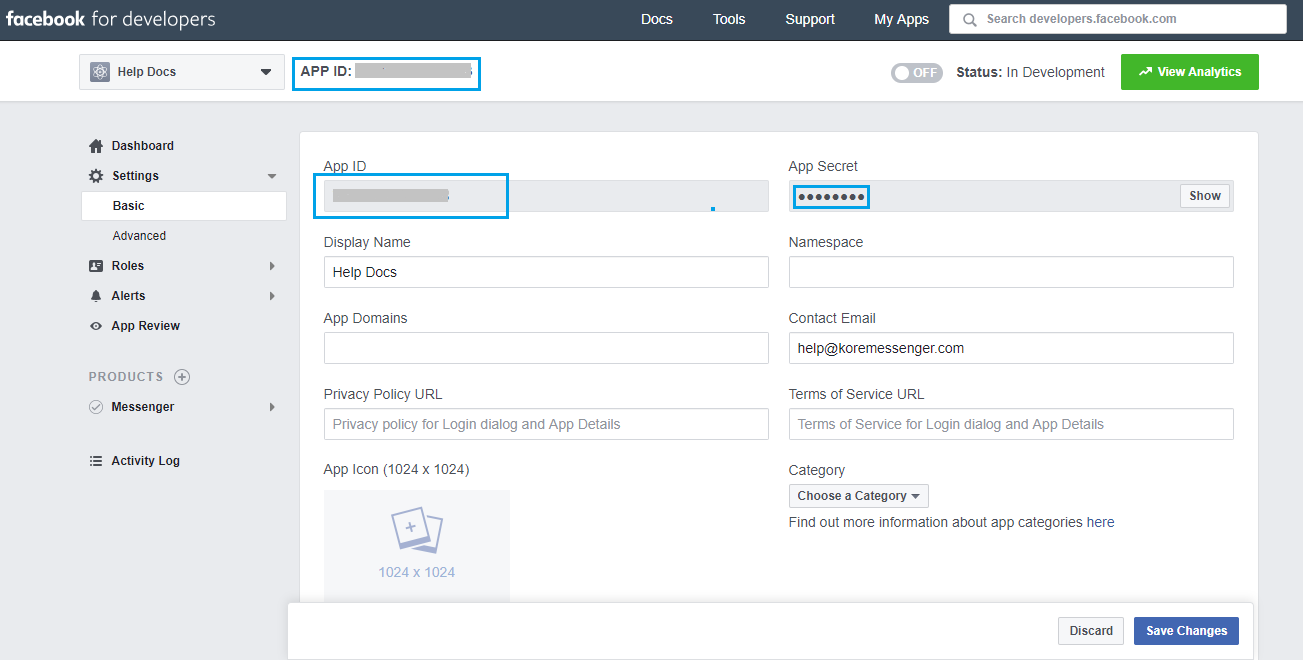
Locate the App ID of this page present on top of the page and enter it in the Configurations tab.
- Navigate to the main settings menu then select Basic settings, capture the App Secret and enter it in the Configurations tab of the channel page.
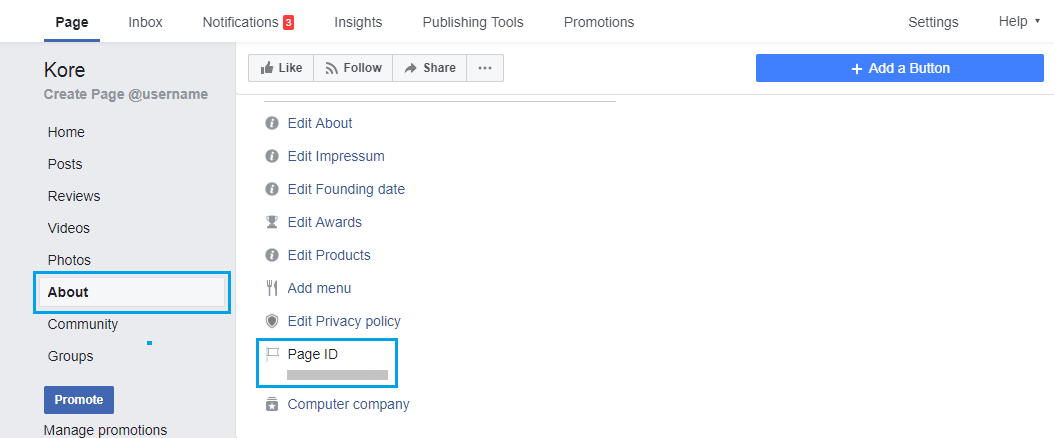
- From your Facebook account, navigate to the Facebook page you have selected above. From About menu, copy Page ID and enter it in the Configurations tab of Facebook Messenger channel page.
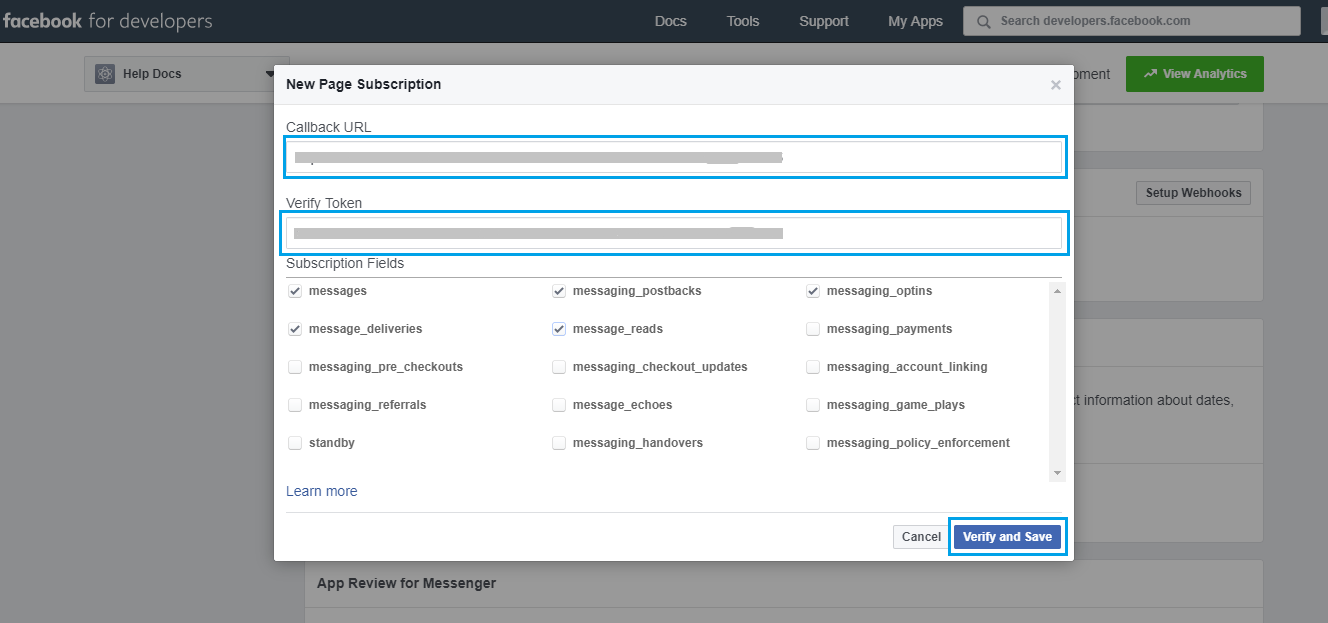
- Navigate to Webhooks section under Settings and click on the Setup Webhooks to configure the Webhook between your app and the bots platform. Use the Callback URL and Verify Token provided in the Configurations tab of the channel page and enter them in appropriate fields in your Facebook apps configuration. Select messages, messaging_postbacks, messaging_optins, message_deliveries, message_reads under Subscription Fields. Click on Verify and Save.
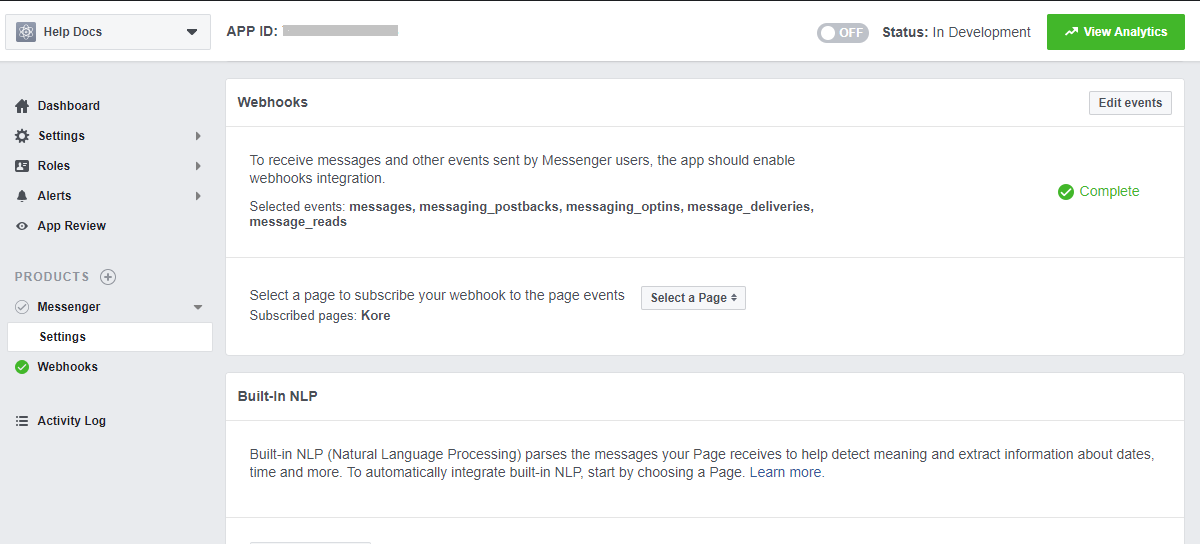
- Under Webhooks section, select the page you have used to generate the page token and click on Subscribe.
- Submit the facebook app for approval. Once approved, you can enable the Facebook Messenger channel for your bot. For more info on how to submit the app visit here.
Editing the Facebook Messenger Channel
To edit the Facebook Messenger channel, hover your mouse over the channel and click to modify. You can make necessary updates to your channel configurations and save them. You may also disable or delete the channel information by clicking the Settings icon.
Select one of the following commands to modify the channel:
- Disable/Enable – Click Disable to temporarily disable use of the Facebook Messenger channel for your Bot.To enable use of the Facebook Messenger channel, Click Enable.
- Delete – Click Delete, and then click OK in the Delete Confirmation dialog to permanently delete the Bot channel configuration.
Warning: This action is permanent, and cannot be undone.