Chatbot Overview
Conversational Bots
Intents & Entities
Intelligent Bots
Kore.ai's Approach
Kore.ai Conversational Platform
Bot Concepts and Terminology
Natural Language Processing (NLP)
Bot Types
Bot Tasks
Starting with Kore.ai Platform
How to Access Bot Builder
Working with Kore.ai Bot Builder
Building your first Bot
Getting Started with Building Bots
Using the Dialog Builder Tool
Creating a Simple Bot
Release Notes
Latest Updates
Older Releases
Deprecations
Bot Builder
Creating a Bot
Design
Develop
Storyboard
Dialog Task
User Intent Node
Dialog Node
Entity Node
Supported Entity Types
Composite Entities
Supported Time Zones
Supported Colors
Supported Company Names
Form Node
Logic Node
Message Nodes
Confirmation Nodes
Service Node
Custom Authentication
2-way SSL for Service nodes
Script Node
Agent Transfer Node
WebHook Node
Grouping Nodes
Connections & Transitions
Managing Dialogs
Prompt Editor
Alert Tasks
Alert Tasks
Ignore Words and Field Memory
Digital Forms
Digital Views
Knowledge Graph
Terminology
Building
Generation
Importing and Exporting
Analysis
Knowledge Extraction
Small Talk
Action & Information Task
Action Tasks
Information Tasks
Establishing Flows
Natural Language
Overview
Machine Learning
ML Model
Fundamental Meaning
NLP Settings and Guidelines
Knowledge Graph Training
Traits
Ranking and Resolver
NLP Detection
Bot Intelligence
Overview
Context Management
Session and Context Variables
Context Object
Dialog Management
Sub-Intents
Amend Entity
Multi-Intent Detection
Sentiment Management
Tone Analysis
Sentiment Management
Default Conversations
Default Standard Responses
Channel Enablement
Test & Debug
Talk to Bot
Utterance Testing
Batch Testing
Record Conversations
Publishing your Bot
Analyzing your Bot
Overview
Dashboard
Custom Dashboard
Conversation Flows
Bot Metrics
Advanced Topics
Bot Authorization
Language Management
Collaborative Development
IVR Integration
Data Table
Universal Bots
Defining
Creating
Training
Customizing
Enabling Languages
Smart Bots
Defining
Sample Bots
Github
Asana
Travel Planning
Flight Search
Event Based Bot Actions
koreUtil Libraries
Bot Settings
Bot Functions
General Settings
PII Settings
Customizing Error Messages
Bot Management
Bot Versioning
Using Bot Variables
API Guide
API Overview
API List
API Collection
SDKs
SDK Overview
SDK Security
SDK App Registration
Web SDK Tutorial
Message Formatting and Templates
Mobile SDK Push Notification
Widget SDK Tutorial
Widget SDK – Message Formatting and Templates
Web Socket Connect & RTM
Using the BotKit SDK
Installing
Configuring
Events
Functions
BotKit SDK Tutorial – Agent Transfer
BotKit SDK Tutorial – Flight Search Sample Bot
Using an External NLP Engine
Bot Administration
Bots Admin Console
Dashboard
User Management
Managing Users
Managing Groups
Managing Role
Bots Management
Enrollment
Inviting Users
Bulk Invites
Importing Users
Synchronizing Users from AD
Security & Compliance
Using Single Sign-On
Security Settings
Cloud Connector
Analytics
Billing
How Tos
Creating a Simple Bot
Creating a Banking Bot
Transfer Funds Task
Update Balance Task
Context Switching
Using Traits
Schedule a Smart Alert
Configure Digital Forms
Add Form Data into Data Tables
Configuring Digital Views
Add Data to Data Tables
Update Data in Data Tables
Custom Dashboard
Custom Tags to filter Bot Metrics
Patterns for Intents & Entities
Build Knowledge Graph
Global Variables
Content Variables
Using Bot Functions
Configure Agent Transfer
  1. Home
  2. Docs
  3. Bots
  4. Channel Enablement
  5. Adding the Cisco Tropo Channel

Adding the Cisco Tropo Channel

IMPORTANT: Tropo has announced to discontinue its services. Please proceed with the channel setup only if you have a live Tropo account. You may refer here to verify the status of your Tropo account.

Adding the Cisco Tropo channel to your Kore.ai Bot is a 3-step process to allow end-users for your bot to interact using their Tropo accounts. To add the Cisco Tropo channel to your bot, you will need to:

  1. Create a Tropo App – Create and configure a new app in Tropo, and then copy the Tropo app data into Kore.ai Bot Builder.
  2. Access using API Key – Add Web API Details in Tropo, and then copy generated API keys from Tropo into the Bot Builder Cisco Tropo channel Access API Key tab.
  3. Enable the Channel – In Bot Builder, save the channel settings.

When you add the Cisco Tropo channel to your bot, end-users for your bot can interact with your bot using the Tropo client.
To add the Cisco Tropo channel to a bot
To complete this procedure, you must already have a Tropo account and be a member of a Tropo team.

  1. In Bot Builder, in the Bots section, click the Bot that you want to add the Cisco Tropo channel to.
  2. On the Channels tab, click the Expand  icon for the Cisco Tropo section. The Cisco Tropo Channel page is displayed.
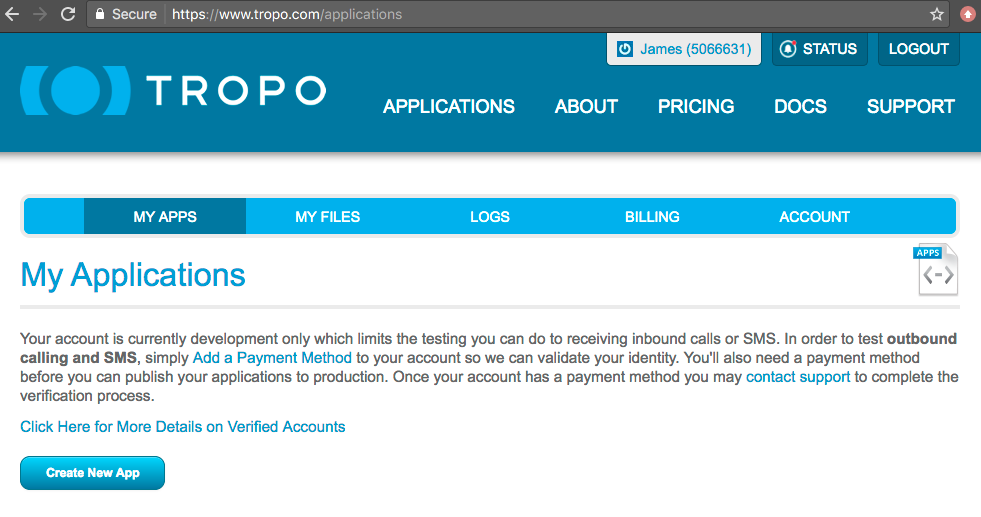
  3. In a new browser tab, sign in to your Tropo account and then go to https://www.tropo.com/login/.
  4. On the My Apps page, click Create New App. as shown in the following illustration.
    Cisco Tropo Channel - My Apps Page
  5. In Bot Builder, on the Create your new app page, in the Basic information section, enter a name for your app, for example, My Kore.ai App.
  6. In the Type of Application section, select Web (HTTP) API, and then copy the Bot Builder Cisco Tropo Channel page Callback URL on the Access API Key tab into the Web (HTTP) API field in Tropo.
  7. In the Phone number section in Tropo, choose a country in the first field, select Standard:Voice and SMS in the next field, and then optionally change the phone number location in the third field.
  8. Click Create App. The < Your App Name > page is displayed.
  9. Copy the Number in the Numbers section in Tropo, for example, 307-555-1212, to the Phone Number field in Bot Builder on the Create Tropo App tab, and then select the country code.
  10. From the API Keys section in Tropo, copy the messaging key to the API Key field in Bot Builder, and then click Next. The Enable Channel tab is displayed.
  11. Click Save.

The Successfully added Cisco Tropo channel message is displayed at the top of the Bot Builder Home page. In Tropo, it is optional to submit your app to the Tropo App Directory.

Editing the Cisco Tropo Channel

To edit the Cisco Tropo channel, hover your mouse over the channel to modify, and then click the Settings  icon displayed to show the command menu displayed in the following illustration.
Channels Tab - Cisco Tropo - Edit
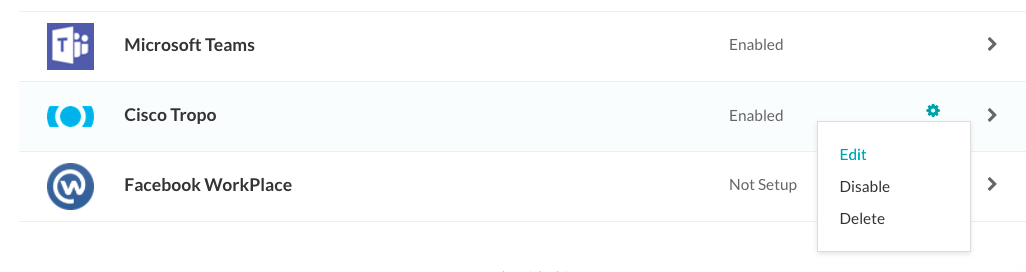
Select one of the following commands to modify the channel:

  • Edit – Click to open the Cisco Tropo Channel setup page.
  • Disable/Enable – Click Disable to temporarily disable use of the Cisco Tropo channel for your Bot. When the channel is disabled, click Enable to enable use of the Cisco Tropo channel.
  • Delete – Click Delete, and then click OK in the Delete Confirmation dialog to permanently delete the Bot channel configuration.

    Warning: This operation is permanent, and cannot be undone.

Menu