
In this How-To, we will explore a scenario in a Bot, say traveling Bot, where the user needs to be provided with weather updates daily for a preferred location. We will be using an Alert task to achieve the same. We will also see how auto subscription can be enabled on this Alert task, making it smart.
For details on what Alert task is and how it is implemented in the Kore.ai Bots platform, refer here.
Problem Statement
A registered user of a Bot needs to be sent a weather update in the form of an alert, on a pre-specified time of the day and/or at a specified interval of time.
In this document, we will show how an Alert Task can be used to cater to such situations and take appropriate action.
Pre-requisites
- Basic Bot building knowledge.
- A working Bot, we are using a Banking Bot.
- Access to a web service that gives a weather updates. We are using a REST service hosted at: http://api.openweathermap.org. If you want to use this service, you need register to their free alert service as we will be using the API key to access their APIs.
Implementation
Setting Alert Task
Alert tasks can be used to deliver timely, relevant, and personalized information from enterprise systems to customers and employees by polling the relevant service in real-time or according to a user-defined schedule.
Steps:
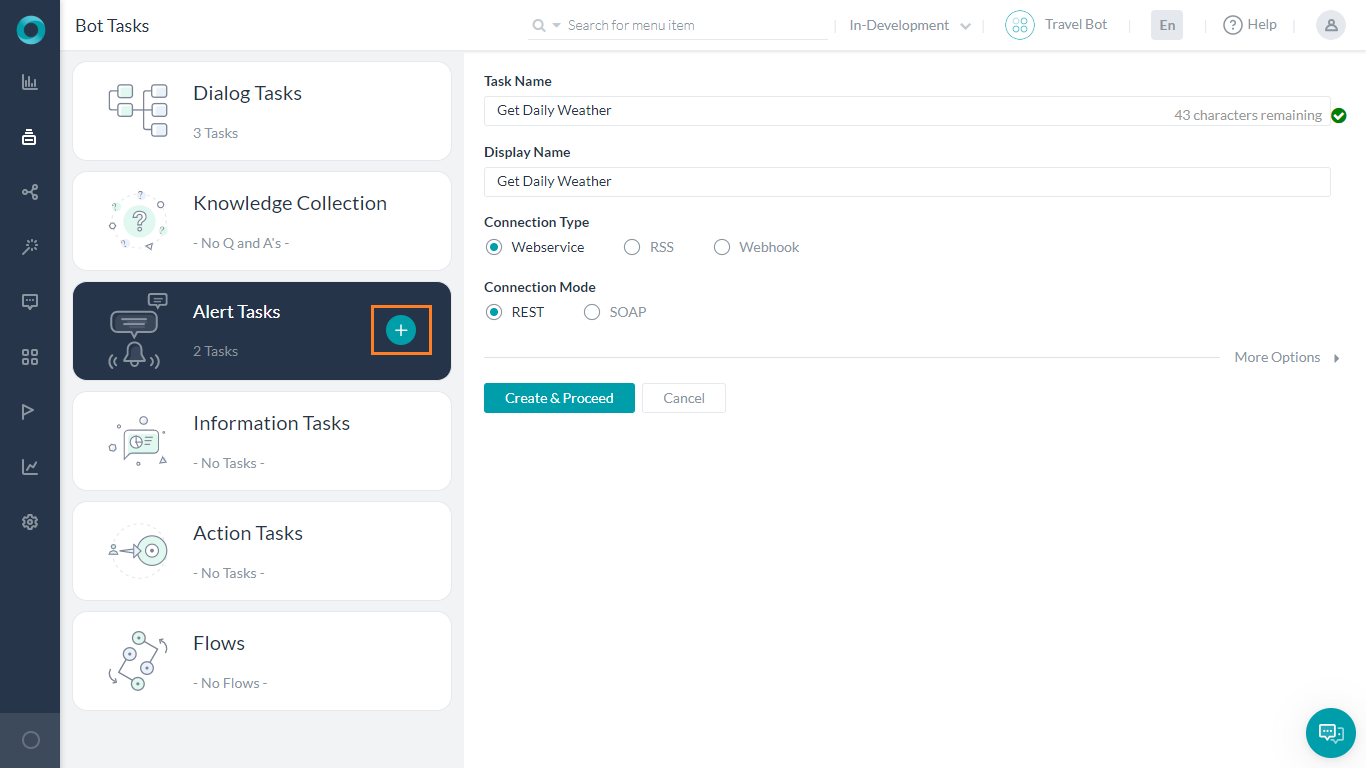
- From Bot Tasks add an Alert Task (click on the + in the Alert Tasks card). On
the task details page:- Enter a Task Name, say Get Daily Weather
- Choose the Connection Type, we will go with Webservice
- Choose the Connection Mode, we will be using REST
- Click Create & Proceed
- You will be directed to the Alert Settings page
- Review and modify the General Settings if needed. For our use case, we do not need to modify any settings here.
- Select the API Request tab
- Ensure that the Content Type is set to JSON
- We do not need to set Authorization Provider for our use case. Configure the same if the API you are using has any authorization requirements.
- Set Parameter to gather the preferred City from the User. Ensure that it is set as a Mandatory field. This is the API requirement.

- We will not need any Initializer requirements for our use case. Use this in case any JavaScript needs to be executed before the request is sent.
- Under Request click Add API to add the service API that needs to be invoked. We are using a GET method from the following API:
http://api.openweathermap.org/data/2.5/weather?q={cityname}&APPID=<your-app-id>- The APPID in the above url is assigned to you by OpenWeather when you sign up. You can find it from the API keys section after you login to your account.
- Notice that the Parameters list is populated automatically with the parameters entered earlier.
- Save the API.

- Test the API to ensure that the configuration is proper. Enter a sample city name, when prompted and ensure you get a success message and a proper Response.
- Save the response.
- Next we need to format the Bot Response. For our use case, we will be parsing the weather description, temperature and humidity details returned by the API call to be presented to the user.
We are using the following rich text to achieve the same:Todays weather details: <%=weather[0].description%> Temperature: <%=main.temp%> Humidity: <%=main.humidity%>
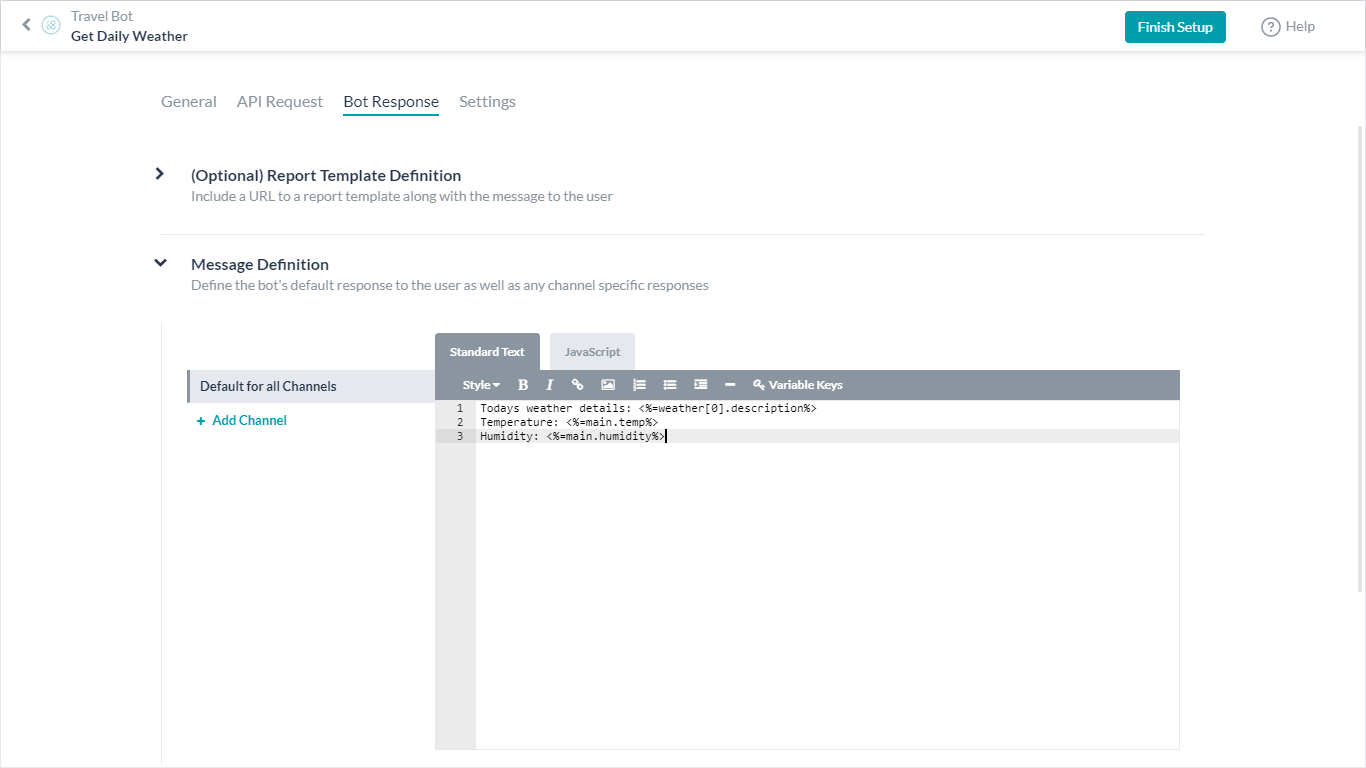
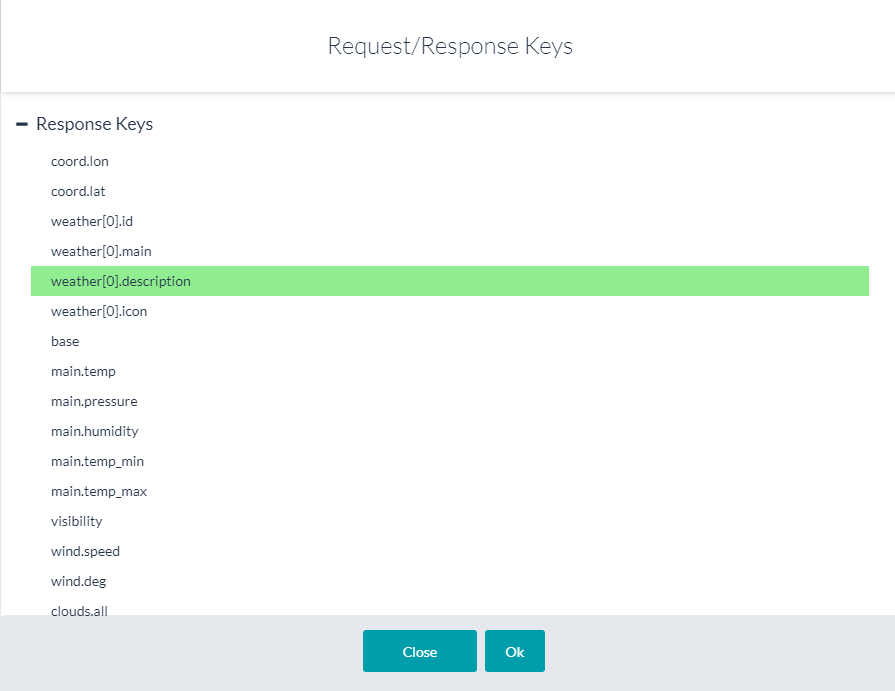
The values returned by the API call can be accessed from the Variable Keys option. Clicking Variable Keys opens the Request/Response Keys window. The various variables available are categorized. Expand Response Keys section to access the response from API call and select the key for the value you want to display and click OK, the key will be inserted in the editor in the appropriate format, for example for the following selection –<%=weather[0].description%>
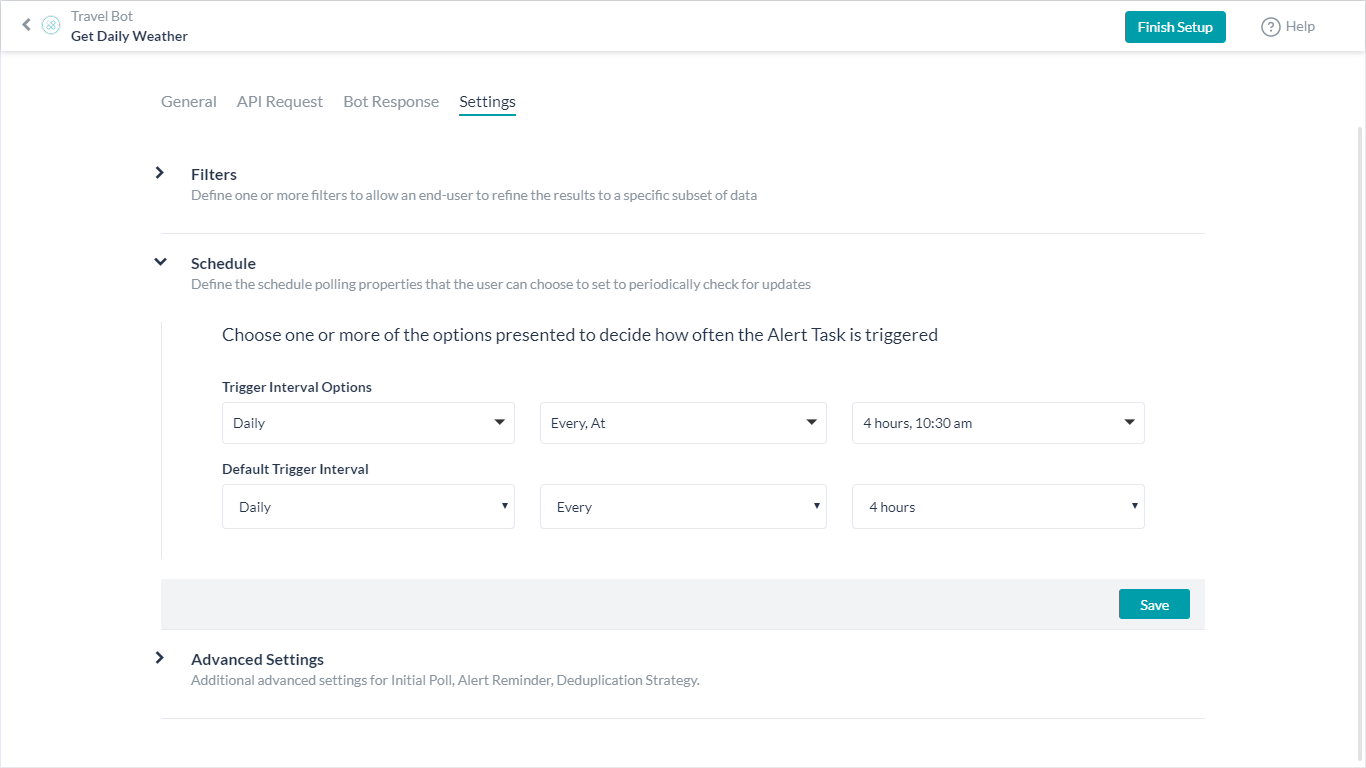
- Select Setttings tab and expand the Schedule section. Use this section to configure an initial schedule, these are the options that are provided to the user to choose from for the initial setup.
For example, in this example, we have set the schedule to be at 10:30 am daily followed by an update every 4 hrs. The user may choose just once at 10:30 am and not get the further updates.
- Finish Setup
Execution
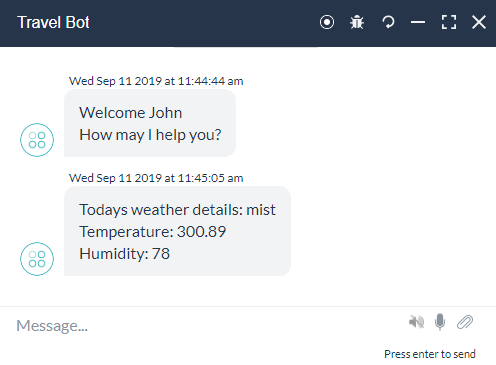
Before publishing and sharing the Bot with a user, you can test it from the Talk to bot feature.
- Launch Talk to bot.
- Initiate the schedule task, Get Daily Weather (name of the Alert Task we configured).
- You will be prompted to enter city name.
- Next you will be prompted to enter a specific time, you can enter a time or enter “every x minutes”.
- As you can see if the time you enter does no match the scheduled time configured, the nearest time will be presented. Same is the case with the frequency setting.

- This is a one-time setup. From this point onwards whenever you launch Talk to Bot for this Bot, you will be given the Weather Alert at the specified time.
- The user can trigger the task using the Alert Task name, just like any other Dialog Task and set up the alert manually. The experience User will have when they start using your Bot will be similar to the above-mentioned flow.
Smart Alert
You can set the alert for the user automatically by adding the Alert Subscription Service type Service node in, say, a welcome dialog task.
- Add a Service Node in the Dialog which will act as the trigger for the Alert Task.
- Set the Service Type to be Alert Subscription Service.
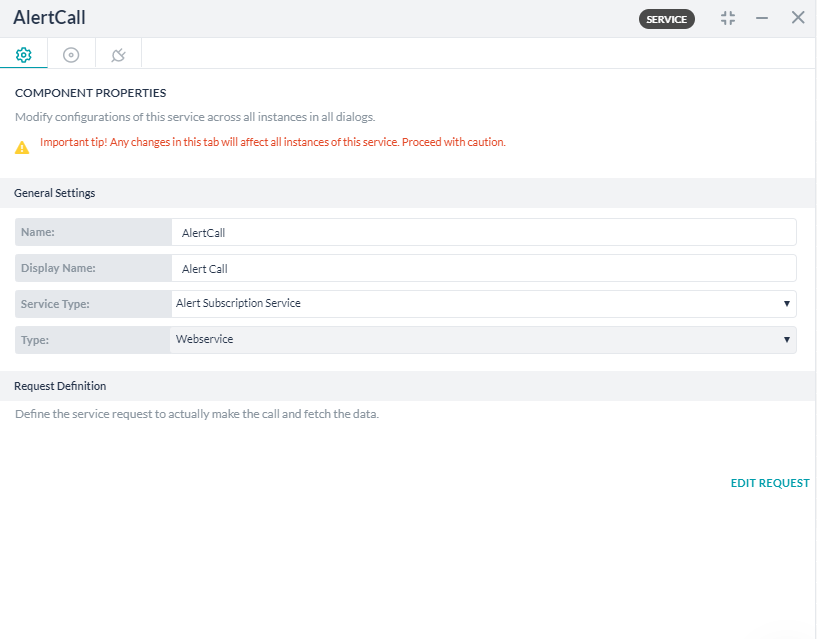
- Click Edit Request and select the already configured Alert Task, in this case Get Daily Weather.
- You will be navigated to the Smart/Automatic Alerts window
- Set up the Alert Parameters as required.
- Set the Alert Frequency
- You can set the Alert Expiry values based upon either the duration of the subscription or the number of notifications sent, these will come in handy in case your subscription to the service is limited. Here we have set the Number of Notification to maximum value.
- You can also define the Alert Ugrade behavior in case the Alert task is updated and published.
- Save
- On setup, the first time this service node is hit the subscription will be in effect without user intervention.
NOTE: Only published Alert Tasks are available for Alert subscription.