OVERVIEW
Virtual Assistants
Kore.ai Platform
Key Concepts
Natural Language Processing (NLP)
Accessing Platform
VIRTUAL ASSISTANTS
Virtual Assistant Builder
Virtual Assistant Types
Getting Started
Creating a Simple Bot
SKILLS
Storyboard
Dialog Task
Introduction
Dialog Builder (New)
Dialog Builder (Legacy)
User Intent Node
Dialog Node
Entity Node
Supported Entity Types
Composite Entities
Supported Colors
Supported Company Names
Form Node
Logic Node
Message Nodes
Confirmation Nodes
Bot Action Node
Service Node
Custom Authentication
2-way SSL for Service nodes
Script Node
Agent Transfer Node
WebHook Node
Grouping Nodes
Connections & Transitions
Manage Dialogs
User Prompts
Knowledge Graph
Terminology
Building
Generation
Importing and Exporting
Analysis
Knowledge Extraction
Build
Alert Tasks
Introduction
Ignore Words and Field Memory
How to Schedule a Smart Alert
Small Talk
Digital Views
Overview
Configuring Digital Views
Digital Forms
Overview
How to Configure Digital Forms
NATURAL LANGUAGE
Overview
Machine Learning
Introduction
Model Validation
Fundamental Meaning
Introduction
NLP Guidelines
Knowledge Graph
Traits
Introduction
How to Use Traits
Ranking and Resolver
Advanced NLP Configurations
INTELLIGENCE
Overview
Context Management
Overview
Session and Context Variables
Context Object
How to Manage Context Switching
Manage Interruptions
Dialog Management
Sub-Intents & Follow-up Intents
Amend Entity
Multi-Intent Detection
Sentiment Management
Tone Analysis
Sentiment Management
Event Based Bot Actions
Default Conversations
Default Standard Responses
TEST & DEBUG
Talk to Bot
Utterance Testing
Batch Testing
Conversation Testing
CHANNELS
PUBLISH
ANALYZE
Overview
Dashboard
Custom Dashboard
Overview
How to Create Custom Dashboard
Conversation Flows
NLP Metrics
ADVANCED TOPICS
Universal Bots
Overview
Defining
Creating
Training
Customizing
Enabling Languages
Store
Smart Bots
Defining
koreUtil Libraries
SETTINGS
Authorization
Language Management
PII Settings
Variables
Functions
IVR Integration
General Settings
Management
Import & Export
Delete
Versioning
Collaborative Development
PLAN & USAGE
Overview
Usage Plans
Support Plans
Invoices
API GUIDE
API Overview
API List
API Collection
SDKs
SDK Overview
SDK Security
SDK App Registration
Web SDK Tutorial
Message Formatting and Templates
Mobile SDK Push Notification
Widget SDK Tutorial
Widget SDK – Message Formatting and Templates
Web Socket Connect & RTM
Using the BotKit SDK
Installing
Configuring
Events
Functions
BotKit SDK Tutorial – Agent Transfer
BotKit SDK Tutorial – Flight Search Sample Bot
Using an External NLP Engine
ADMINISTRATION
HOW TOs
Creating a Simple Bot
Creating a Banking Bot
Context Switching
Using Traits
Schedule a Smart Alert
Configure UI Forms
Add Form Data into Data Tables
Configuring Digital Views
Add Data to Data Tables
Update Data in Data Tables
Custom Dashboard
Custom Tags to filter Bot Metrics
Patterns for Intents & Entities
Build Knowledge Graph
Global Variables
Content Variables
Using Bot Functions
Configure Agent Transfer
Update Balance Task
Transfer Funds Task
RELEASE NOTES
  1. ホーム
  2. Docs
  3. Virtual Assistants
  4. How Tos
  5. パネルとウィジェットの設定方法

パネルとウィジェットの設定方法

こちらの案内では、ワンクリックでユーザーが口座の詳細を表示できるバンキングBotのシナリオについて見ていきます。ウィジェットを使用してダイアログタスクをトリガーし、適切なメッセージを表示する方法と、パネルを使用してこれらのウィジェットを保持する方法を説明いたします。また、ウィジェットSDKを使用してパネルをウェブ/モバイルクライアント上でホストする方法についてもご説明します。パネルとウィジェットとは何か、またKore.aiのBotプラットフォームにどのように導入されるかについての詳細は、こちらを参照してください

例題

以下のシナリオに取り組むバンキングBotを検討します。 このドキュメントでは、パネル、ウィジェット、ウィジェットSDK、ウェブ/モバイルクライアントを使用して、上記のすべてのシナリオを実現するための詳細な手法を説明します。

Pre-requisites

  • Botビルドナレッジ
  • 以下に説明するダイアログを持つバンキングBot:
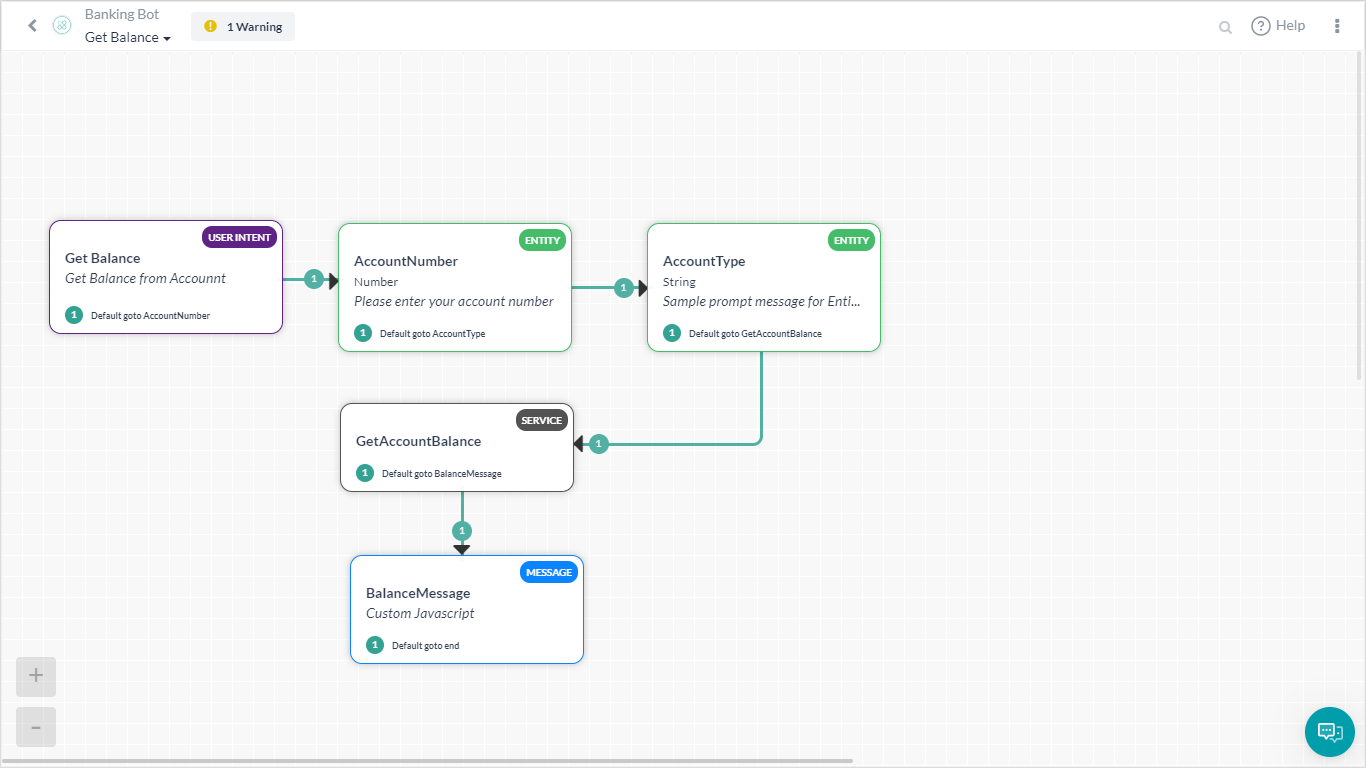
    • 残高取得-ユーザーが口座番号と口座種類を入力し、利用可能な残高を表示するダイアログタスクです。

設定

次の各シナリオを1つずつ考えてみましょう。

  1. ウィジェットSDKチャネルを使用して特定の口座の残高を表示するダイアログタスクです。
  2. ウィジェットは上記のダイアログタスクをトリガーし、ウィジェットとパネルをセットします。
  3. パネルは静的なJSONテンプレートメッセージを表示するウィジェットを保持します。

メッセージテンプレート

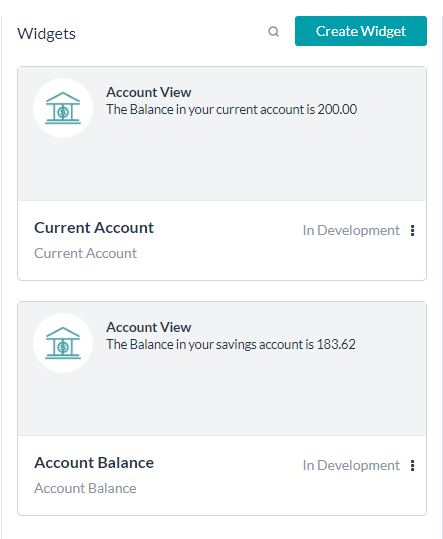
まず、ウィジェットからトリガーされるダイアログタスクには、ウィジェットSDKチャネル用にメッセージ定義が必要となります。 ここでは口座の詳細を表示するために次のメッセージを使用しています。
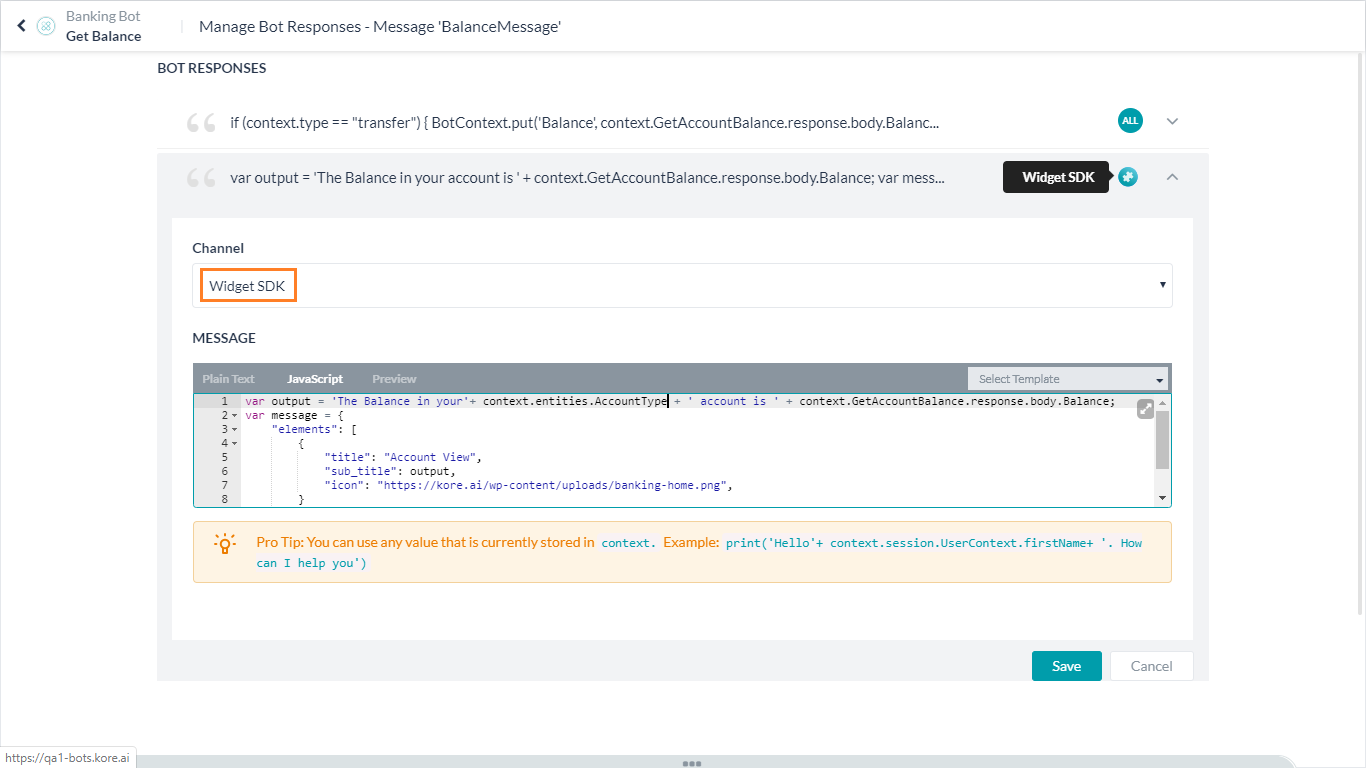
var output = 'The Balance in your' + context.entities.AccountType + ' account is ' + context.GetAccountBalance.response.body.Balance; var message = { "elements": [ { "title": "Account View", "sub_title": output, "icon": "https://kore.ai/wp-content/uploads/sites/22/banking-home.png", } ] }; print(JSON.stringify(message));

ウィジェットの設定

ダイアログタスクのウィジェット

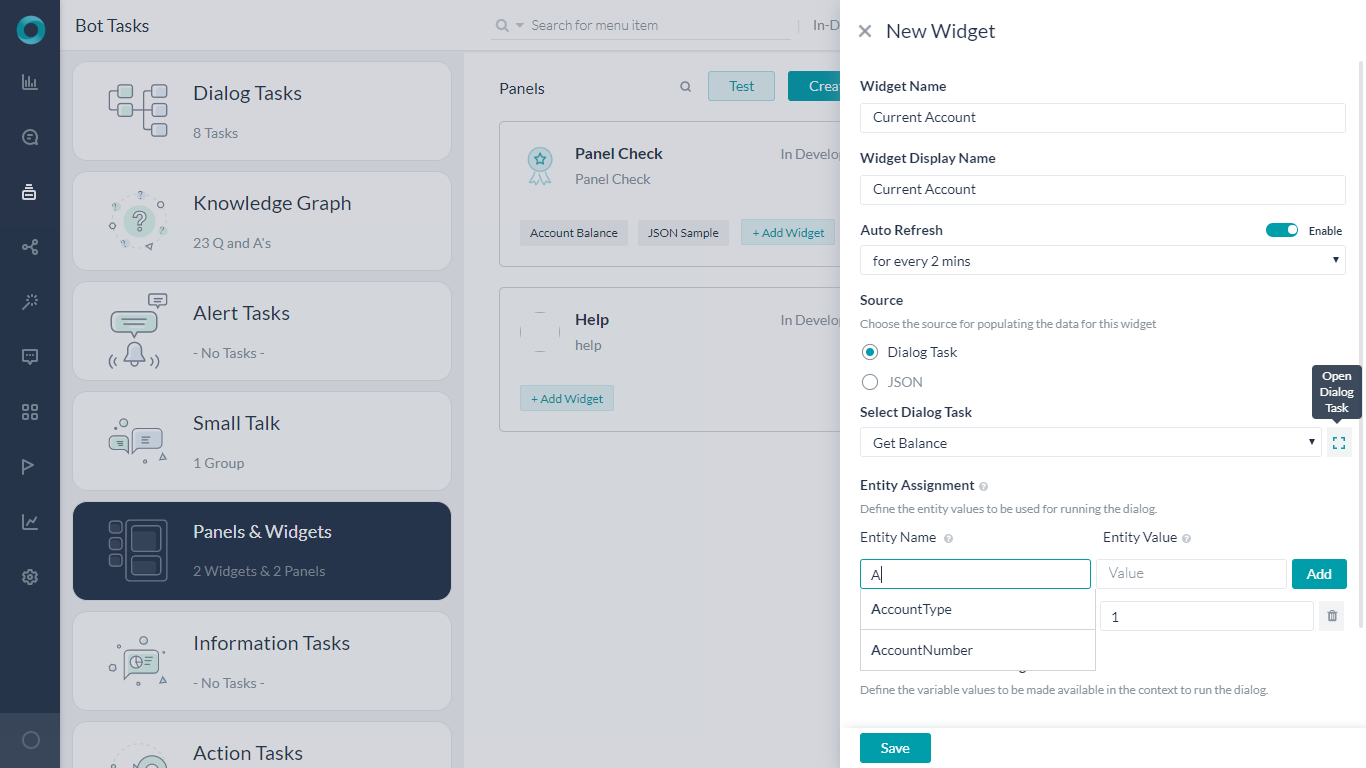
ダイアログタスクをトリガーする2つのウィジェットを作成します。当座預金:まず、ユーザーの現在の口座残高を表示するようにウィジェットを設定する方法を見ていきましょう。

  • 左側のナビゲーションメニューから、Botタスクの下部にあるパネルとウィジェットを開きます。
  • ウィジェットを作成ボタンをクリックします。
  • ウィジェット名と表示名を付けます。
  • ソースを設定します。ダイアログタスクをトリガーしているため、ダイアログタスクを選択します。
  • ユースケースに従って、ダイアログタスクを選択残高取得として選択します。
  • エンティティの割り当てで、ダイアログタスクの要件に従って次のエンティティを設定します(入力時に表示されるドロップボックスから選択できます)。
    • AccountType当座
    • AccountNumber1.「ダイアログタスクを選択」ドロップダウンの横にあるダイアログタスクを開くアイコンを使用して、ダイアログを開き、必要なエンティティを確認することができます。

  • ウィジェットを保存します。
  • ウィジェットを編集し、実行とプレビューをクリックして、ウィジェットのアウトプットを確認します。
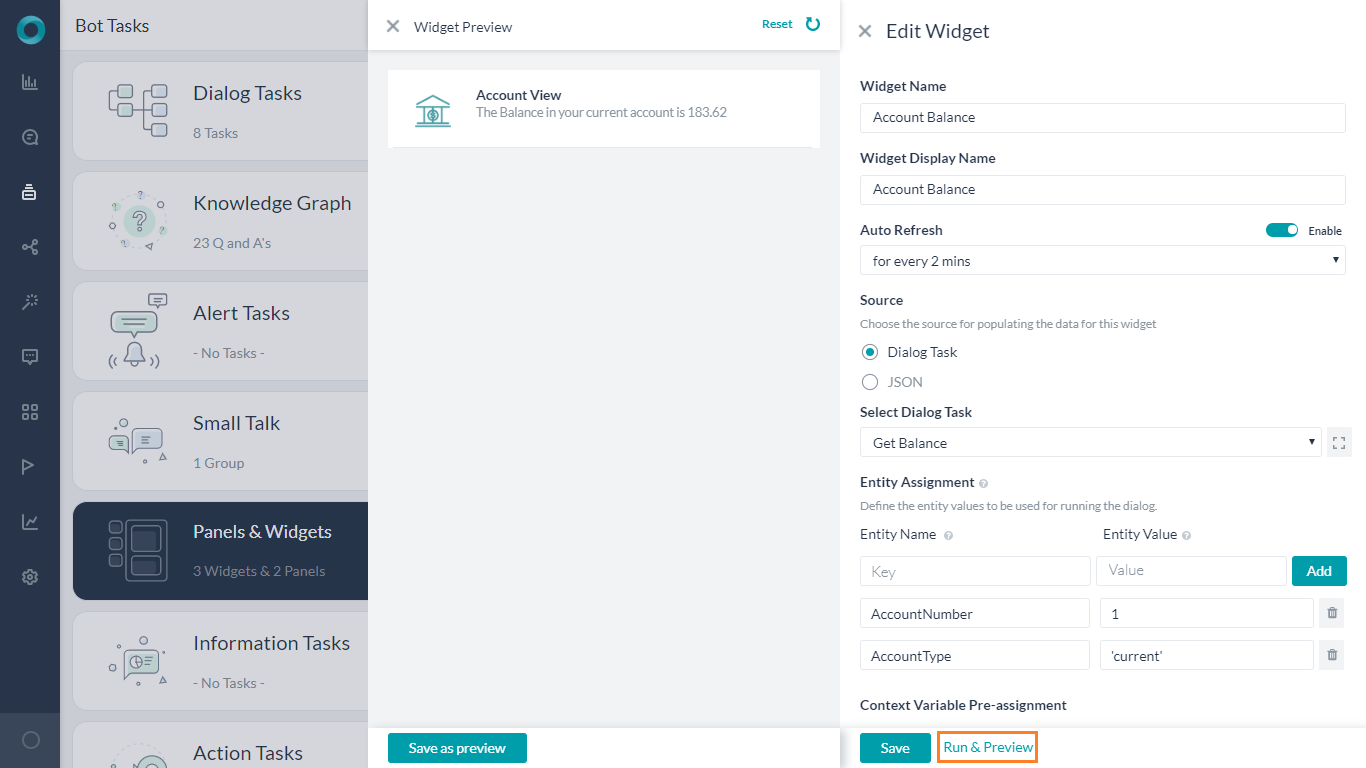
  • プレビューとして保存を行うと、アウトプットをウィジェットに対するサムネイルとして設定します。

普通預金口座 同じ口座番号の普通預金口座から、口座の表示のために上記の手順を繰り返します。

パネルの設定

このようにして作成されたウィジェットは、ランタイムの表示と実行のためにパネルに添付する必要があります。

  1. パネルを作成ボタンをクリックして、パネルを作成します。
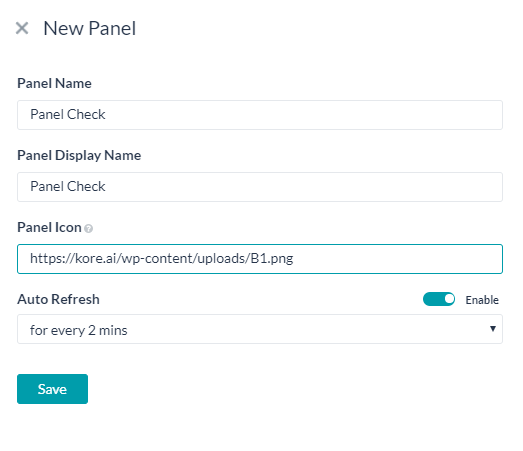
  2. 新しいパネルウィンドウの中に、パネル名、表示名、アイコンURLを入力します。
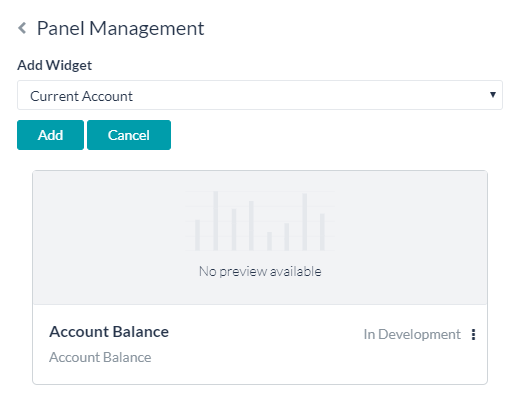
  3. ウィジェットを追加ボタンをクリックして、パネル管理ウィンドウを開きます。
  4. ウィジェットを追加を使用して、表示するウィジェット(この場合は口座残高と当座預金のウィジェット)を選択して追加します。
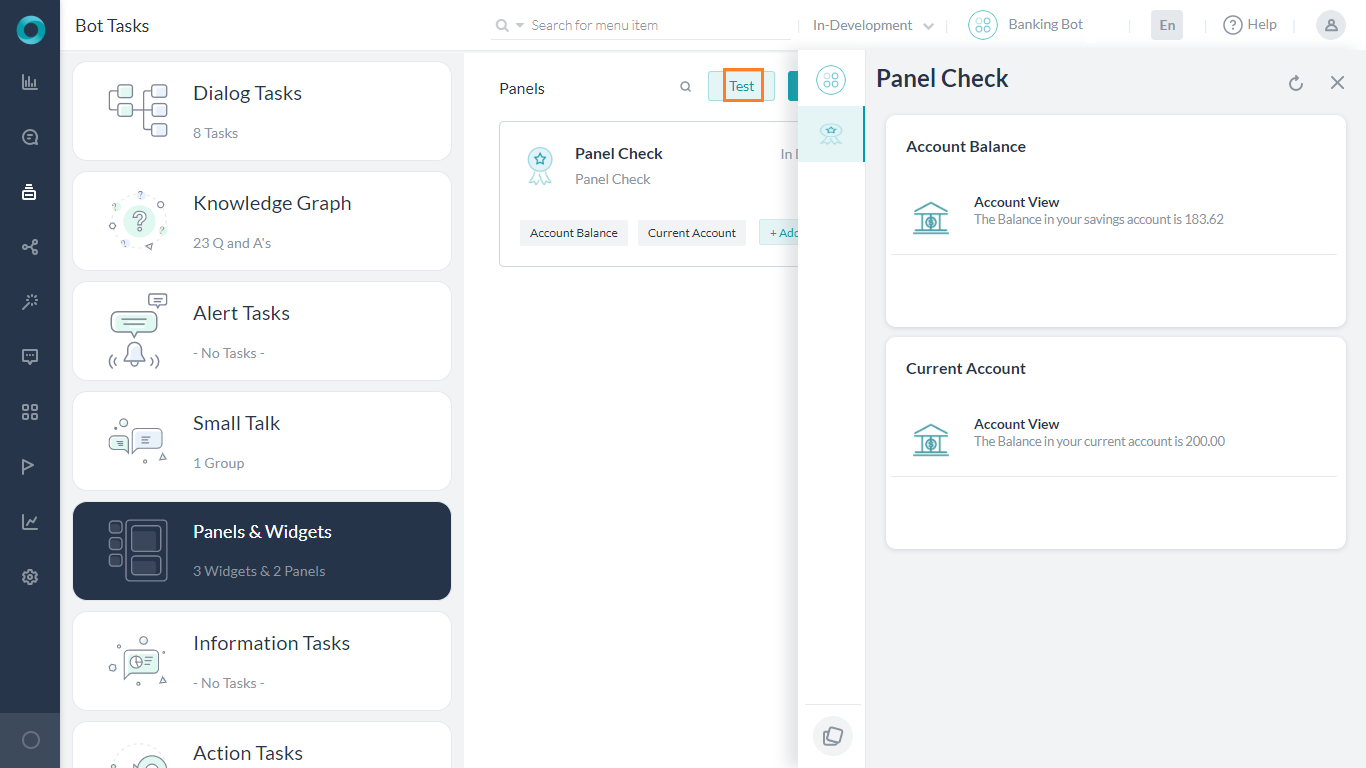
  5. テストボタンを使用して、ウィジェットの動作を確認します。

JSONウィジェットのパネル

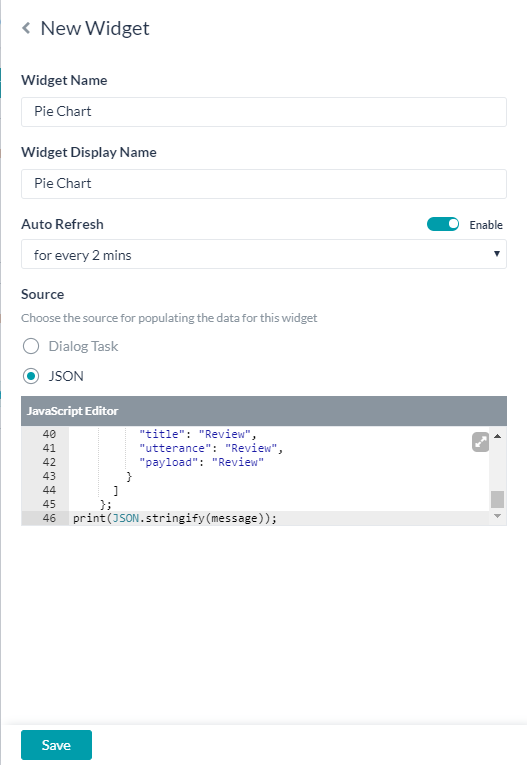
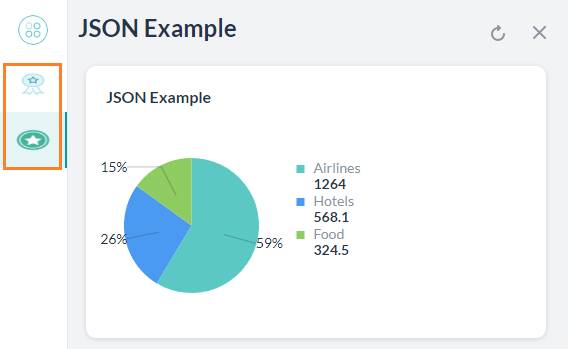
静的なJSONコンテンツを使用してウィジェットを作成する方法をご説明します。JSONを使用して円グラフを表示させます。

  1. パネルを作成をクリックして新しいパネルを作成しJSONの例と名前を付けます。
  2. 詳細アイコンを選択してパネル管理を選択すると、ウィジェットを作成のオプションが見つかりますので、それをクリックします。
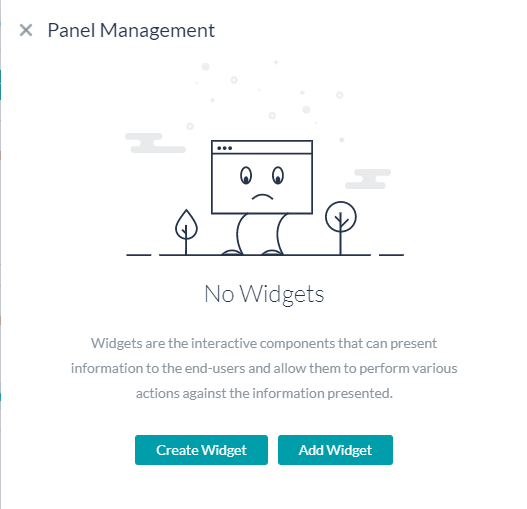
  3. 新しいウィジェットダイアログで名前を入力し、ソースをJSONに設定します。
  4. JavaScriptエディタには次のように入力します。これは、交通費、食費、宿泊費などのさまざまな局面で費やされた金額の内訳を円グラフで表示するためのメッセージテンプレートです。サポートされているメッセージテンプレートの詳細については、こちらを参照してください
    var message = { "templateType": "piechart", "pie_type": "regular", "title": "Summary", "description": "monthly report", "elements": [ { "title": "Airlines", "value": "1264.0", "displayValue": "$ 1,234" }, { "title": "Hotels", "value": "568.10", "displayValue": "$ 568" }, { "title": "Food", "value": "324.50", "displayValue": "$ 324" } ] }; print(JSON.stringify(message));
  5. パネルをテストすると、両方のパネルアイコンが表示されますので、それぞれをクリックして実際の動作を確認してください。
公開

Botを公開するには、まずチャネルを有効にします。

  1. 左側のナビゲーションメニューから、公開するチャネルを選択します。このユースケースでは、ウェブ/モバイルクライアントとウィジェットSDKのチャネルの両方を選択します。
  2. チャネルを選択し、設定タブからBot名BotIdクライアントIdクライアントシークレットをメモします。
  3. 左側のナビゲーションメニューから、公開オプションを選択します。「タスクと言語」セクションで、開発したウィジェットとパネルが公開用に選択されていることを確認します。
  4. 公開として続行します。

ホスティング

パネルはウェブ/モバイルクライアントでホストします。ウィジェットSDKの使用方法の詳細についてはこちらをご覧ください

  1. Kore.aiウィジェットSDKをダウンロードするには、https://github.com/Koredotcom/web-kore-sdkにアクセスし、ダウンロードをクリックします。
  2. すべてのファイルを…/SDKApp/sdkフォルダに展開します。
  3. 上記のSDKフォルダを開き、UIフォルダに移動します。
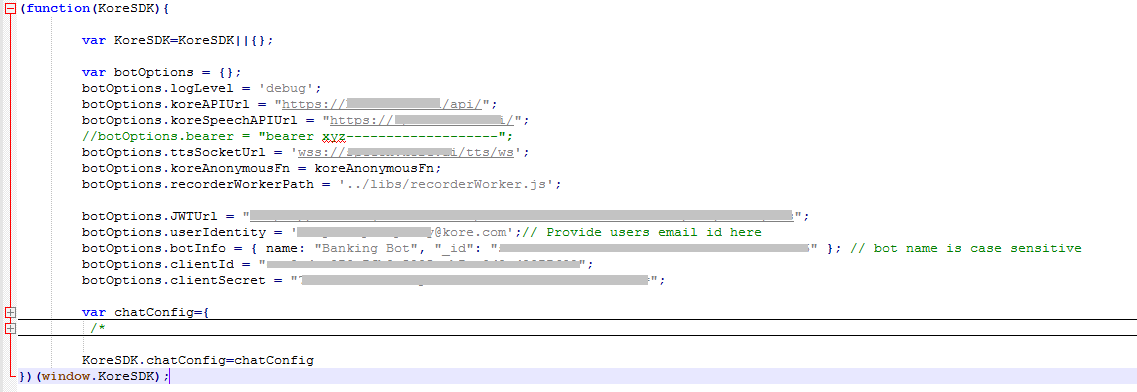
  4. 次を開きます。 kore-config.js
  5. 上記のセクションでコピーしたウェブ/モバイルクライアントのチャネル設定のbotOptionsを設定します。
    • botOptions.botInfo
    • botOptions.clientId
    • botOptions.clientSecret

    要件に応じて他の変更内容を加えます。

  6. 次を開きます。 kore-widgets-config.js
  7. 上記のセクションでコピーしたウィジェットSDKのチャネル設定のbotOptionsWizを設定します。
    • botOptionsWiz.botInfo
    • botOptionsWiz.clientId
    • botOptionsWiz.clientSecret

    要件に応じて他の変更内容を加えます。

  8. ブラウザでindex_widgets_chat.htmlファイルを開き、ウィジェットと共にチャットウィンドウを表示します。
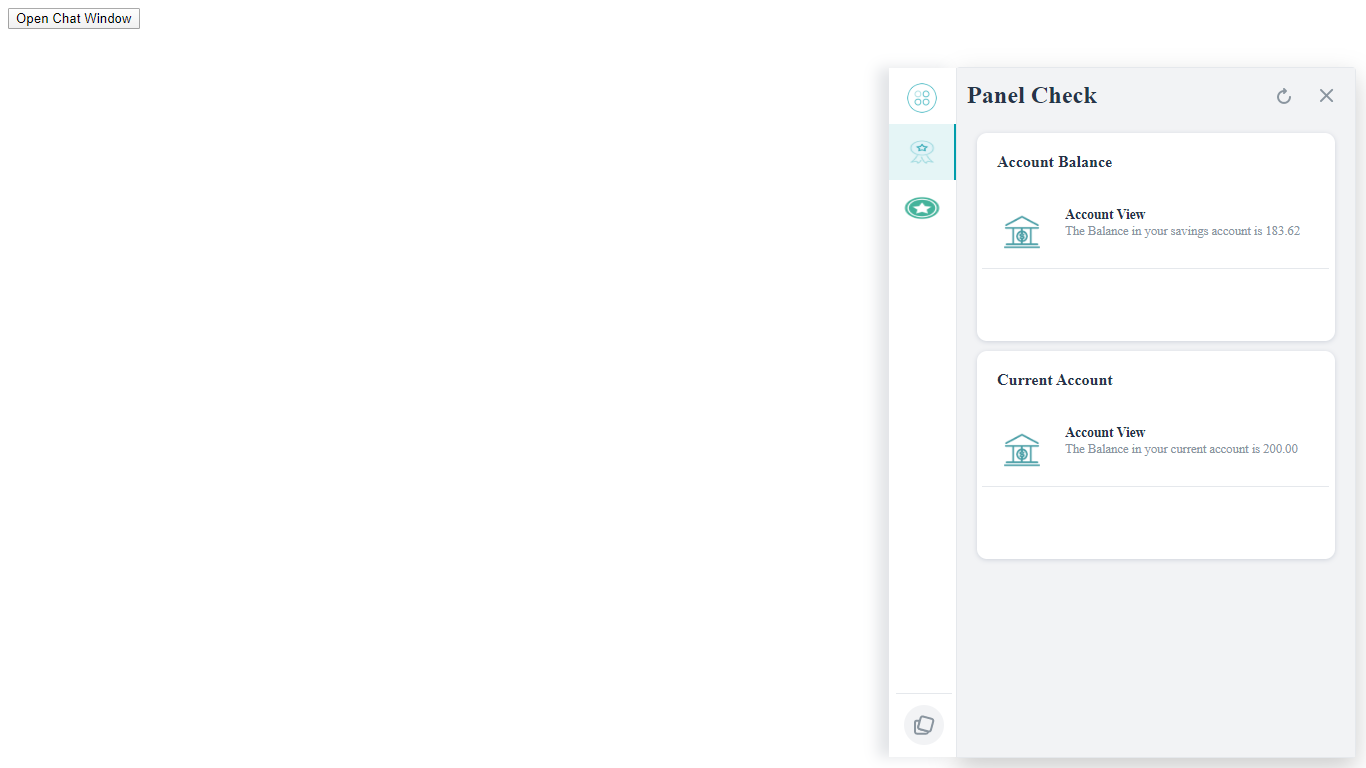
  9. パネルを個別にホストする場合は、index_widgets.htmlファイルを使用します。ウェブサイトで同じものをホストする方法については、GitHubを参照してください。
メニュー
Kore.ai Named a Leader in 2022 Gartner® Magic Quadrant™ for Enterprise Conversational AI PlatformsGet the Report