こちらの案内では、ワンクリックでユーザーが口座の詳細を表示できるバンキングBotのシナリオについて見ていきます。パネルとウィジェットを使用して、デジタルビューをどのように表示できるかを見ていきましょう。ウィジェットを使用することでダイアログタスクをトリガーして適切なメッセージを表示でき、パネルを使用することでこれらのウィジェットを保持します。また、ウィジェットSDKを使用してパネルをウェブ/モバイルクライアント上でホストする方法についてもご説明します。デジタルビューとは何か、またKore.aiのBotプラットフォームにどのように導入されているかについての詳細は、こちらを参照してください。
例題
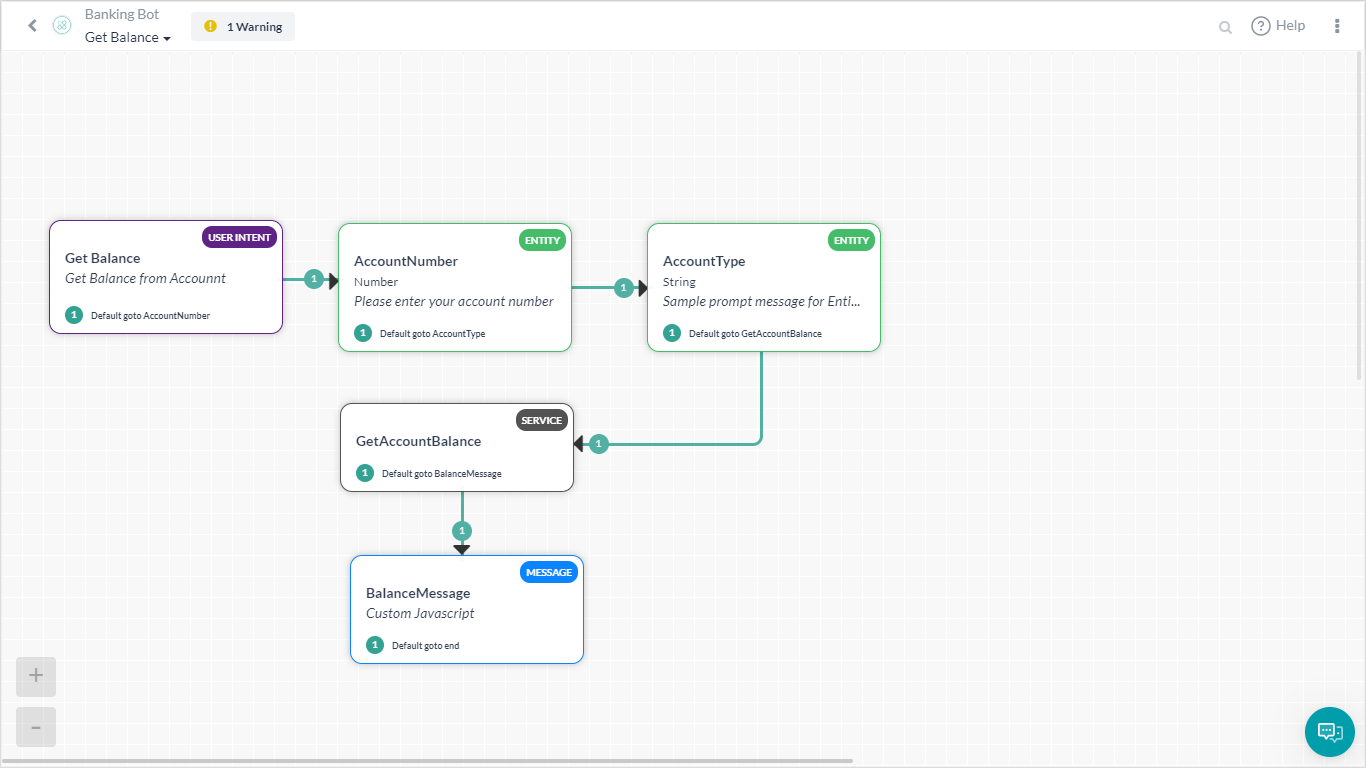
以下のシナリオに取り組むバンキングBotを検討します。 このドキュメントでは、デジタルビュー(パネル、ウィジェット)、ウィジェットSDK、ウェブ/モバイルクライアントを使用して、上記のすべてのシナリオを実現するための詳細な手法を説明します。
設定
次の各シナリオを1つずつ考えてみましょう。
- ウィジェットSDKチャネルを使用して特定の口座の残高を表示するダイアログタスクです。
- ウィジェットは上記のダイアログタスクをトリガーし、ウィジェットとパネルをセットします。
- パネルは静的なJSONテンプレートメッセージを表示するウィジェットを保持します。
メッセージテンプレート
まず、ウィジェットからトリガーされるダイアログタスクには、ウィジェットSDKチャネル用にメッセージ定義が必要となります。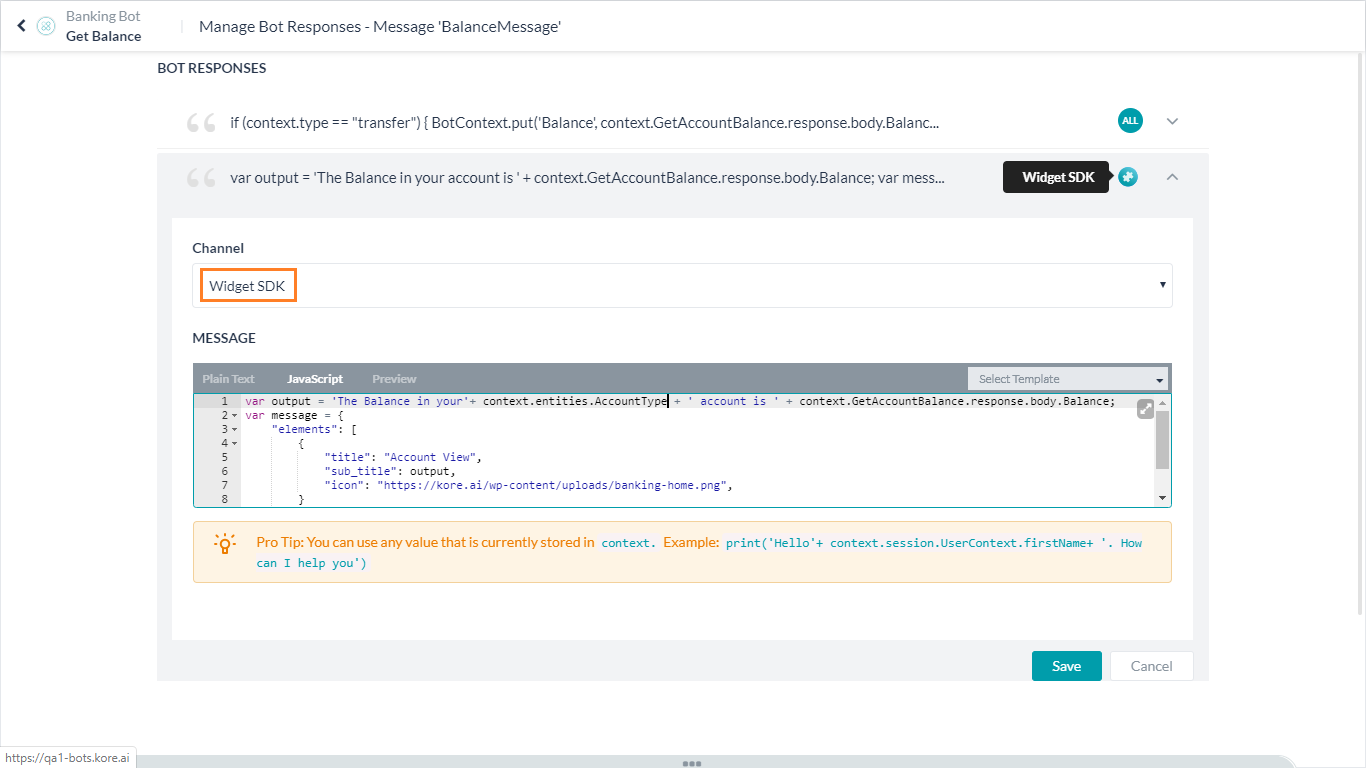 ここでは口座の詳細を表示するために次のメッセージを使用しています。
var output = 'The Balance in your' + context.entities.AccountType + ' account is ' + context.GetAccountBalance.response.body.Balance; var message = { "elements": [ { "title": "Account View", "sub_title": output, "icon": "https://kore.ai/wp-content/uploads/sites/22/banking-home.png", } ] }; print(JSON.stringify(message));
ウィジェットの設定
ダイアログタスクのウィジェット
ダイアログタスクをトリガーする2つのウィジェットを作成します。当座預金:まず、ユーザーの現在の口座残高を表示するようにウィジェットを設定する方法を見ていきましょう。
- 左側のナビゲーションメニューから、Botタスクの下部にあるデジタルビューを開きます。
- ウィジェットを作成ボタンをクリックします。
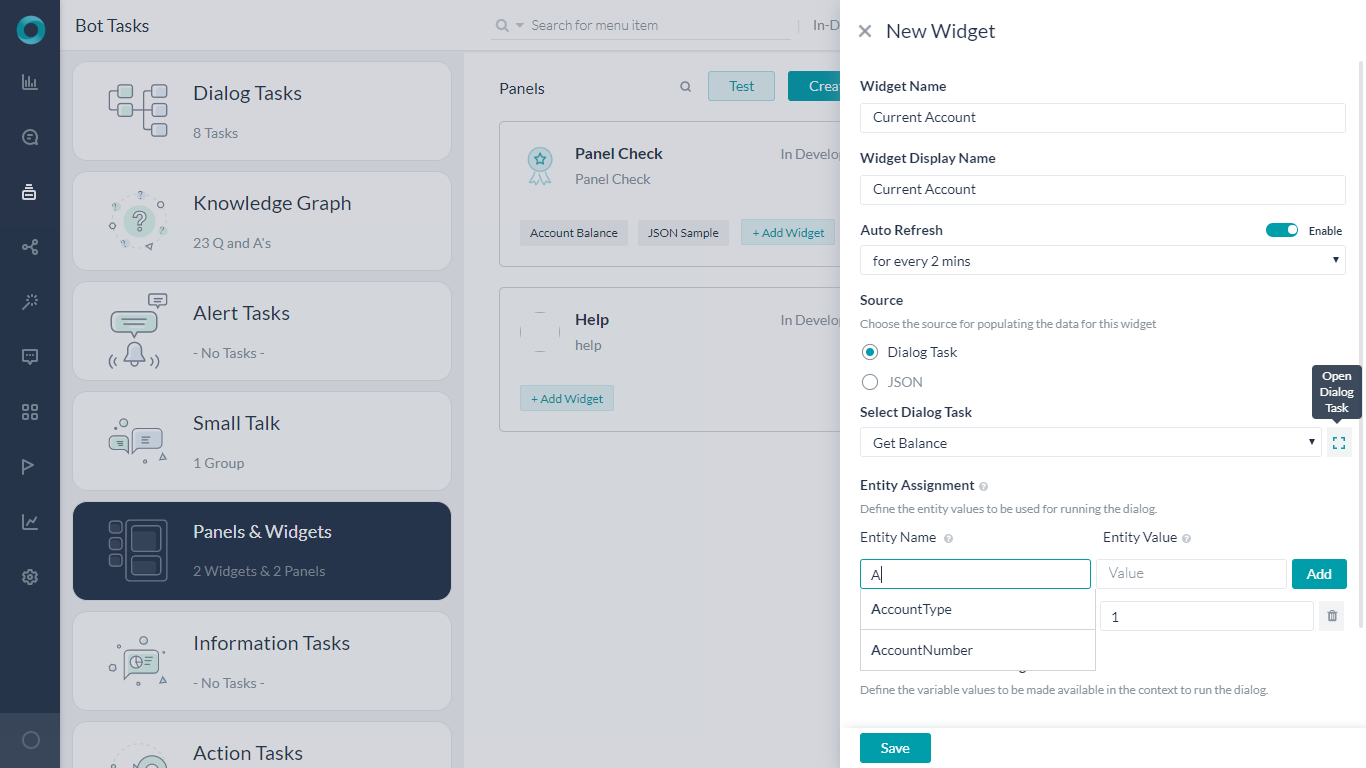
- ウィジェット名と表示名を付けます。
- ソースを設定します。ダイアログタスクをトリガーしているため、ダイアログタスクを選択します。
- ユースケースに従って、ダイアログタスクを選択を残高取得として選択します。
- エンティティの割り当てで、ダイアログタスクの要件に従って次のエンティティを設定します(入力時に表示されるドロップボックスから選択できます)。
- AccountTypeを当座
- AccountNumberを1.「ダイアログタスクを選択」ドロップダウンの横にあるダイアログタスクを開くアイコンを使用して、ダイアログを開き、必要なエンティティを確認することができます。
- ウィジェットを保存します。
- ウィジェットを編集し、実行とプレビューをクリックして、ウィジェットのアウトプットを確認します。
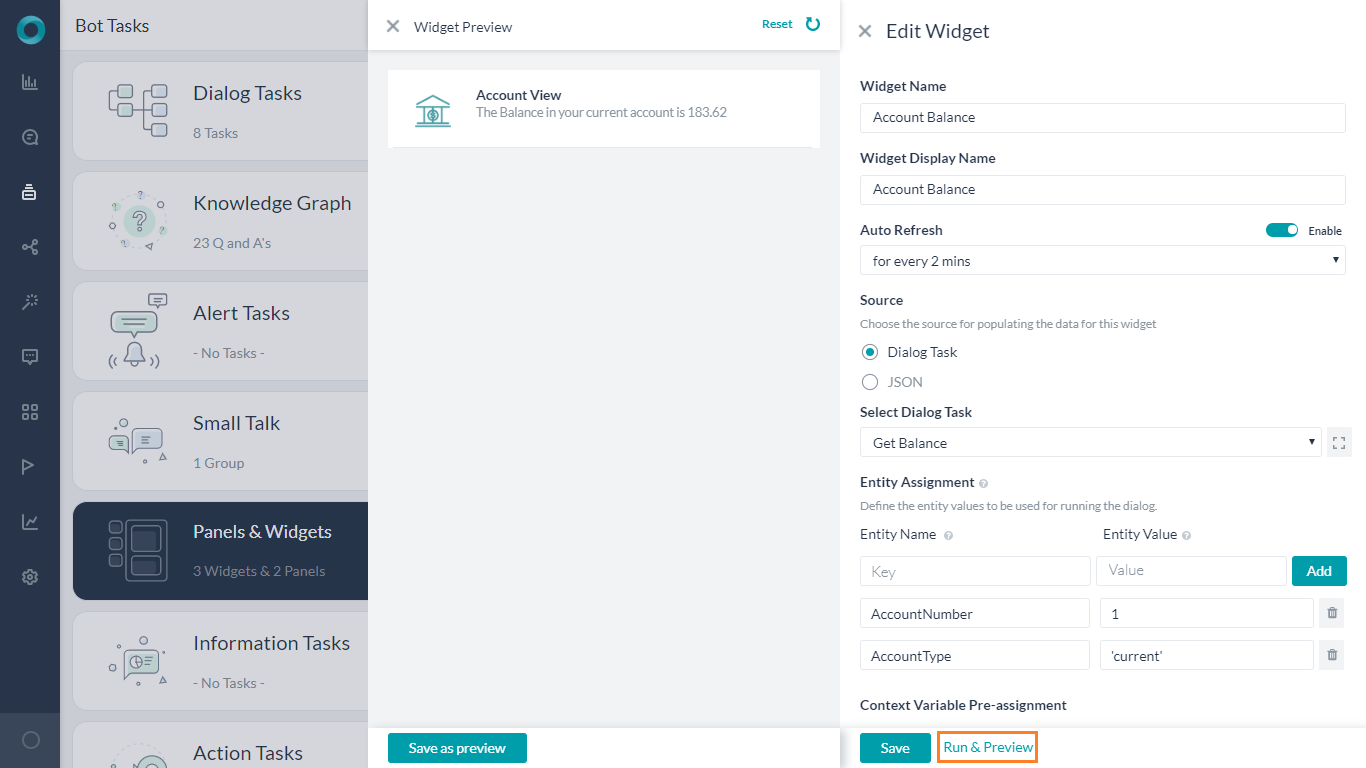
- プレビューとして保存を行うと、アウトプットをウィジェットに対するサムネイルとして設定します。
普通預金口座 同じ口座番号の普通預金口座から、口座の表示のために上記の手順を繰り返します。 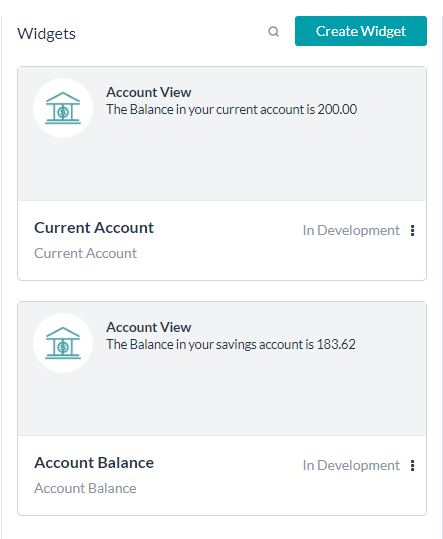
パネルの設定
このようにして作成されたウィジェットは、ランタイムの表示と実行のためにパネルに添付する必要があります。
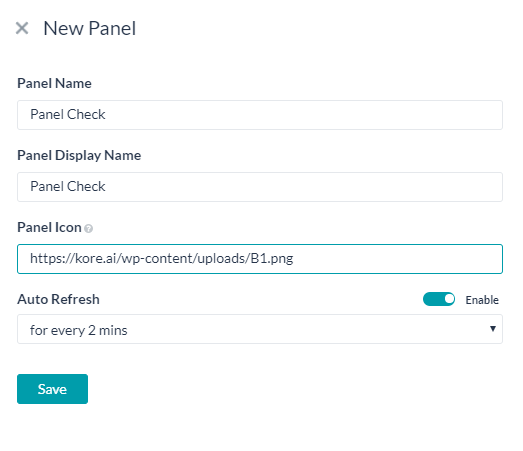
- パネルを作成ボタンをクリックして、パネルを作成します。
- 新しいパネルウィンドウの中に、パネル名、表示名、アイコンURLを入力します。
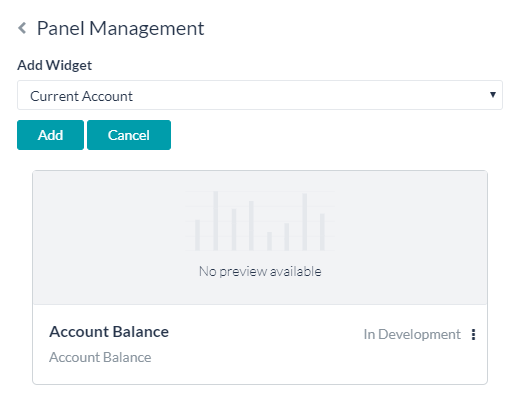
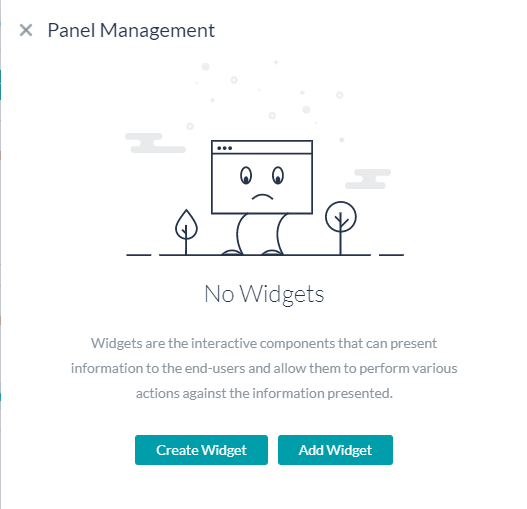
- ウィジェットを追加ボタンをクリックして、パネル管理ウィンドウを開きます。
- ウィジェットを追加を使用して、表示するウィジェット(この場合は口座残高と当座預金のウィジェット)を選択して追加します。
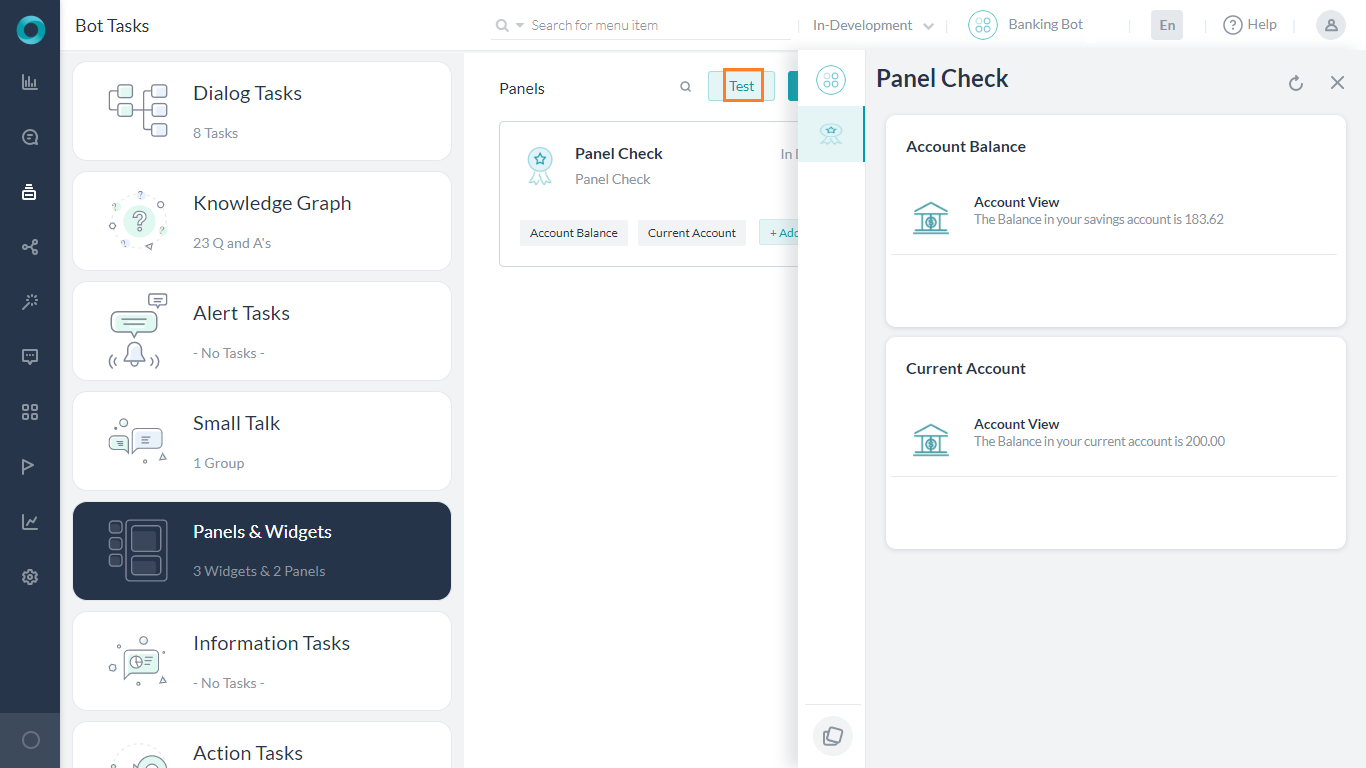
- テストボタンを使用して、ウィジェットの動作を確認します。
JSONウィジェットのパネル
静的なJSONコンテンツを使用してウィジェットを作成する方法をご説明します。JSONを使用して円グラフを表示させます。
- パネルを作成をクリックして新しいパネルを作成しJSONの例と名前を付けます。
- 詳細アイコンを選択してパネル管理を選択すると、ウィジェットを作成のオプションが見つかりますので、それをクリックします。
- 新しいウィジェットダイアログで名前を入力し、ソースをJSONに設定します。
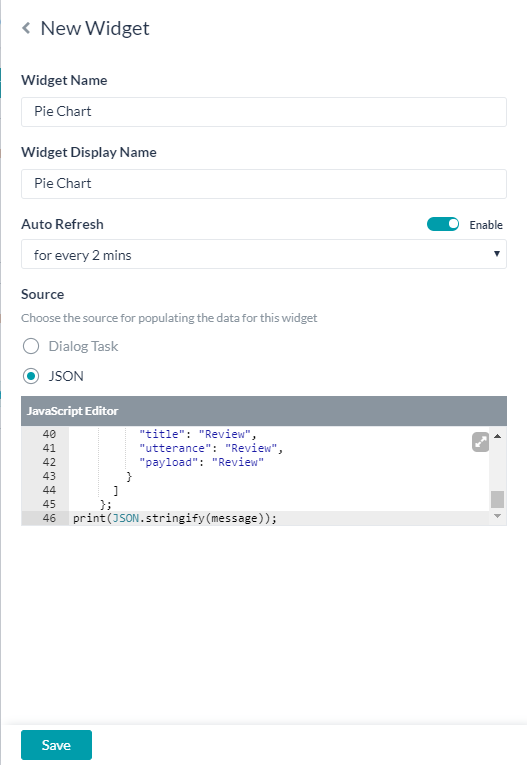
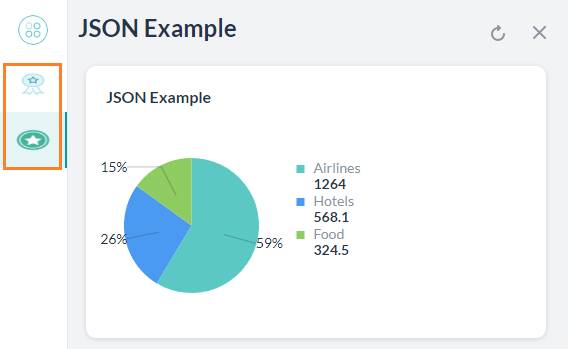
- JavaScriptエディタには次のように入力します。これは、交通費、食費、宿泊費などのさまざまな局面で費やされた金額の内訳を円グラフで表示するためのメッセージテンプレートです。サポートされているメッセージテンプレートの詳細については、こちらを参照してください。
var message = { "templateType": "piechart", "pie_type": "regular", "title": "Summary", "description": "monthly report", "elements": [ { "title": "Airlines", "value": "1264.0", "displayValue": "$ 1,234" }, { "title": "Hotels", "value": "568.10", "displayValue": "$ 568" }, { "title": "Food", "value": "324.50", "displayValue": "$ 324" } ] }; print(JSON.stringify(message)); - パネルをテストすると、両方のパネルアイコンが表示されますので、それぞれをクリックして実際の動作を確認してください。
公開
Botを公開するには、まずチャネルを有効にします。
- 左側のナビゲーションメニューから、公開するチャネルを選択します。このユースケースでは、ウェブ/モバイルクライアントとウィジェットSDKのチャネルの両方を選択します。
- チャネルを選択し、設定タブからBot名、BotId、クライアントId、クライアントシークレットをメモします。
- 左側のナビゲーションメニューから、公開オプションを選択します。「タスクと言語」セクションで、開発したウィジェットとパネルが公開用に選択されていることを確認します。
- 公開として続行します。
ホスティング
パネルはウェブ/モバイルクライアントでホストします。ウィジェットSDKの使用方法の詳細についてはこちらをご覧ください。
- Kore.aiウィジェットSDKをダウンロードするには、https://github.com/Koredotcom/web-kore-sdkにアクセスし、ダウンロードをクリックします。
- すべてのファイルを…/SDKApp/sdkフォルダに展開します。
- 上記のSDKフォルダを開き、UIフォルダに移動します。
- 次を開きます。
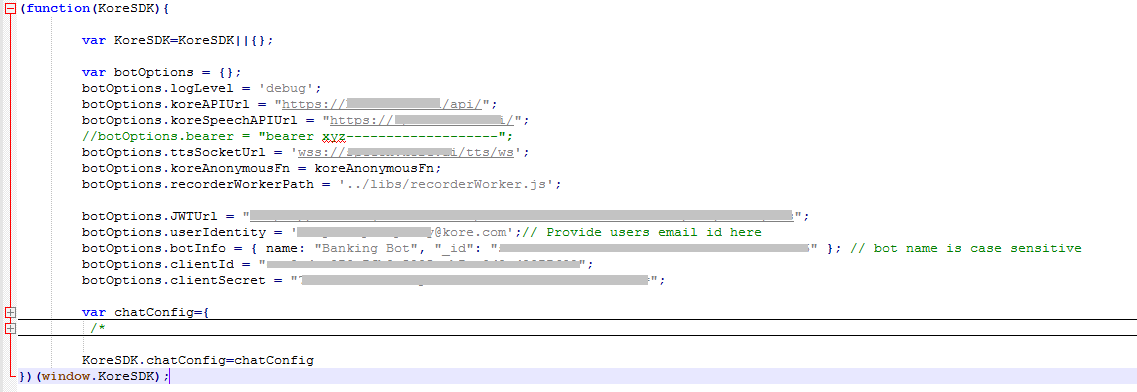
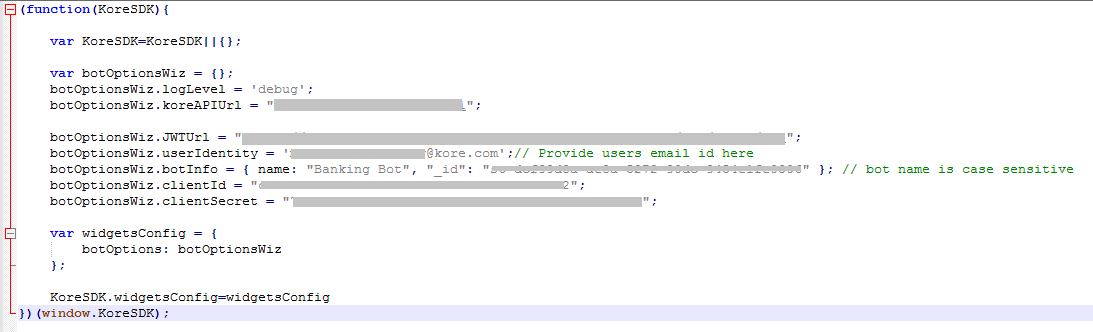
kore-config.js - 上記のセクションでコピーしたウェブ/モバイルクライアントのチャネル設定の
botOptionsを設定します。botOptions.botInfobotOptions.clientIdbotOptions.clientSecret
要件に応じて他の変更内容を加えます。
- 次を開きます。
kore-widgets-config.js - 上記のセクションでコピーしたウィジェットSDKのチャネル設定の
botOptionsWizを設定します。botOptionsWiz.botInfobotOptionsWiz.clientIdbotOptionsWiz.clientSecret
要件に応じて他の変更内容を加えます。
- ブラウザで
index_widgets_chat.htmlファイルを開き、ウィジェットと共にチャットウィンドウを表示します。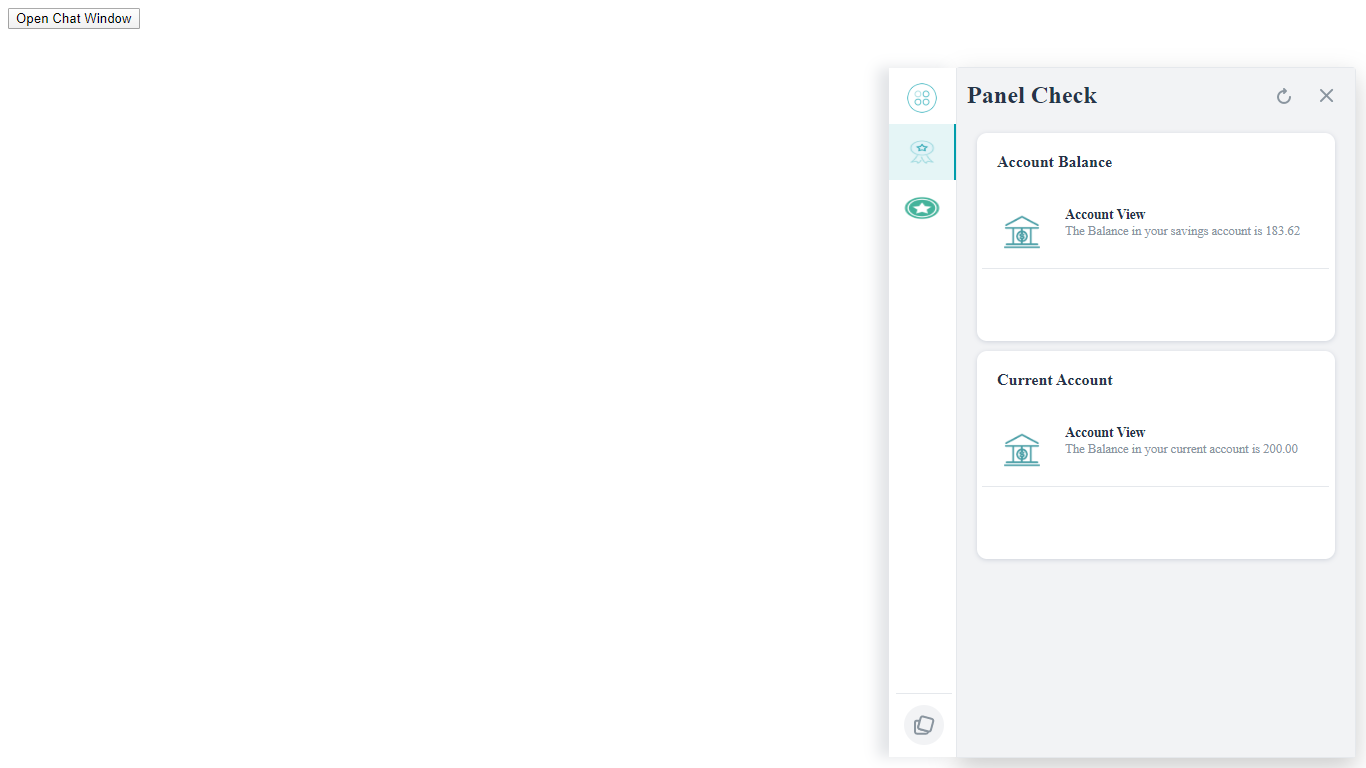
- パネルを個別にホストする場合は、
index_widgets.htmlファイルを使用します。ウェブサイトで同じものをホストする方法については、GitHubを参照してください。