To add Twilio SMS as a channel, you must set up a Programmable SMS app, define the messaging service, and associate the bot with a Twilio Phone Number. When you add the Twilio channel to your bot, end-users for your bot can interact with your bot using text messages.
To add the Twilio SMS channel, follow the below steps:
- Setup Account – Login to Twilio developer portal and set up an account.
- Setup Messaging Service – In the Programmable Messages section, create a messaging service
- Add Phone Number – Associate a Twilio Phone Number to your bot.
To add the Twilio Channel, follow the below steps:
The following procedure requires an active Twilio account for developers with access to the Twilio Console. For more information, refer to Creating a Twilio Trial Account later in this topic.
- In Bots section of the Bot Builder, click the bot that you want to add the Twilio SMS channel to.
- On the Channels tab, click the Twilio SMS icon. The Twilio SMS Channel page is displayed.
- Login to Twilio developer portal.
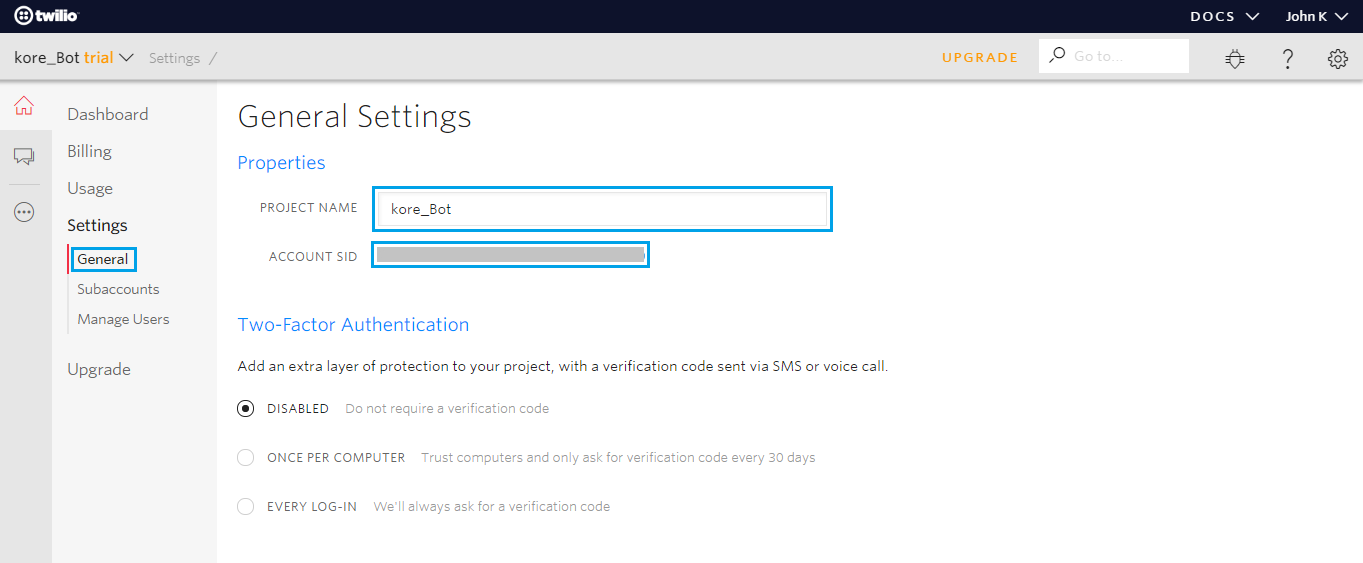
- Under the Settings section, click the General tab.
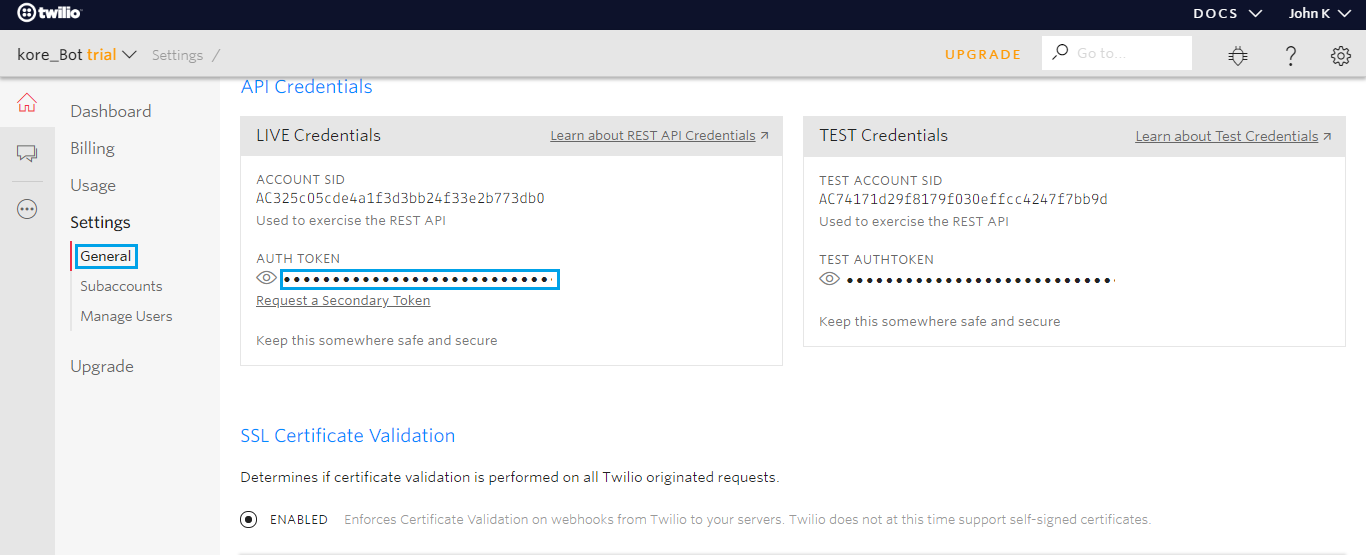
- Create your API credentials, if you have not already set up your account.
- Copy your Account SID and Auth Token and enter them in the Configurations tab of the Twilio channel page.
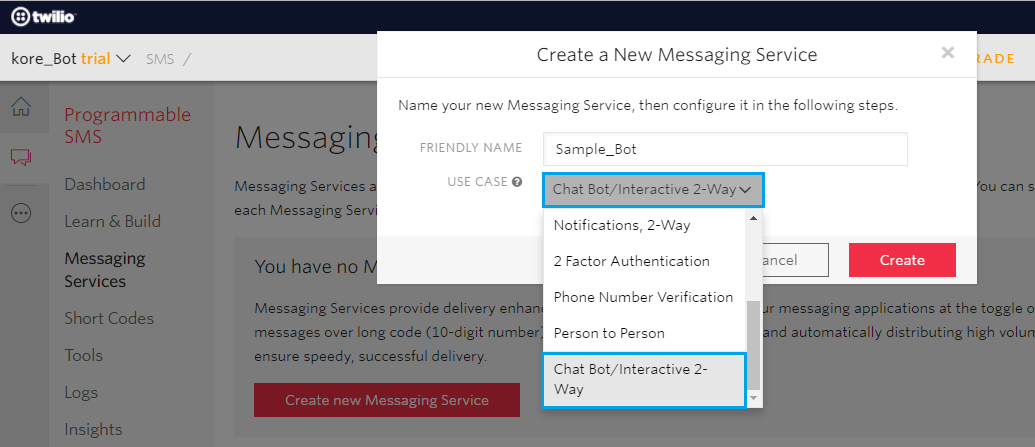
- Go to the Programmable SMS section from the All Products & Services menu.
- Click Create New Messaging Service option. Provide a name for your messaging service and select Use Case as Chat Bot/Interactive 2-way.

- After creating the service, make note of the Service SID of this service and enter it in the Configurations tab of the Twilio SMS channel page.
- Under Inbound Settings section, select the Process Inbound Messages option and update the Request URL and Fallback URL fields with the information provided in Configurations tab of the Twilio SMS channel page.
- Under Outbound Settings, update the Status Callback Request URL field with the information provided in the Configurations tab.
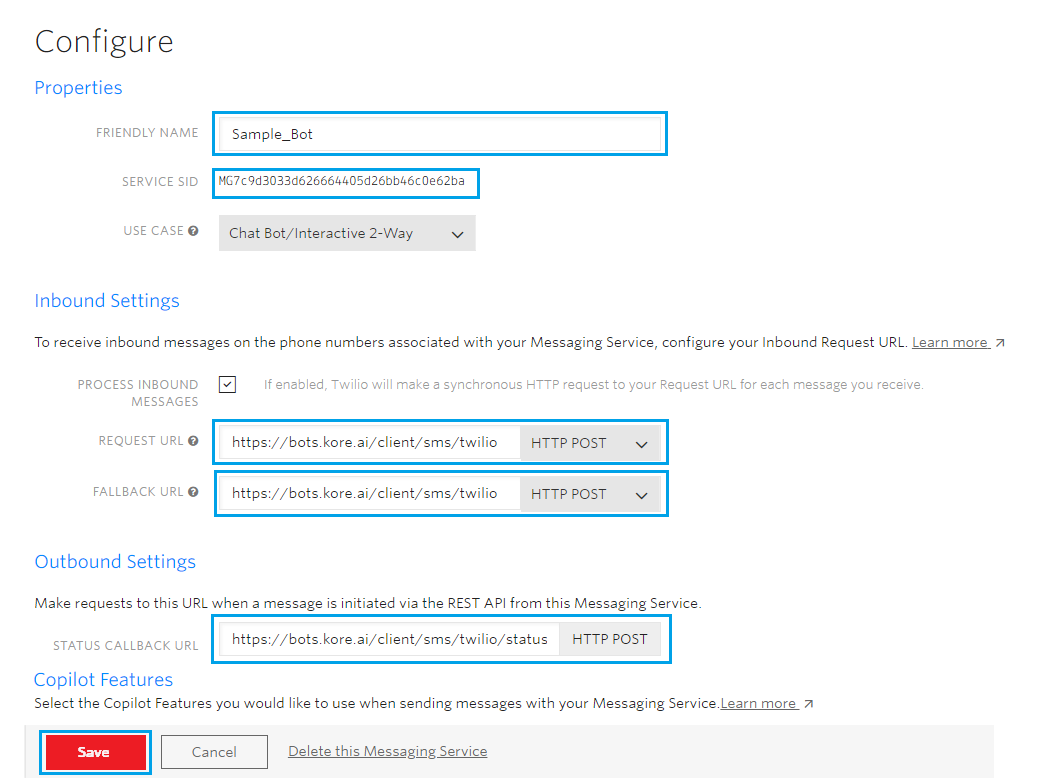
- Under Copilot Features section, make sure that Sticky Sender, MMS Converter, Scaler, Short Code Reroute, and Country Code Geomatch options are enabled.
- Save your changes and proceed.
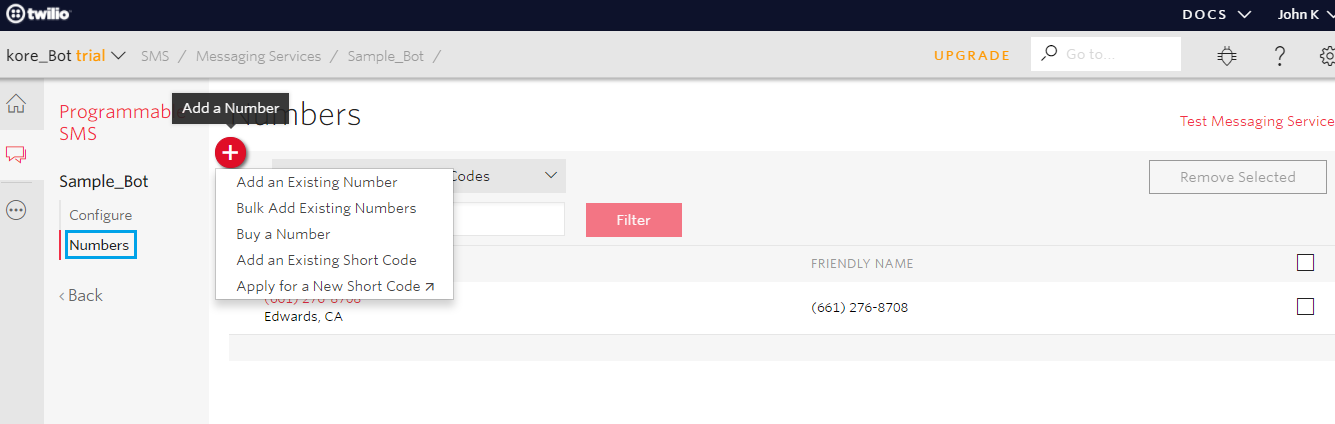
- To add a number, go to the Numbers section and associate a Twilio Phone Number to this bot. If you do not have a Twilio Number, you must buy one.
- Go to the Configurations tab in the Twilio SMS channel page to review and complete the channel setup.
Edit the Twilio Channel
To edit the Twilio channel, follow the below steps:
- Hover over the channel and click to modify.
- You can make necessary updates to your channel configurations and save them. You can also disable or delete the channel information by clicking the Settings icon.

Select one of the following commands to modify the channel:
- Disable/Enable
- Click Disable to temporarily disable the use of the Twilio SMS channel for your bot. To enable the use of the Twilio SMS channel, click Enable.
- Delete
- Click Delete.
- On the Delete Confirmation dialog box, click OK to permanently delete the bot channel configuration.
Warning: This operation is permanent, and cannot be undone.
Create a Twilio Trial Account
- You can sign up and create a free Twilio trial account at https://www.twilio.com/try-twilio.
- After you create an account, you can sign in and open the Twilio Console Dashboard.
- In the Account Summary section, you can find the Account SID and Auth Token.
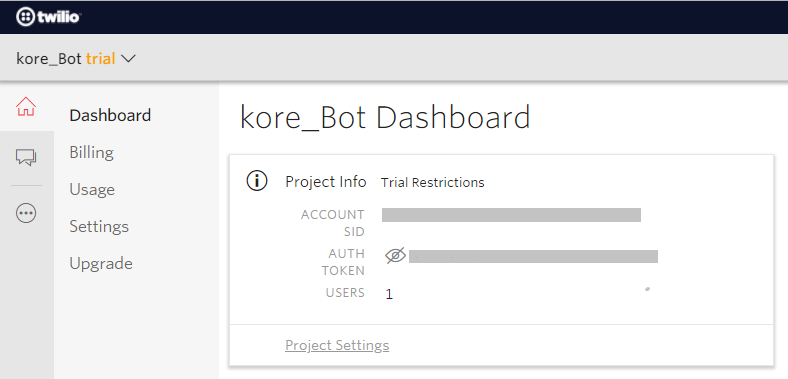
- Copy the Account SID and Auth Token and save for configuring the Twilio channel settings in Kore.ai Bot Builder. You also need a telephone number for your end users to send text message interactions to for your bot.
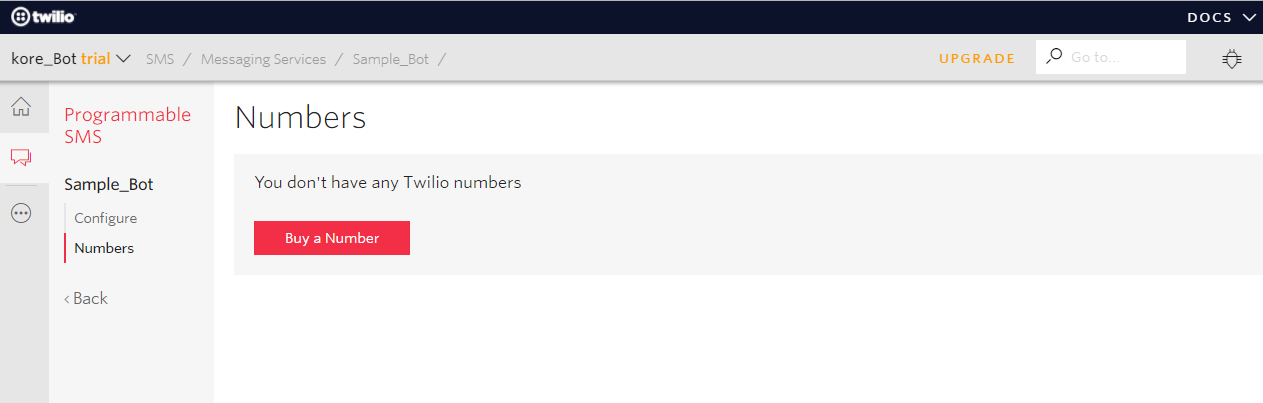
- On the Dashboard page, you can scroll down and click Numbers. The Phone Numbers Dashboard is displayed.
- Click Numbers on the left menu to display the Numbers page. Click Buy a number.
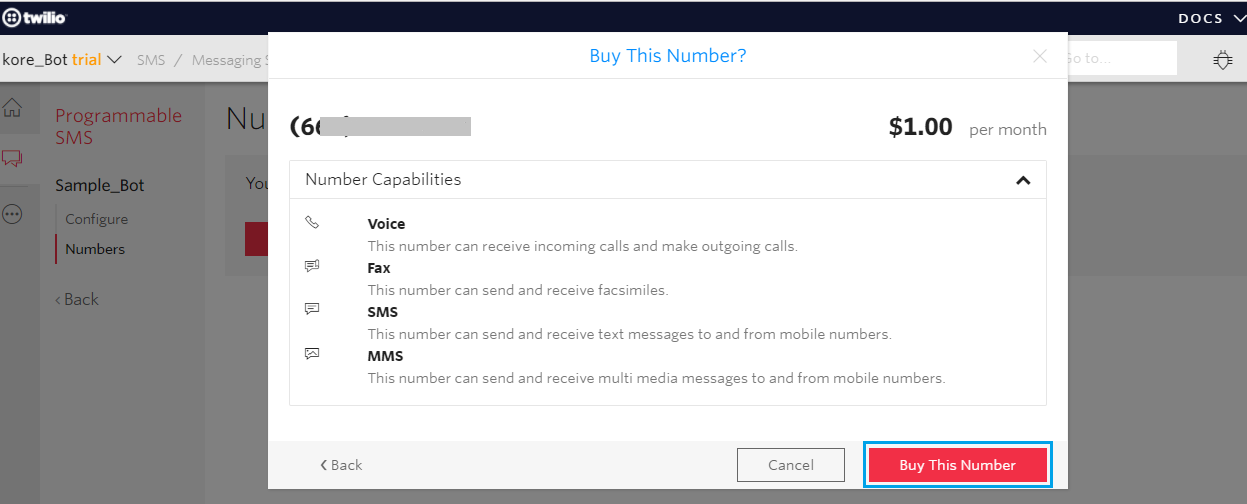
- On the Get Started with Phone Numbers page, click Get your first Twilio phone number.
- On the corresponding dialog box, you can find the phone number that you must configure the Kore.ai Twilio channel.
- Click Buy This Number to save the number to your account.
- The phone number is saved and accessible from the Home screen on the Dashboard. You are now ready to configure the Twilio channel in Kore.ai Bot Builder.