The Message Node is used to deliver a message to the user. Message nodes commonly follow an API, web service call, or webhook event to define their results as a formatted response.
You can format bot responses as below:
- Plain text: Type a message in plain text. You can use stored context values with
{{variable brackets}}. For example:'Hello {{context.session.UserContext.firstName}}. How can I help you?' - Javascript: Compose JavaScript responses either:
- For dynamically constructing messages using context and session variables.
- for displaying templates or widgets as supported by various channels.
For example, you can compose a JavaScript message for Facebook Channel to present a Carousel template. - Optionally, you can generate links to view the information in an HTML report format using templates and share the URL with the bot message.
For example, the Book Flights sample dialog uses the following message nodes:
- WeatherReport: This shows the weather details returned by the WeatherApi Service node, formatted using the LocationScript node.
- FinalFlightinfo: This shows the flight itineraries that the Flights info service node returns.
- Thanks: After showing the final flight details, prompts the user if they have any other request.
Set up a Message Node
Setting up a Message node in a dialog task involves the following steps.
Add a Message Node to the Dialog Task
- Open the Dialog Task in which you want to add the Message node.
- Click the
 icon next to the respective node.
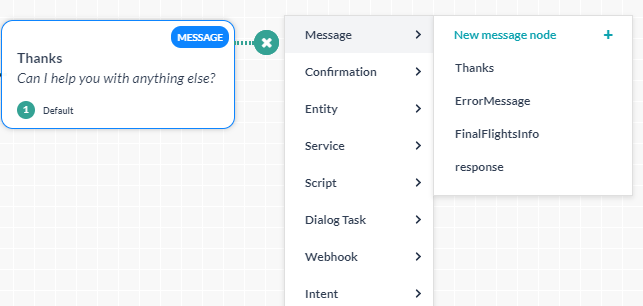
 - Select Message > New message node. You can also select an existing message node from the list.
- The Message window is displayed with the Component Properties tab selected by default.
Configure the Bot Response
- On the Component Properties tab, under the General Settings section, enter a Name and Display Name for the message node.
- Under the Bot Responses section, compose and format the bot response either as plain text or as a JavaScript message. A default message is set by the platform, you can customize it in the following ways:
- Edit the message directly and click Enter. The message is saved in plain text format.
- Click Manage Responses. On the Bot Responses page:
- To edit the default sample message by adding context object variables or javascript code, click the sample message and make changes.
- To add a new bot response, click Add Bot Response.
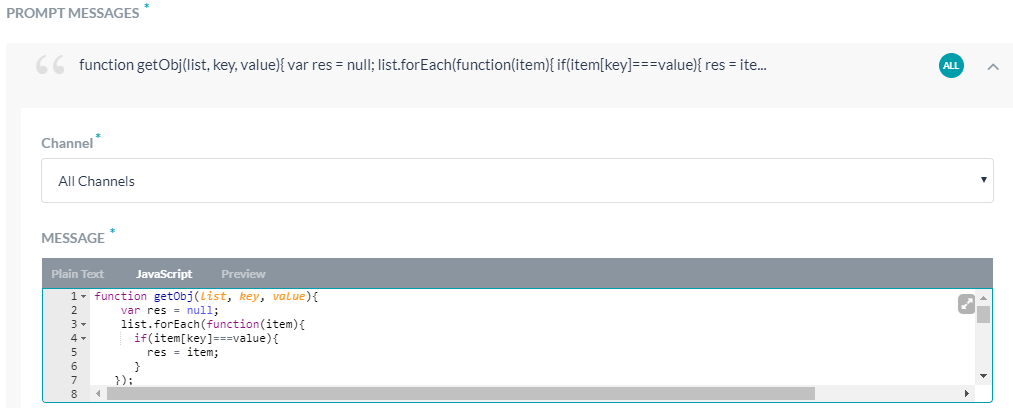
- On the New Prompt Message window, in the Channel drop-down list, All Channels is selected by default.
- To create a channel-specific message, select the channel from the list.
- In the Message Editor, the Plain Text tab is the default selection. If you want to compose a Javascript message, click the JavaScript tab.
Note: You can use any value that is currently stored in the context. For example,print('Hello'+ context.session.UserContext.firstName+ '. How can I help you')
- Compose the message and click Save.
To add more bot responses, follow the below steps:
Generate Message as Report Link (Optional)
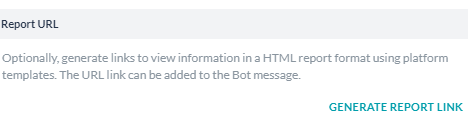
The Message node allows you to generate links to view the information in an HTML report format using templates. The URL link is added to the bot message. When you add a link to a bot response, the users can select the link and get more details, such as a table of values for Closed Sales Opportunities in the SalesForce Bot.
To generate a report link, follow the below steps:
- On the Component Properties tab, under the Report URL section, click Generate Report Link.
- On the Generate Report dialog box, enter the following values:
- Link Title – The link text displayed in the bot channel. For example, View Shopping Cart.
- Header – The title of the report. For example, These are the items in your Shopping Cart.
- Details – End-user help information displayed directly below the header, describing the content of the report. For example, Review your Shopping Cart, and then click Continue when you are ready to place your order.
- Data Path – Path for the data, usually the response from the web service. For example, context.ShoppingCartService.response.body
- Template – Select one of the following format templates to display the data from the task response. For each type, define the Column Name, Key Mapping, Data Type, and template-specific options.
- Table – Uses a table format with defined columns. Each mapping for the Table template is set to Is Sortable, Display as an image, and Display it as a link. For more information, refer to Defining a Table Report.
- Fixed Column Table – Uses a table format with one or more columns fixed. Each mapping for the Fixed Column Table template is set to Is Sortable, Column in fixed, Display as an image, and Display it as a link. For more information, refer to Defining a Fixed-Column Table Report.
- Card Layout – Uses a contact card format. Each mapping for the Card Layout template is set to Is Sortable, Display as an image, and Display it as a link. For more information, refer to Defining a Card Layout Report.
- Weather Info – Define a date for a weather service response payload. Each mapping for the Weather Info template is set to Is Sortable, Display as an image, and Display it as a link. For more information, refer to Defining a Weather Info Report.
- Card Layout with Group By – Shows a list of items grouped by a specific field. For more information, refer to Define a Card Layout with Group By Report.
- Click Save.
Configure the Variable Namespace
(introduced in v8.0)
- In the Variable Namespaces section, associate the variable namespaces to execute this node and its transitions. This option is visible only when the Variable Namespace is enabled for the bot. You can go with the task level settings or customize it for this node. For more information, refer to Managing Namespace.
Configure the Instance Properties
- On the Message window, click the Instance Properties tab.
- Under the Interruptions Behavior section, you can configure the interruptions behavior for this node.
Note: The settings in the Instance Properties tab are specific to the current task and do not reflect in other dialog tasks that use this entity node.- Use the task level ‘Interruptions Behavior’ setting: The bot refers to the Interruptions Behavior settings set at the dialog task level.
- Customize for this node option: You can customize the Interruptions Behavior settings for this node by selecting this option and configuring the same. Refer to Interruption Handling and Context Switching article for more information.
- Under the Custom Tags section, add tags to build custom profiles of your bot conversations. Click here for more.
Configure the Connections Properties
From the node’s Connections tab, you can determine the node in the dialog task to execute next. You can write the conditional statements based on the values of any Entity or Context Objects in the dialog task, or you can use intents for transitions.
To setup Component Transitions, follow these steps:
- On the Message window, click the Connections tab.
- On the Connections tab, under the Connection Rules section, you can select nodes from the Default drop-down list.
- To configure a conditional flow, click Add IF.
- Configure the conditional expression based on one of the following criteria:
- Entity: Compare an entity node in the dialog with a specific value using one of these operators: Exists, equals to, greater than equals to, less than equals to, not equal to, greater than, and less than. Select the entity, operator using the respective drop-down lists, and type the number in the Value box. For example, PassengerCount (entity) greater than (operator) 5 (specified value).
- Context: Compare a context object in the dialog with a specific value using one of these operators: Exists, equals to, greater than equals to, less than equals to, not equal to, greater than, and less than. For example, Context.entity.PassengerCount (Context object) greater than (operator) 5 (specified value).
- Intent: Select an intent that matches the next user utterance.
- In the Then go to drop-down list, select the next node to execute in the dialog flow if the conditional expression succeeds. For example, if the PassengerCount (entity) greater than (operator) 5 (specified value), Then go to Offers (sub-dialog).
- In the Else drop-down list, select the node to execute if the condition fails.
Configure the IVR Properties
You can use this tab to define the input mode, grammar, prompts, and call behavior parameters for this node to use in IVR Channel. It is done at the node level. Click here for details