Chatbot Overview
Conversational Bots
Intents & Entities
Intelligent Bots
Kore.ai's Approach
Kore.ai Conversational Platform
Bot Concepts and Terminology
Natural Language Processing (NLP)
Bot Types
Bot Tasks
Starting with Kore.ai Platform
How to Access Bot Builder
Working with Kore.ai Bot Builder
Building your first Bot
Getting Started with Building Bots
Using the Dialog Builder Tool
Creating a Simple Bot
Release Notes
Latest Updates
Older Releases
Deprecations
Bot Builder
Creating a Bot
Design
Develop
Storyboard
Dialog Task
User Intent Node
Dialog Node
Entity Node
Supported Entity Types
Composite Entities
Supported Time Zones
Supported Colors
Supported Company Names
Form Node
Logic Node
Message Nodes
Confirmation Nodes
Service Node
Custom Authentication
2-way SSL for Service nodes
Script Node
Agent Transfer Node
WebHook Node
Grouping Nodes
Connections & Transitions
Managing Dialogs
Prompt Editor
Alert Tasks
Alert Tasks
Ignore Words and Field Memory
Digital Forms
Digital Views
Knowledge Graph
Terminology
Building
Generation
Importing and Exporting
Analysis
Knowledge Extraction
Small Talk
Action & Information Task
Action Tasks
Information Tasks
Establishing Flows
Natural Language
Overview
Machine Learning
ML Model
Fundamental Meaning
NLP Settings and Guidelines
Knowledge Graph Training
Traits
Ranking and Resolver
NLP Detection
Bot Intelligence
Overview
Context Management
Session and Context Variables
Context Object
Dialog Management
Sub-Intents
Amend Entity
Multi-Intent Detection
Sentiment Management
Tone Analysis
Sentiment Management
Default Conversations
Default Standard Responses
Channel Enablement
Test & Debug
Talk to Bot
Utterance Testing
Batch Testing
Record Conversations
Publishing your Bot
Analyzing your Bot
Overview
Dashboard
Custom Dashboard
Conversation Flows
Bot Metrics
Advanced Topics
Bot Authorization
Language Management
Collaborative Development
IVR Integration
Data Table
Universal Bots
Defining
Creating
Training
Customizing
Enabling Languages
Smart Bots
Defining
Sample Bots
Github
Asana
Travel Planning
Flight Search
Event Based Bot Actions
koreUtil Libraries
Bot Settings
Bot Functions
General Settings
PII Settings
Customizing Error Messages
Bot Management
Bot Versioning
Using Bot Variables
API Guide
API Overview
API List
API Collection
SDKs
SDK Overview
SDK Security
SDK App Registration
Web SDK Tutorial
Message Formatting and Templates
Mobile SDK Push Notification
Widget SDK Tutorial
Widget SDK – Message Formatting and Templates
Web Socket Connect & RTM
Using the BotKit SDK
Installing
Configuring
Events
Functions
BotKit SDK Tutorial – Agent Transfer
BotKit SDK Tutorial – Flight Search Sample Bot
Using an External NLP Engine
Bot Administration
Bots Admin Console
Dashboard
User Management
Managing Users
Managing Groups
Managing Role
Bots Management
Enrollment
Inviting Users
Bulk Invites
Importing Users
Synchronizing Users from AD
Security & Compliance
Using Single Sign-On
Security Settings
Cloud Connector
Analytics
Billing
How Tos
Creating a Simple Bot
Creating a Banking Bot
Transfer Funds Task
Update Balance Task
Context Switching
Using Traits
Schedule a Smart Alert
Configure Digital Forms
Add Form Data into Data Tables
Configuring Digital Views
Add Data to Data Tables
Update Data in Data Tables
Custom Dashboard
Custom Tags to filter Bot Metrics
Patterns for Intents & Entities
Build Knowledge Graph
Global Variables
Content Variables
Using Bot Functions
Configure Agent Transfer
  1. Home
  2. Docs
  3. Bots
  4. Bot Building
  5. Action & Info Task
  6. Defining a Table Report

Defining a Table Report

With some tasks, you may want to add a link to a message sent to a user that contains data too large for a message, for example, an message with a picture, abstract, and a link to a full article or report. This topic describes how to define a table report with variable width columns.
The table report type can be displayed to an end-user when the URL for this table is clicked in a message. In the following illustration, the message sent to the end-user contains a link to the table report called Your Daily Tasks.
DIYBotBuilderAlertReportTasksTableReportTask
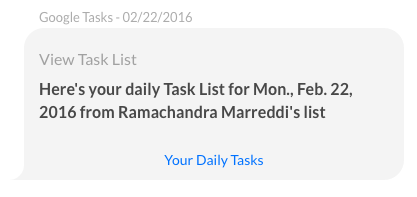
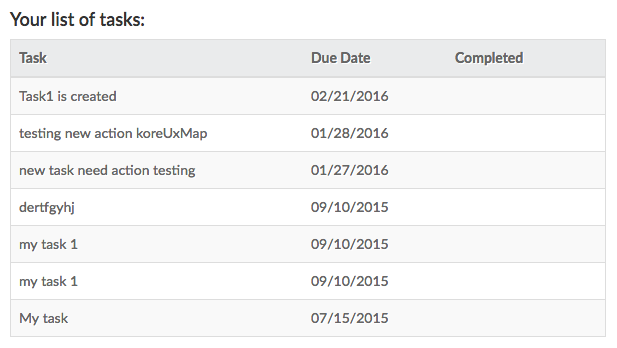
When the user clicks the link in the message, a table report with variable width columns shows the data for the columns defined with a table header, optional table description, and a header row as shown in the following illustration for the Your list of tasks report.
DIYBotBuilderAlertReportTasksTableReport
To define a table report
To complete the following procedure, you must have already defined a task, such as an alert task, or information task, that you want to add a table report link to. Complete the steps in the following procedure to define a table report with variable width columns.

  1. In Bot Builder, select the task for the Bot that you want to add a table report link to.
    Note: Only unpublished tasks can be modified.
  2. Click the Settings  icon, and then click Edit.
  3. On the Bot Response tab for the task that you want to add a table report to, click the Expand  icon for the Report Template Definition section.
  4. In the Link Title field, enter the link text to display to the end-user in the task post, for example, Your Task List.
  5. In the Header field, enter the title of the report to display when the table report is displayed to the end-user.
  6. In the Details field, optionally enter any end-user help information displayed directly below the Header in the report, for example, This is a list of your daily Google Tasks.
  7. In the Template drop-down list, select Table.
  8. Click Edit Template. The Table Configuration dialog is displayed.
  9. Click Add Column. The Column Configuration dialog is displayed as shown in the following illustration.
    Table Report Template - Column Configuration
    Table Report Template - Column Configuration 2
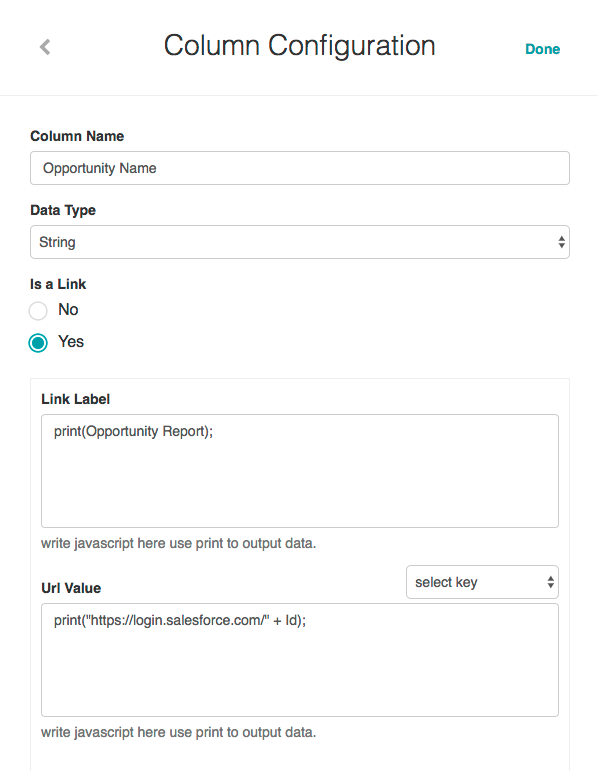
  10. In the Column Name field, enter the first column title, for example, Task.
  11. In the  Data Type field, select one of the following data types for the information displayed in the column:
    1. String
    2. Number
    3. Date
  12. Enable Is a link if the data in the column is a hyperlink. When enabled:
    1. In the Link Label field, enter the JavaScript to display the text for the link, for example, print(Name); .
    2. In the URL Value field, enter the JavaScript to display the data to output when the Link Label is clicked, for example, print("https://login.salesforce.com/" + Id);
  13. If Is a link is not enabled, then enter the JavaScript to display the value for the column, for example,
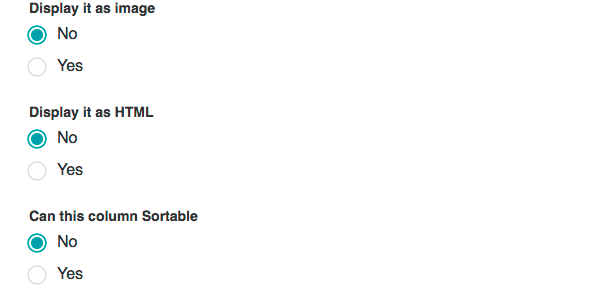
 print(StageName);.
  14. In the Display it as an image section, select Yes if the column value is an image.
  15. In the Display it as HTML section, select Yes if the column value contains HTML content.
  16. In the Is this column Sortable section, select Yes if the end-user should be able to sort the column.
  17. Click Done. The Table Configuration dialog is displayed with the new column added as shown in the following illustration.
    Table Configuration Dialog
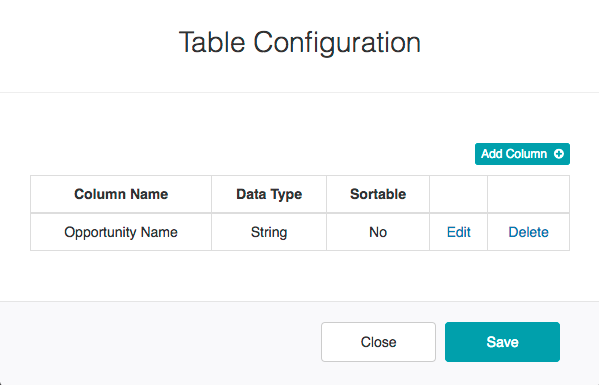
  18. Repeat Steps 9 – 17 for each additional column in the report, click Save to save the column configurations, and then click Close.
  19. In the Report Template Definition section, click Save to save the table report

The table is saved Successfully saved response data message is displayed at the top of the page.

Menu