To add Amazon Alexa as a channel to your Kore.ai bot, you must extract supported Dialog Tasks of this bot from the Configurations tab and add to your Amazon Alexa’s Skills. Additionally, you must configure your bot’s Webhook URL as your Alexa Skill Set’s Service Endpoint for the platform to receive messages.
Note: Alexa as a channel must be enabled for bots that are specifically built to work on voice-based channels. Review the following constraints before enabling Alexa as a channel for this bot:
- Enterprise bots that require the user’s authorization to communicate with the bot are not supported.
- If your dialog tasks require the user’s authorization to communicate with external systems, then the platform will push a card with URL information to the Alexa app.
- Intents and entities of only Published Dialog Tasks can be exported to Amazon Alexa. Ensure that your intents and entities adhere to the naming guidelines of Amazon Alexa.
- Not all entity types available in the Kore.ai platform are currently available in Alexa. Verify that your tasks contain Alexa-supported entities for optimal user experience.
- Ensure that your dialog tasks contain one or more utterances.
- If you want to display bot response as templates on supported devices like Echo Show, you must define channel-specific responses/prompts.
- Ensure that your dialog tasks contain the Bot Message node as the last node only. Alexa marks a task as completed if a bot message is displayed without expecting any input from the user.
- Webhook Nodes work asynchronously and are currently not supported.
- Amazon Alexa executes one task at a time and hence Hold & Resume functionality is not supported.
To add the Amazon Alexa channel to your bot, you must:
- Add a New Skill – To enable the Alexa channel to your Kore.ai bot, create a new Alexa skill in the Amazon developer console.
- Configure Interaction Model – Alexa skill can be built in one of the following ways:
- Dialog Migration to extract the dialog tasks from Kore.ai and import them into Amazon Alexa’s Skills. This will entail re-import for reflecting ongoing changes in the dialog definition. Intent detection and execution are primarily controlled by Alexa.
- Redirection to create a single intent in your skill with one SearchQuery slot that accepts user inputs and redirects them to your Kore.ai bot. Intent detection and execution are primarily controlled by the Kore.ai bot.
- Enable Account Linking – To access end user’s authentication details to make API calls to external services. This step is optional.
- Enable Webhook Integration – To integrate Amazon Alexa with your Kore.ai bot, enable webhook integration by copying the Webhook URL provided on the Configurations tab of the Amazon Alexa Channel page in the bot builder and select HTTPS as Service Endpoint type.
- Enable Channel – After completing the integration setup, enable the channel.
- Test Integration – Once the channel is enabled, to validate a successful integration, test any intent utterance using the Test tab of your Alexa Skill and check its responses for the given test utterances.
- Publishing Information, Privacy & Compliance, and Certification – You must publish your Alexa Skill on Alexa App and provide details for Privacy and Compliance to enable Skills Beta Testing that allows you to invite your co-developers to test your app. You must also submit your Skill to Amazon for certification to enable your skill to become visible on Alexa Skills on Amazon App Store after it is certified.
To add the Amazon Alexa Channel, follow the below steps:
- In the Bots section of the Bot Builder, click the bot you want to add the Amazon Alexa channel to.
- On the Channels tab, click the Amazon Alexa icon. The Amazon Alexa Channel page is displayed.
- In a new browser tab, log in to your Amazon Developer Portal and click the Alexa tab. Choose Skills from Your Alexa Console and click Create Skill. To enable the Alexa channel, you must have or register for an Amazon Developer account.

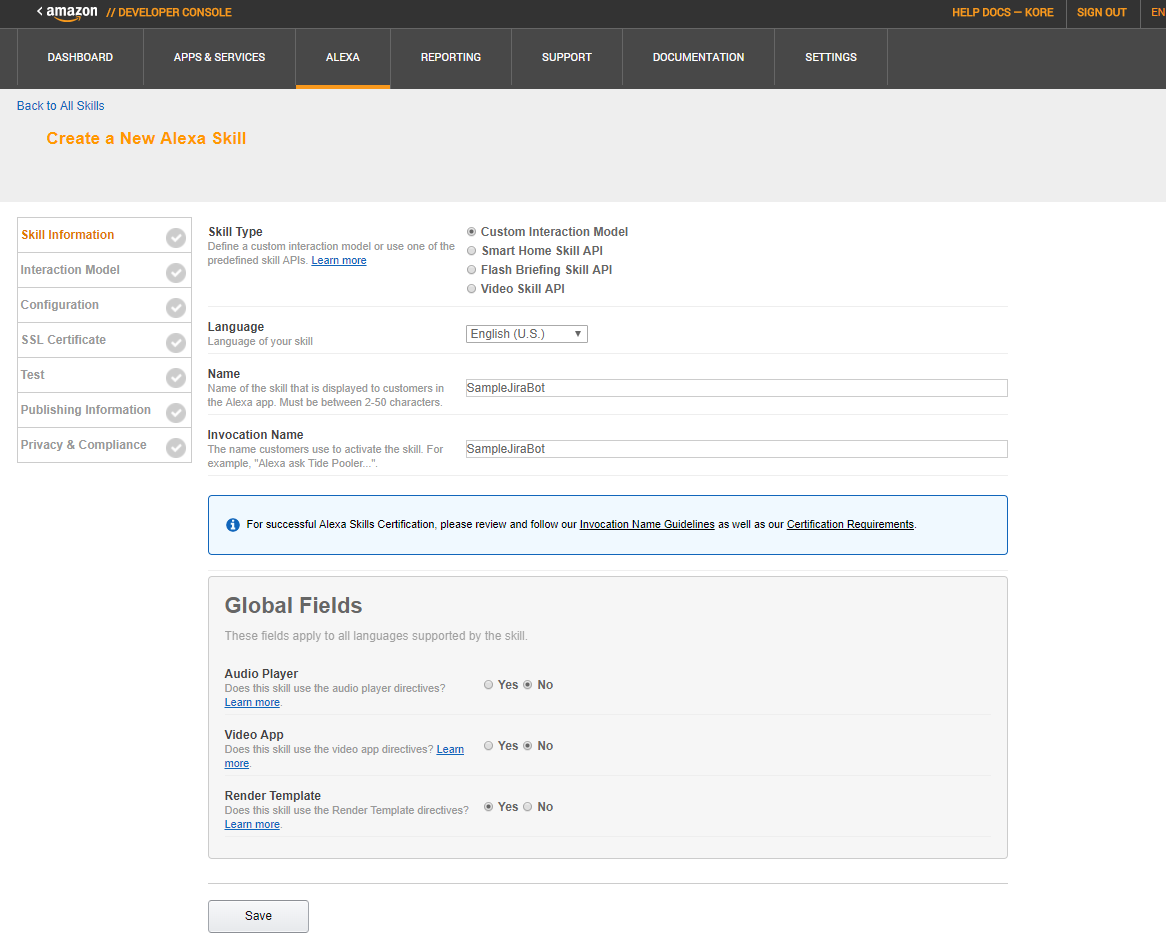
- In Create a New Alexa Skill section, enter the required information in the respective fields. If you want to display templates on Alexa-supported devices, select the Yes for Render Template option in the Global Fields section as shown in the image.
- Click Save to create a new skill and click Next to proceed.
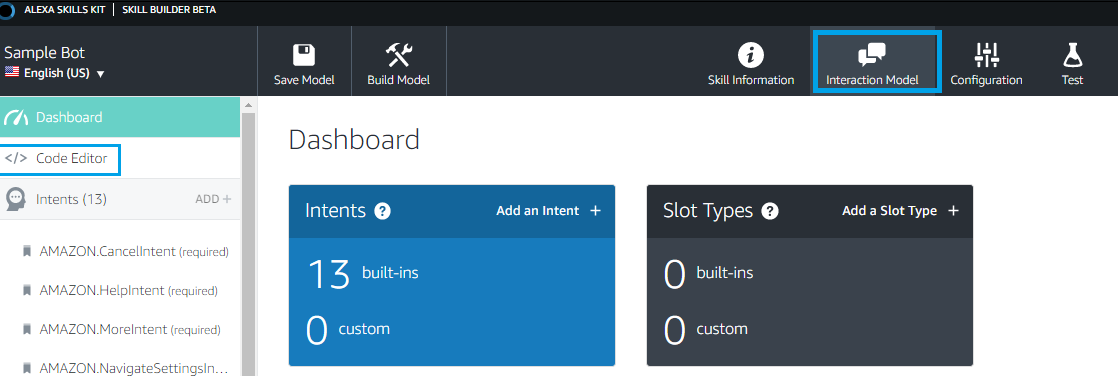
- Now, from the Interaction Model tab, select Launch Skill Builder. You are redirected to the Dashboard section of Skill Builder. Select the Code Editor tab from the left pane.
- In Code Editor, define the intents and entities to associate with your newly created skill. For this, click the Configurations tab of the Amazon Alexa channel page in the bot builder and download the JSON file containing intents and entities of all supported dialogs in this bot. Go back to the Code Editor section in the Developer console and Upload the JSON file and click Apply Changes.
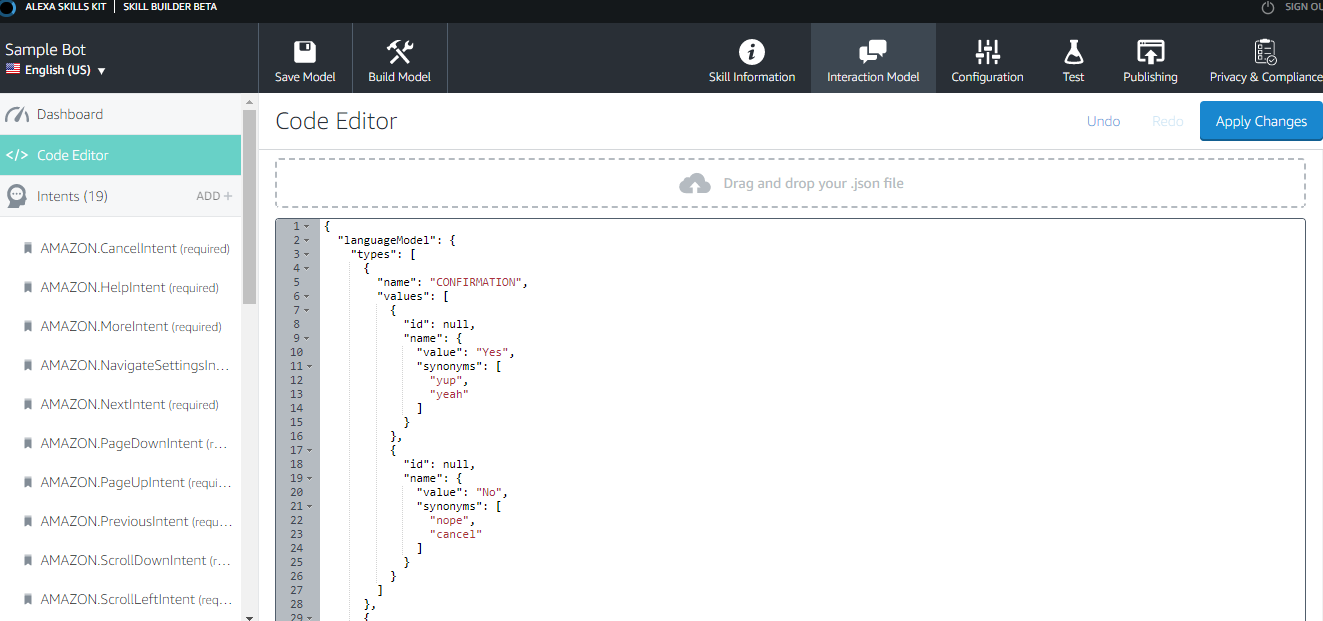
- Review and ensure that there are no errors in your code and click Save Model > Build Model.
Note: It takes 2-5 mins for the Model to build. Any changes implemented to the built model must be followed by rebuilding the model.
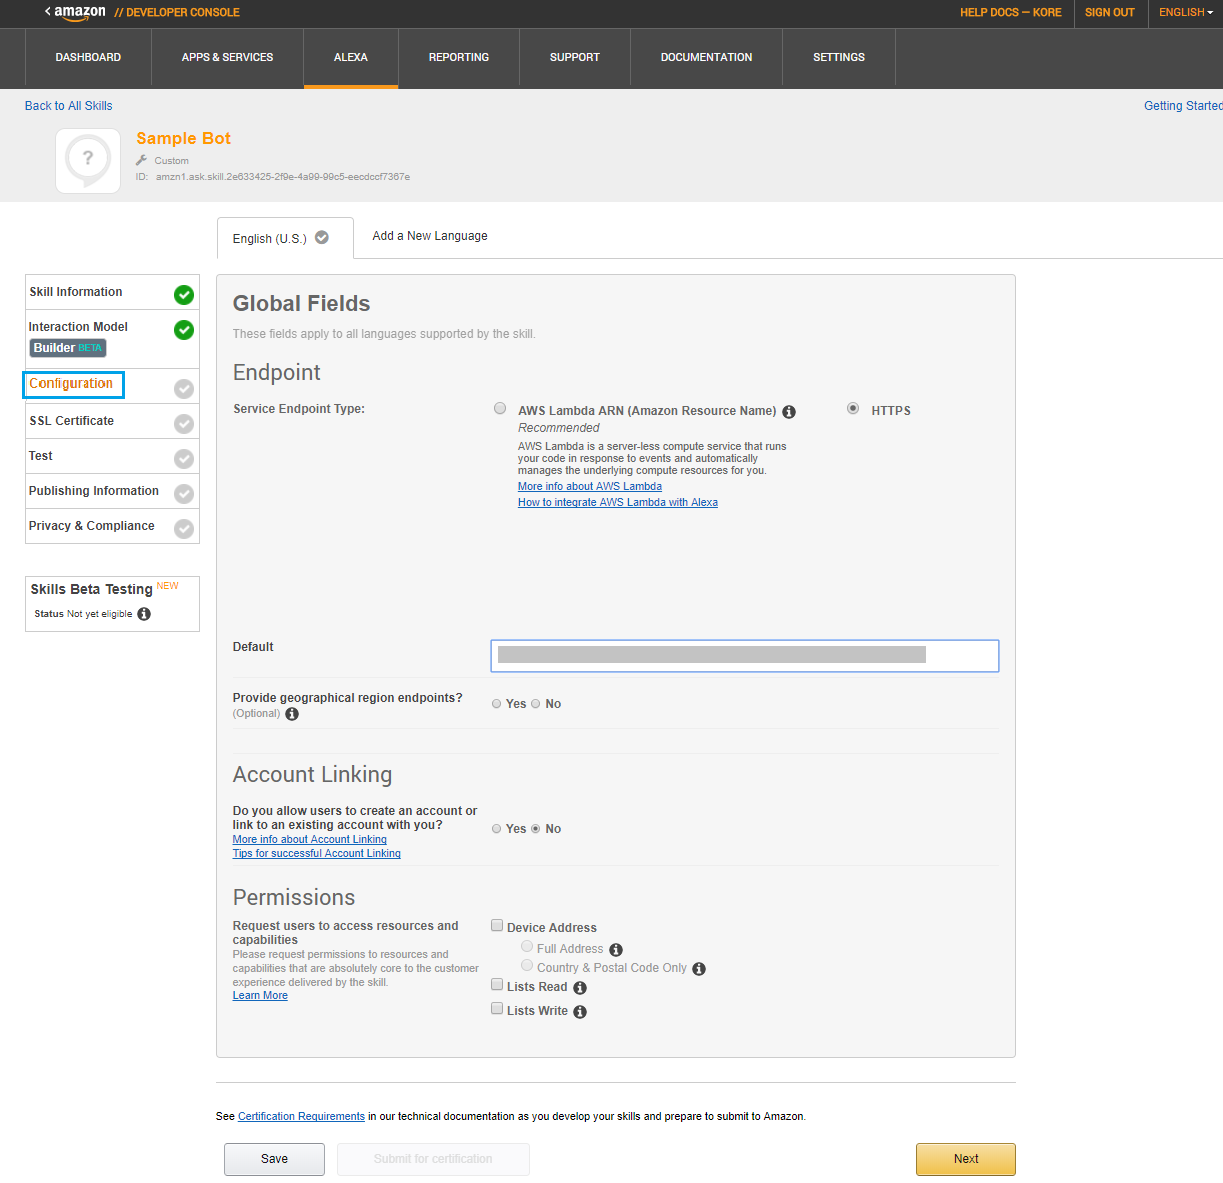
- To enable webhook integration, click the Configuration tab to go back to the Developer Console. In the Global Fields – Endpoint section, select HTTPS as the Service Endpoint Type. Copy the Webhook URL provided in the Configurations tab of the Amazon Alexa channel page in the bot builder and enter it in the Default textbox.
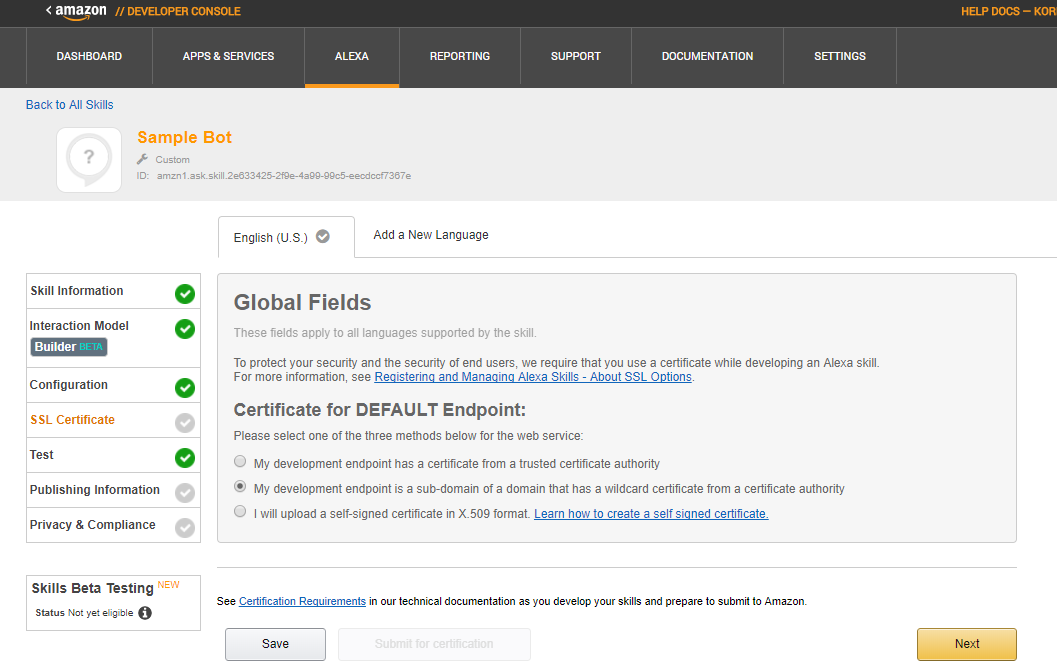
- Click Next to save changes and go to the SSL Certificate tab.
- In the SSL Certificate tab, select the option My development endpoint is a sub-domain of a domain that has a wildcard certificate from a certificate authority.
- Click Next to save changes and to go to the Test tab.
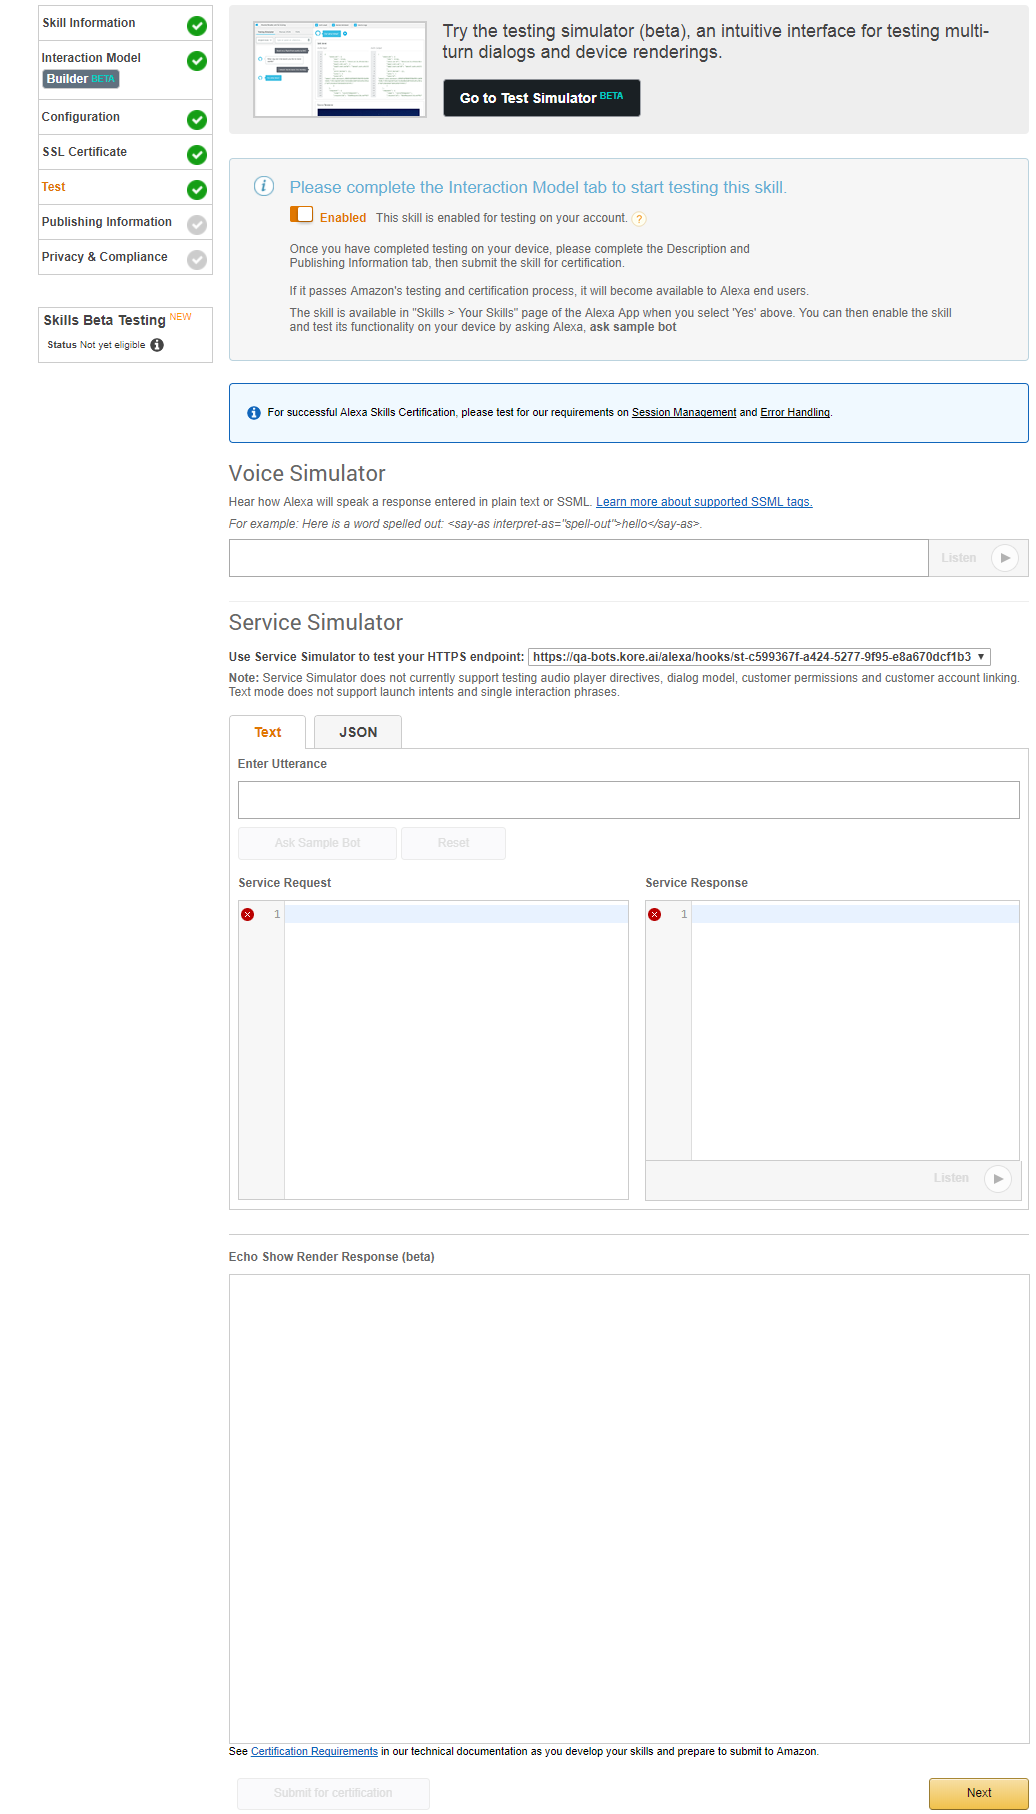
- Before you can start testing your bot on Alexa, you must complete the channel setup. Go to the Configurations tab of the Amazon Alexa channel page, review the details and select Yes; click Save to enable Amazon Alexa Channel.
- Once done, you can use the Test tab of your Alexa Skill to test your utterances against the integration. In the Test tab, go to the Service Simulator section and provide any intent utterance and click Ask <skill-name> to test the utterance. If you get a successful response then the integration is considered a success.
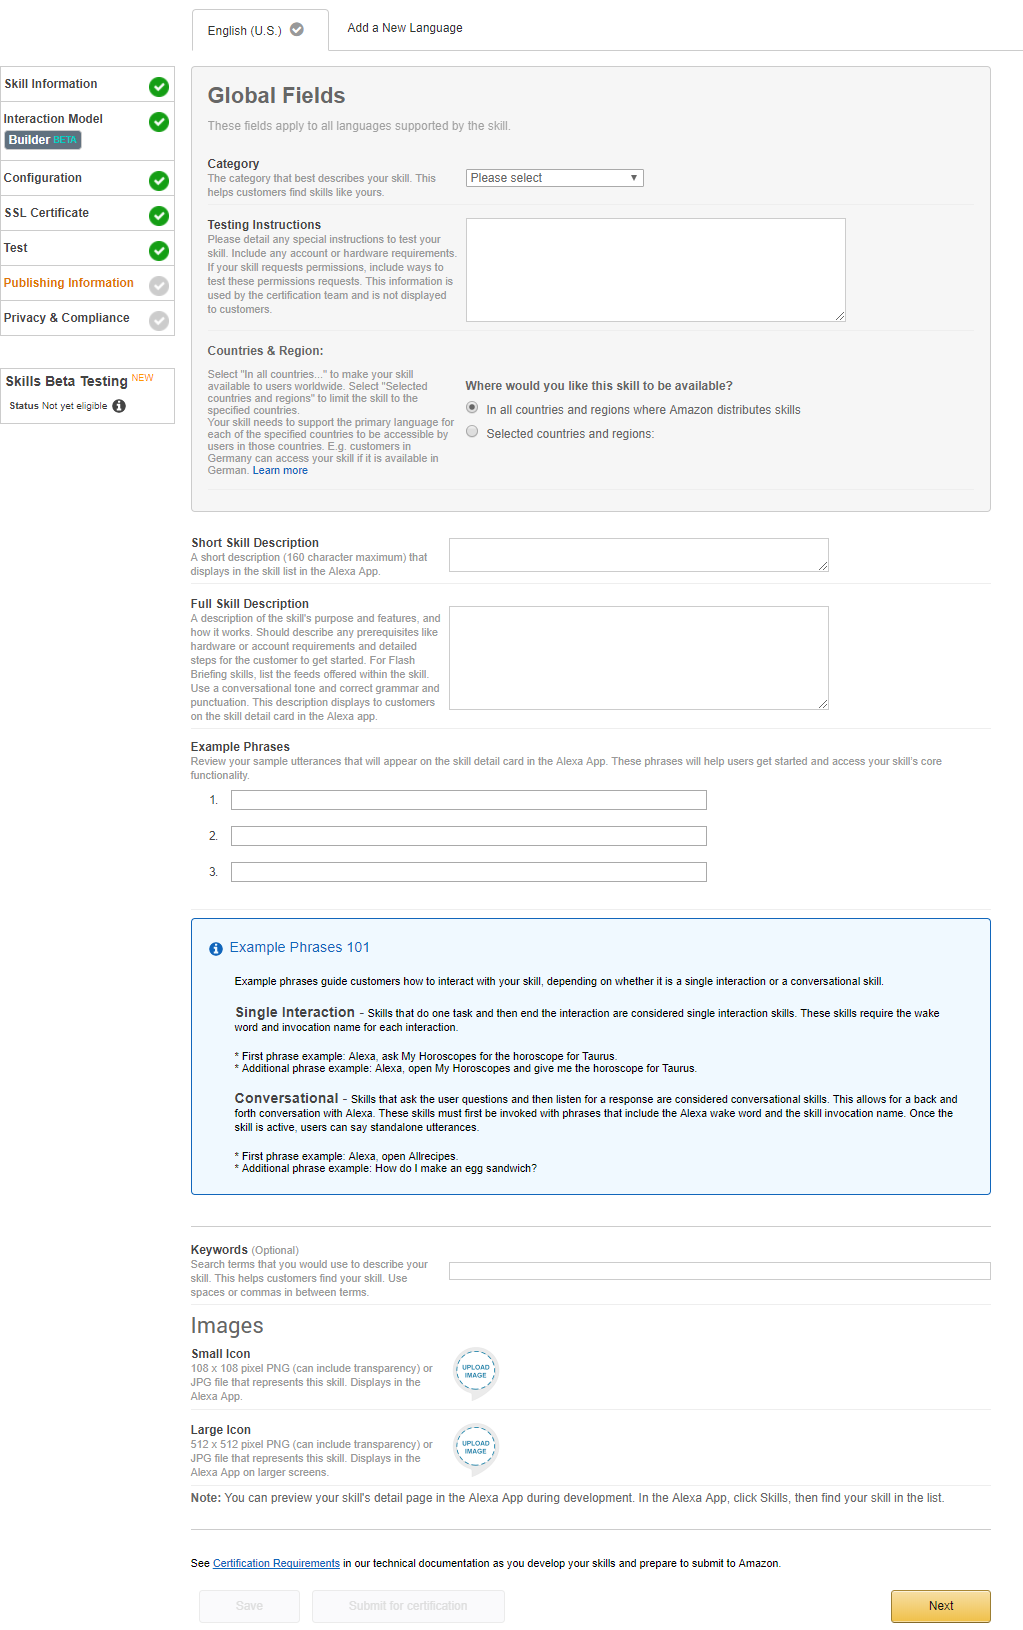
- Now, go to the Publishing Information tab and provide all the required details for publishing your Alexa Skill on Alexa App and Save the details.
- Next, go to the Privacy & Compliance tab and provide all the required details requested and click Save. After completing these steps, the Skills Beta Testing option is enabled and this allows you to invite your co-developers to test your app.
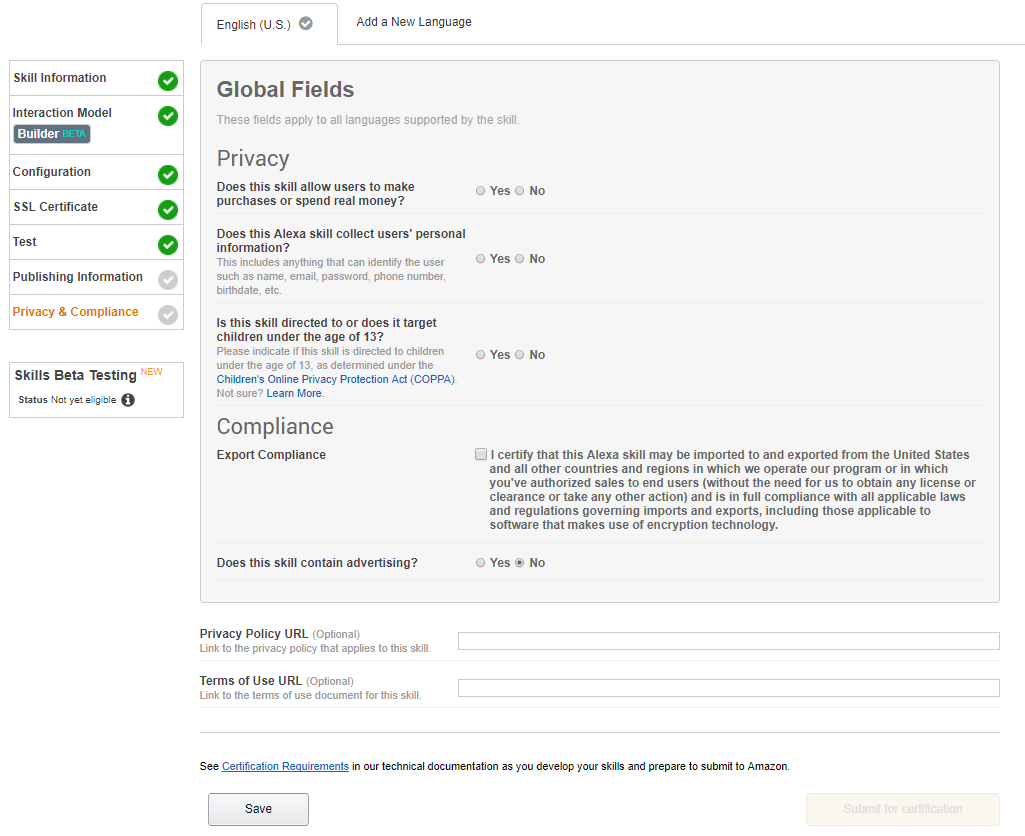
- When you are ready to submit your Skill to Amazon, click Submit for Certification. Your skill will be visible on Alexa Skills on Amazon App Store after it is certified.
Edit Amazon Alexa Channel
To edit the Amazon Alexa channel, follow the below steps:
- Hover over the channel to modify, and then click the Settings icon to display the command menu as shown in the following image.
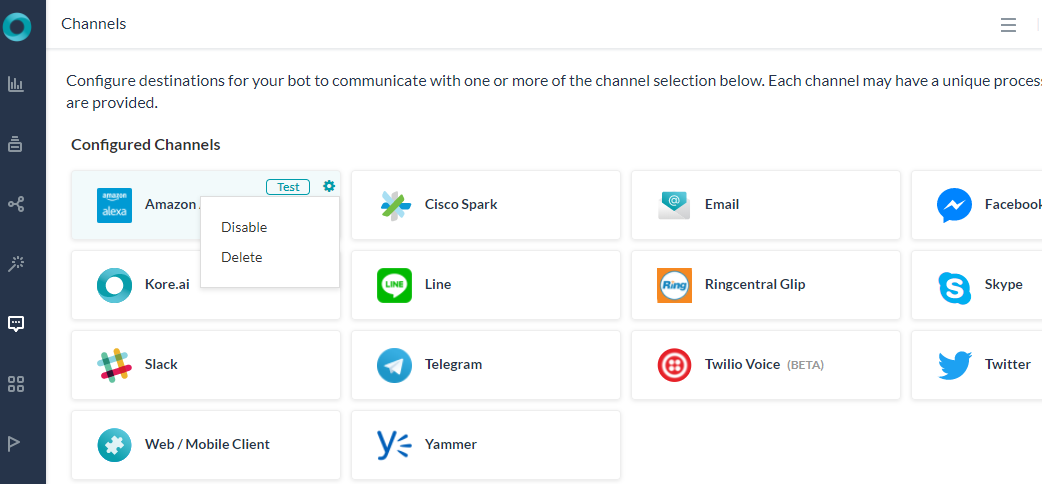
Select one of the following commands to modify the channel:
- Disable/Enable – Click Disable to temporarily disable the use of the Amazon Alexa for your bot. To enable the use of the Amazon Alexa channel, Click Enable.
- Delete – Click Delete. On the Delete Confirmation dialog box, click OK to permanently delete the bot channel configuration.
Warning: This operation is permanent and cannot be undone.