With some tasks, you may want to add a link to a message sent to a user that contains data too large for a message, for example, a list of search items with abstracts and then a link to a detailed list of those search items. This topic describes how to define a shopping cart layout report that can also be defined with action tasks.
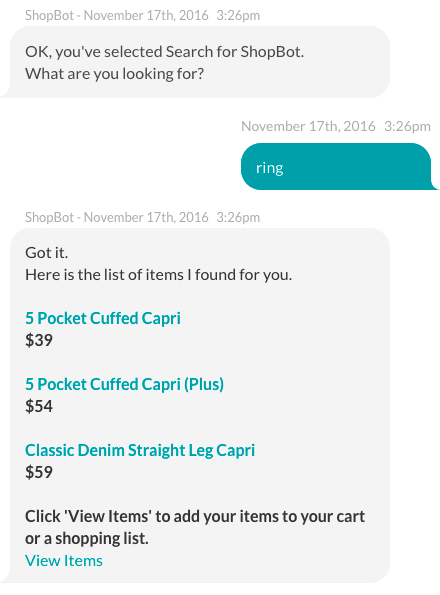
The shopping cart layout with actions report type can be displayed to an end-user when the URL for this report type is clicked in a message. In the following illustration, the message sent to the end-user contains a link to the shopping cart layout with actions report called View Items. The message contains an abbreviated list of search results.
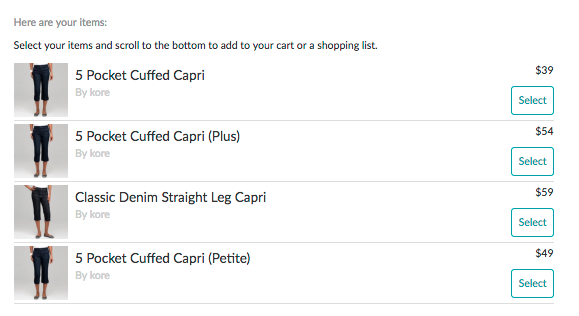
When the user clicks the link in the message, a shopping cart layout with actions report is displayed with a detailed list of search results with a shopping cart header, optional shopping cart description, and a header row as shown in the following illustration for the View Items report as a list of selectable items to add to a shopping cart.
To define a shopping cart layout with actions report
To complete the following procedure, you must have already defined a task, such as an alert task, or information task, that you want to add a shopping cart layout with actions report link to. Complete the steps in the following procedure to define a shopping cart layout with actions report.
- In Bot Builder, select the task for the Bot that you want to add a shopping cart layout with actions report link to.
Note: Only unpublished tasks can be modified.
- Click the Settings
 icon, and then click Edit.
 - On the Bot Response tab for the task that you want to add a shopping cart layout with actions report to, click the Expand
 icon for the Report Template Definition section.
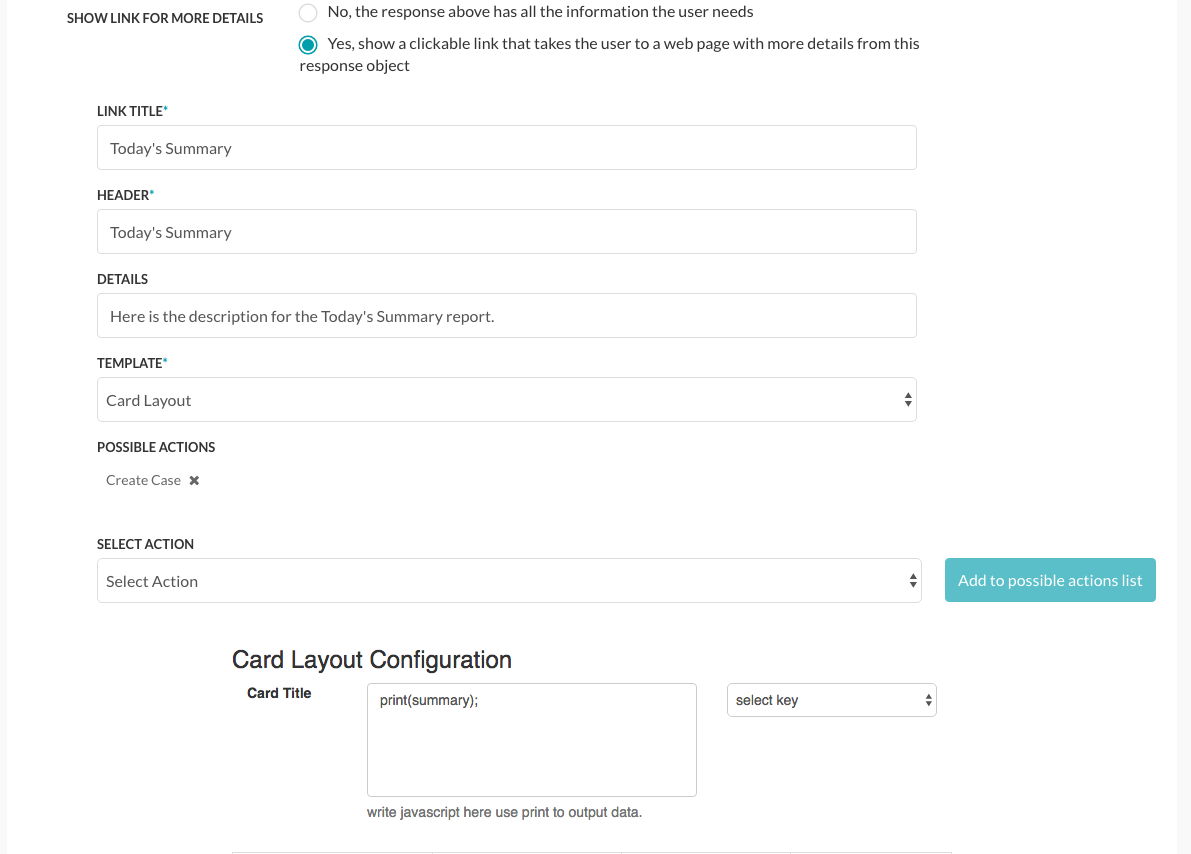
 - In the Link Title field, enter the link text to display to the end-user in the task post, for example, View Items.
- In the Header field, enter the title of the report to display when the shopping cart layout with actions report is displayed to the end-user, for example, Here are your items.
- In the Details field, optionally enter any end-user help information displayed directly below the Header in the report, for example, Select your items and scroll to the bottom to add to your cart or a shopping list.
- In the Select Action drop-down list select one action to add to the report, and then click Add to possible actions list, and then repeat to add more actions as needed. Each added action is displayed in the Possible Actions field.
- In the Template drop-down list, select Shopping Cart Layout With Actions.
- Click Edit Template. The Card Layout Configuration dialog is displayed.
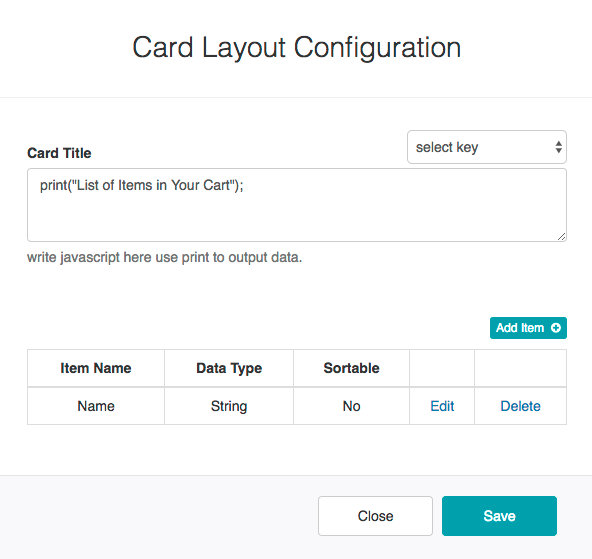
- In the Card Title text area, enter your custom JavaScript to display the title data for your shopping cart, for example, a static title such as
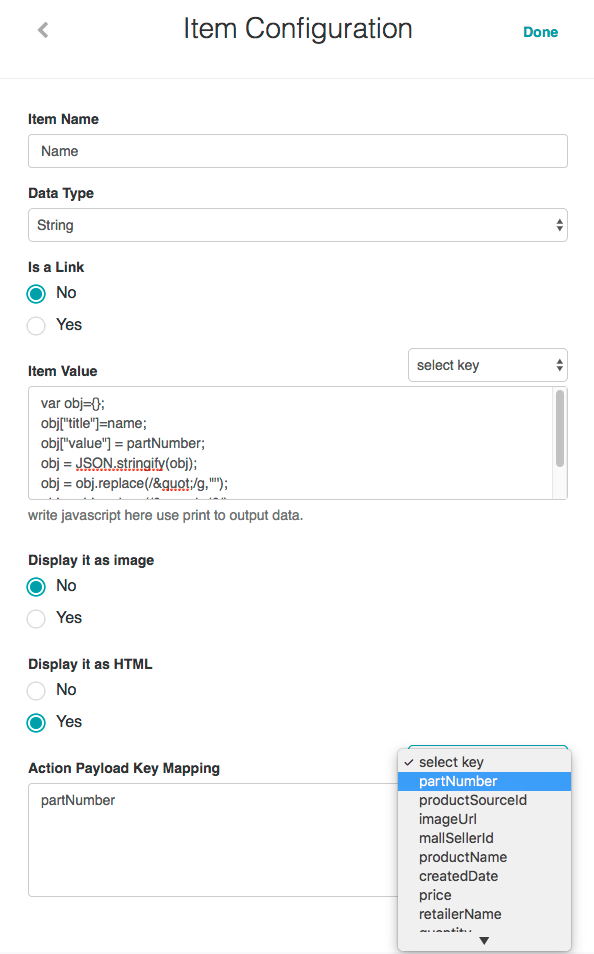
print("List of Items in Your Cart");or you can use payload keys, for example,print(summary); - Click Add Item. The Item Configuration dialog is displayed as shown in the following illustration.
- In the Item Name field, enter the first column title, for example, Name.
- In the Data Type field, select one of the following data types for the information displayed in the column:
- String
- Number
- Date
- Enable Is a link if the data in the column is a hyperlink. When enabled:
- In the Link Label field, enter the JavaScript to display the text for the link, for example,
print(Name);. - In the URL Value field, enter the JavaScript to display the data to output when the Link Label is clicked, for example,
print("https://login.salesforce.com/" + Id);
- In the Link Label field, enter the JavaScript to display the text for the link, for example,
- If Is a link is not enabled, then enter the JavaScript to display the value for the column in the Item Value text area, for example,
var obj={}; obj["title"]=name; obj["value"] = partNumber; obj = JSON.stringify(obj); obj = obj.replace(/"/g,'"'); obj = obj.replace(/&/g,'&'); print(obj); - In the Display it as an image section, select Yes if the column value is an image.
- In the Display it as HTML section, select Yes if the column value contains HTML content.
- In the Action Payload Key Mapping field, you can display a response key as a link by mapping an action response key, for example, partNumber, to the Item Value field displayed to the end-user as the item Name as shown in the previous illustration.
- Click Done. The Card Layout Configuration dialog is displayed with the new column added as shown in the following illustration.
- Repeat Steps 11 – 19 for each additional column in the report, click Save to save the column configurations, and then click Close.
- In the Report Template Definition section, click Save to save the shopping cart layout with actions report.
The table is saved Successfully saved response data message is displayed at the top of the page.