Starting Release 8.1.0, the support for the Smart Bots functionality is deprecated. You may continue to use the existing Smart Bots but you will no longer be able to create new Smart Bots. This feature will be discontinued in the upcoming releases.
Kore.ai’s Smart Bots allow enterprises to build Bots centrally and allow various teams within the enterprise to reuse and extend the Bot configurations to suit their requirements. Smart Bots expedite the bot building process by allowing new bots to inherit the configuration and tasks of pre-defined bots.
For a detailed overview, click here.
This document deals with how you can create your own Smart Bots and use it within your enterprise account.
Creating a Smart Bot is similar to very similar to Creating a Standard bot and involves the following steps:
- Creating bot,
- Defining bot tasks,
- Testing the bot,
- Configuring channels,
- Defining bot settings, and
- Publishing.
Few of the above steps need special mention in the context of Smart Bots and are discussed in this document.
Creating a Smart Bot
- Open the Bot Builder.
- Click + New Bot.
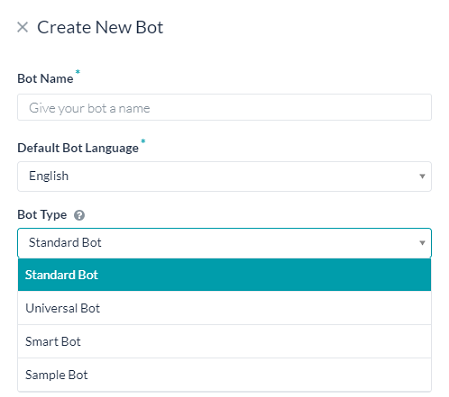
- On the Create New Bot window, enter a name, and set default bot language. From the Bot Type drop-down list, select Smart Bot.

- It opens the Bot Tasks window of the smart bot.
- Define your Bot as you would any Standard Bot by adding tasks, flows, test and improve.
Configure Bot Settings
Some Bot Settings that need to be configured specially for a Smart Bot are mentioned in this section.
Setup Options for Bot Variables
Bot Variables allow you to define variables centrally and reuse them across bot definition. For example, during bot building, developers typically use staging endpoints for testing. You can set those endpoints as variables. When you export or publish the bot, you can replace such variable values with the production endpoints. Defining Bot Variables remains the same as Standard Bots. Refer here to learn how to configure the Bot Variables.
Global Variables of Smart Bots will have an additional option to define the visibility or usage of variables during inheritance:
- Pre-Populated: Use this option to allow the child bot developers to see and edit the variable value in the Setup Variables tab while inheriting the bot.
- Hidden: Use this option when you do not want to allow the child bot developers to see or edit the variable value while inheriting the bot. They can, however, view the name and value of the variable on the Bot Variables page after inheriting.
- Ask on Install: Use this option to get the value of the bot variable from the child bot developer while inheriting the bot. Developers of the inherited bot cannot see the variable’s value set up in the smart bot and they cannot complete inheriting the bot without entering a value.
Smart Bot Settings
Configuration settings required to inherit the smart bot can be set from the Smart Bot Settings tab in the Bot Settings. These settings serve as an aid in the discovery, preview, and installation of the Smart Bot.
Following are the steps to configure them:
- Hover over the side navigation panel of the bot and click Settings > Smart Bot Settings.
- Configure the following settings:
- Allow User to Test the Bot in Marketplace: This option allows the user to try the smart bot from the marketplace before installing it.
- Yes, allow users to try using developer authorization: Use this option to allow the Try option for this bot, so your developers can chat with this bot by logging into your account’s marketplace.
- No, do not enable try capability: Use this option to disallow the Try options for this bot in your account’s marketplace.
- Smart Bot Description: Enter a description for the Smart Bot to show it in your account’s marketplace.
- Configuration Instructions: Instructions can be given to the developers using the Smart Bot for installing the same. This should include details like the list of tasks available and their purpose, bot variables that need to be populated, and so forth. The purpose of these instructions is to ensure that the developers inheriting this bot can put it to maximum use. Developers can see these instructions while inheriting the bot. You can either upload a PDF file containing the instructions or enter it in a plain text format.
- Configuration Instructions URL: Additionally, you can provide a URL, if any, for the configuration instructions details.
- Allow User to Test the Bot in Marketplace: This option allows the user to try the smart bot from the marketplace before installing it.
- Save the settings.
Inheriting a Smart Bot
Bot developers can view and install a Smart Bot published within their account.
NOTE: In order for the developers to see and inherit your smart bot, you need to publish it. Refer here for details on Publishing the Bot.
Steps to Inherit a Smart Bot
- Open the Bot Builder.
- On the top-right side of the landing page, click New Bot.
- Select the Install Smart Bot option. The Select Smart Bot window opens.
- On the Select Smart Bot window, search or scroll to the bot you want to inherit. Hover over the Smart Bot’s name and click Install. The Configure Smart Bot window opens.
- The Bot Name field is auto-filled with a suffix added to the Smart Bot name. Replace it with a name of your choice.
- If you want to add a custom icon for the bot, select Custom Icon in the icon field and upload the file.
- Update Preference can be set, which decides how the updates to the parent bot are to be handled by the child bot. When there are changes to the parent bot, the updates to the child bot can be made to the published version or the in-development version of the child bot.
- Add bot definition updates directly to published version when available is the default setting whereby all the updates get inherited by the published version of the child bot. In case the published version is not available, then the updates are applied to the in-development version
Note that this setting overrides the bot setting of ‘hold all deployment requests and publishing only on explicit approval from admin’ from the Admin Console. - Always add bot definition updates to the in-development version will apply the changes to the in-development version of the child bot. If the in-development version is not available it is created in the locked inheritance state. Note that if any tasks or nodes are unlocked in the in-development version the same will be applied to the published version.
Note: This setting can be modified later from the Advanced Settings of the child bot.
- Add bot definition updates directly to published version when available is the default setting whereby all the updates get inherited by the published version of the child bot. In case the published version is not available, then the updates are applied to the in-development version
- Next, click the Setup Variables tab. It shows the list of variables that are configured with Pre-Populated or Ask on Install settings. Enter the values for Ask on Install variables. Optionally, make edits to Pre-Populated variables if any.
- The Configuration Installation file opens. Read the instructions carefully and then click Next.
- The child bot gets created, and the Bot Tasks page of the bot opens.
The child bots can use the Smart Bot as is or extend the inherited functionality by adding tasks and knowledge queries, as well as localize relevant parameters using variables. The Inheritance Scenarios section below provides the list of elements that get inherited by the child bot and the conditions under which the inheritance continues or gets overridden.
Inheritance Scenarios
In a child bot, the inheritance applies in the following ways:
- No inheritance where some elements do not get inherited by the child bot;
- One-time inheritance wherein inheritance is a one-time process and any further changes to some bot elements in the parent smart bot will not be inherited by the child bot; and
- Continued inheritance where changes to some bot elements in the parent smart bot will be inherited by the child bot. Update Preference settings configured at the time of bot installation or later from the Advanced Settings tab will decide which version of the child bot – published or in-development – will get the updates.
Disable Inheritance: Inheritance can be disabled at the bot level, from the Advanced Settings of the child bot using the Smart Bot Inheritance option. This option will permanently delink the child bot from the parent smart bot and should be used with caution.
The following sections show the list of bot elements with no, one-time and continuous inheritance and the actions that unlock the inheritance.
Bot Elements which are not Inherited
- Any Configured Channels
- Any apps created in the Smart Bot for connecting to BotKit or Web SDK
Bot Elements with One-Time Inheritance
- Entity Synonyms
- Bot Settings
- Auth Profiles
- Default Dialog
Note: While the Entity Synonyms of existing bot tasks have a one-time inheritance, the NLP entries of any new task created in the parent bot will get inherited by the child bots.
Bot Elements with Continued Inheritance
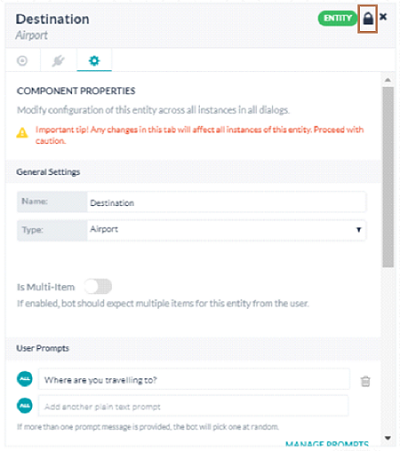
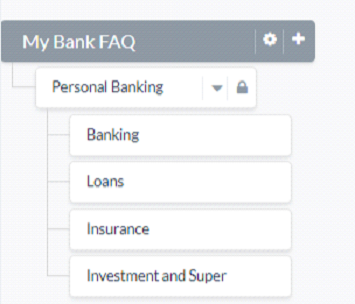
Bot Tasks inherited by the child bot have a continued inheritance which means that any published changes to the bot tasks in the parent automatically reflect in the child bot. You can override or “unlock” the continued inheritance of bot elements by editing a certain portion of them. The following table shows the list of bot elements that acquire a continued inheritance and provides the steps to unlock the inheritance.


