GETTING STARTED
Process Assistants Overview
Concepts and Terminology
Quick Start Guide
Exploring the Process Apps Store
Building Process Apps from Scratch
What's New
Current Version

CONCEPTS
Flow Builder
Triggers
Logic
Introduction
Split
Merge
GoTo
End
Tasks
Introduction
Human Task
Script Task
Integrations
Introduction
Connect to Data Table
Connect to API
Events
Call a Subflow
Notify
Delay
Forms
Form Creation
Form Components
Form Actions
Simulate
Publish
Self-Service Portal
Dashboard

SETTINGS
General Settings
Members and Roles
Versioning
Channels
Bot Permissions
Alerts
Import & Export
Change Logs
Delete App

HOW TOs
Creating a Process App
Importing and Exporting a Process App
Sharing a Process App with Co-Developers
Configuring a Process App
Defining a Digital Form
Defining a Flow for a Process App
Defining Triggers for a Process App
Using Stencil to Define a Logic for a Process App
Using Events for a Process App
Adding Access Controls to a Digital Form
Calling a Subflow from Process App
Deploying a Process App
Configuring Channels to a Process App
Publishing a Process App
Analyzing a Process App
Stimulating a Process Instance
Creating and Publishing a Process App
Viewing a Process App Errors
Viewing Change Logs Made to Process App Definition
Creating or Restoring a Version of Process App
Adding Bot Permissions to let Bot Trigger the Process App

ADMINISTRATION
Introduction
Assistant Admin Console
Administration Dashboard
User Management
Add Users
Manage Groups
Assistant Management
Enrollment
Invite Users
Send Bulk Invites
Import User Data
Synchronize Users from AD
Security & Compliance
Using Single-Sign On
Security Settings
Cloud Connector
Billing
  1. Home
  2. Forms
  3. Form Components

Form Components

You can define a Digital Form by adding components and configuring their properties.

  • You can drag and drop the components available on the left pane to the canvas and configure their properties to build the form. For details of the components & their properties, see below.
  • Scroll through the list to search for a given component.
  • View in a grid format.

Basic & Advanced Components

The following is a list of available components and their properties:

Component Description Sample
Basic
Text Field – Used for single-line input.
Text Area – Used for multi-line entry.
Number – Used for numerical entries.
Radio Button – Used as a selection option from a given list.
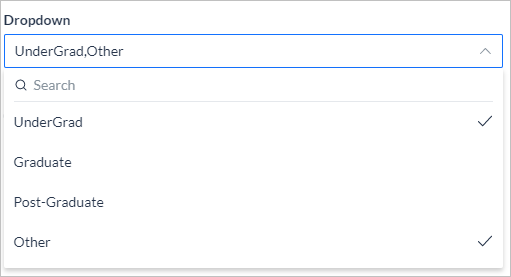
Drop-down – Used as a selection option from a given list; can be multi-select.
Checkbox – Used for multi-select option from a given list.
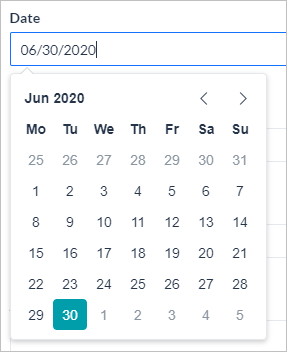
Date – Used for date entries, gives a date picker for the user to choose the date.
Date & Time – Used for date and time entries, give a date and time picker for the user to choose the date and time.
Use the Date component and set the Time option to yes; choose from 12- or 24-hour format.
Phone Number – Used for phone number entries, allows the user to choose the country code.
Email – Used for email address entries, validates for xxx@uuu.com format.
Toggle – Used for switching between two values, ideal for yes/no type of inputs.
Address – Used for address entries.
URL – Used for web URL entries, validates for xxx.com format.
Range Slider – Value selection between specified min and max values; can be represented as a percentage.
Advanced
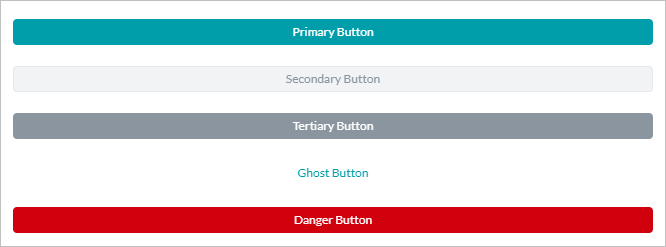
Button – Used as a clickable component to submit, or reset, or open an external URL on the form. Choose from Primary, Secondary, Tertiary, Ghost, or Danger.
Label – Used to display a static text box, no action is required from the user.
Protip – Used to mark important information for the end-user, no user action required.
Note – Used to mark information for the end-user, no user action required.
Menu