This channel enablement flow is modified as per the changes implemented by Facebook post v7.2 of the product.
To add the Workplace by Facebook channel to your bot, you need a developer portal Facebook account to configure the connection between Facebook Workplace and Kore.ai. Kore.ai application must be authorized to send and receive messages from the Workplace by Facebook channel.
Add Workplace by Facebook Channel
To complete the following procedure, you must have an admin account in the Facebook Workplace Developers Portal (https://<Your Domain>workplace.com/work/admin).
- In Bot Builder, under the Bots section, click the bot you want to enable the Workplace by Facebook channel.
- On the Channels tab, click the Workplace by Facebook icon.
- The Workplace by Facebook Channel page is displayed.
- Go to the Configurations tab:
- In the Communication Mode section, select one or both of the following:
- Allow communication with a bot in a Workplace Group
- Allow communication with a bot through a Work Chat
- In the Manage Permissions section, set the following as per your requirements (click here for more on the permissions):
- Message any member – To send messages to any group member. This permission is selected by default and is mandatory hence not editable.
- Mention bot – Needed when the bot is mentioned in a post, to see the post and to reply to comments. This permission is selected by default and is required for the bot to respond to users in groups.
- Manage group content – Required to post and comment in groups. This permission is selected by default and is required for the bot to respond to users in groups.
- Create link previews – Needed to see links added to posts in order to display a preview for certain domains.
- Read user email – Required to see any group member’s email address.
- Read work profile – Required to see any group member’s complete profile, including phone number, department, and location.
- Read org chart – Needed to check a group member’s profile to see who they report to and who reports to them;
Note: You are advised to set the permissions correctly after evaluating the above-mentioned link carefully. Managing the permissions for your bot after installing the Kore.ai application on your workplace account needs you to uninstall the application on the workplace account and re-authorize it in the bot platform.
- In the Communication Mode section, select one or both of the following:
- Click Authorize.
- You are redirected to Workplace by Facebook page.
- Log in to your Facebook Workplace admin account.
- Click Add to Workplace to generate a page access token to enable access for the Kore.ai platform.
- Click Customize to provide the following details for the instance of Kore.ai application installed on Workplace by Facebook account:
- integration logo
- name
- description
- The permissions needed by the Kore.ai bot is selected based upon the configuration given in step 4.
- Select the groups to which the bot needs to be added and click Add to Workplace.
- Once the instance of Kore.ai application is added to your Workplace by Facebook account, you are redirected to Kore.ai Bot Builder.
- In Bot Builder, from the Configuration tab, click Yes in the Enable Channel section; and click Save.
- The bot may require your Bots Admin approval and assignment before it is available to any users.
Edit the Channel
To edit the Workplace by Facebook channel,
- Hover over the channel to modify, and then click the Settings
 icon displayed to show the command menu displayed in the following image.
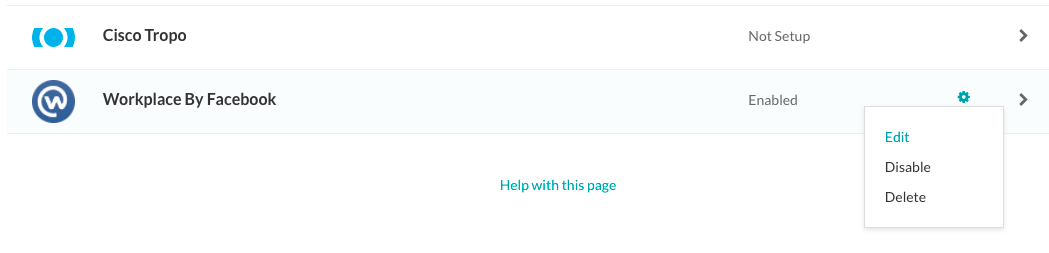
Select one of the following commands to modify the channel:
- Edit – Click to open the Workplace by Facebook channel setup page.
- Disable/Enable – Click Disable to temporarily disable the use of the Workplace by Facebook channel for your bot. When the channel is disabled, click Enable to enable the use of the Workplace by Facebook channel.
- Delete – Click Delete. On the Delete Confirmation dialog box, click OK to permanently delete the bot channel configuration.
Warning: This operation is permanent, and cannot be undone.