On the Enrollment > Bulk Invite page, you can use a text file that contains email addresses of the users you want to join your account. This option is particularly useful to enroll a large number of members.
The import file should be a basic text file with one email address per line and saved as a .txt file format. After you create a bulk invite file, you need to upload the file.
About Bulk Invites
When using a bulk invite file to add new users to your account, the following needs to be kept in mind:
- Entries with an invalid email format are ignored.
- Invitation emails are sent to each email address which was successfully imported.
- Invites are not sent to existing account users.
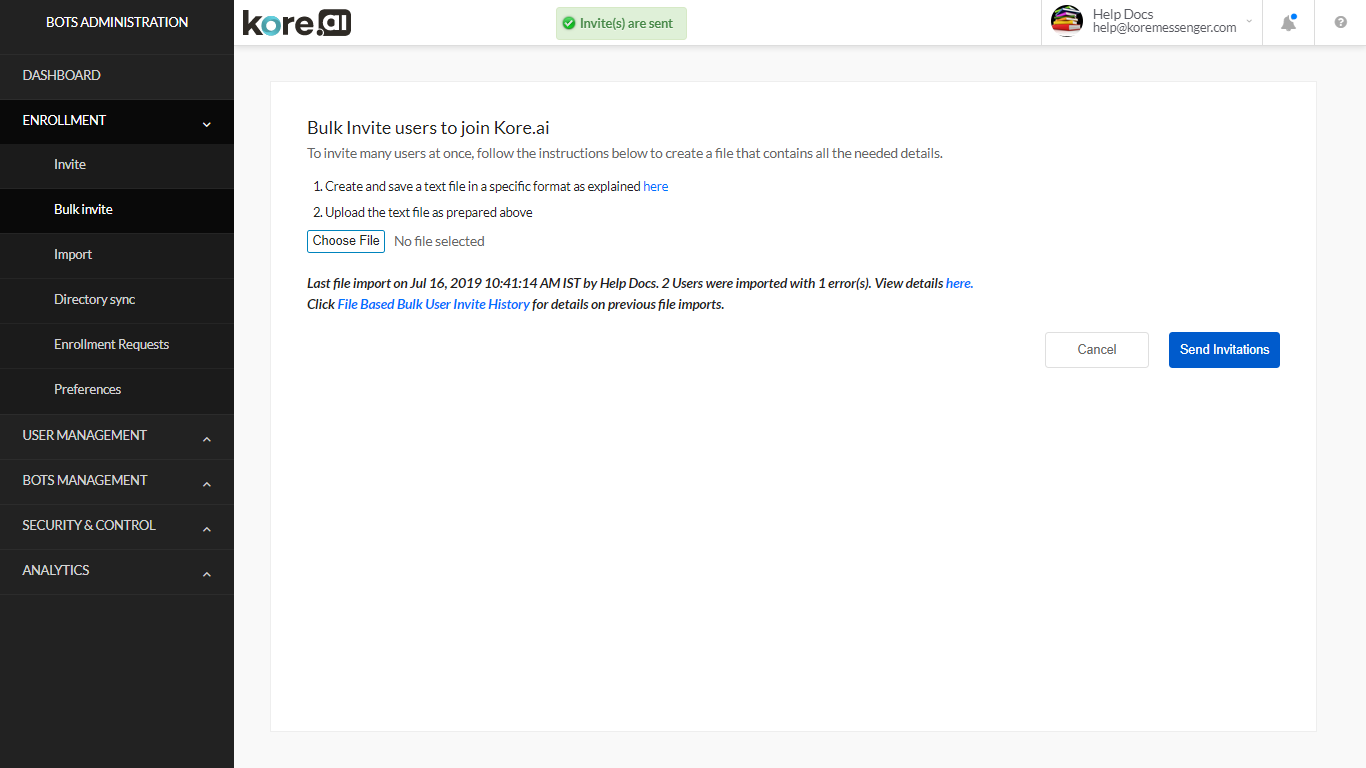
The following illustration is an example of the Bulk Invite page in the Enrollment module.
Create a Bulk Invite File
You can create an invitation file with all the email addresses of the users you want to add to your Enterprise Bots Platform account.
To create a bulk invite file
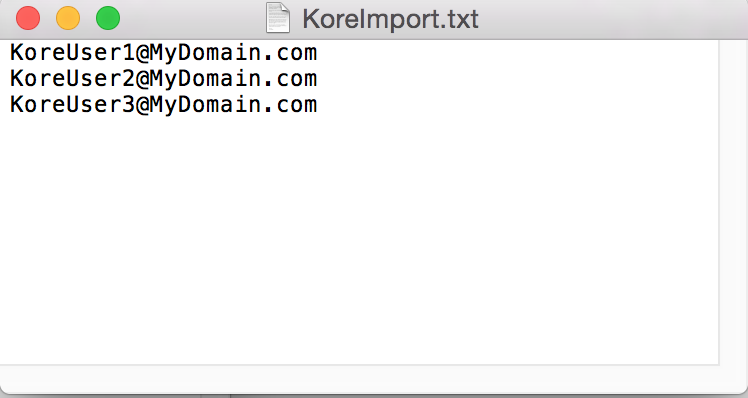
- In a text editor, enter a complete email address on each line or in a comma-separated list as shown in the following example:
For a .txt file:
Kore.aiUser1@kore.com
Kore.aiUser2@kore.com
Kore.aiUser3@kore.com - Save the bulk invite file as a .txt file, for example, Kore.aiImport.txt.
- After you create a bulk invite file, you can upload the file to invite your users.
The following image is an example of text editor used to create a bulk invite file that can be uploaded with your custom list of users to invite to your Kore.ai account.
Upload a Bulk Invite File
This topic describes how to upload a file that contains user email addresses to invite the users to become Kore.ai users in your account.
To upload a bulk invite file
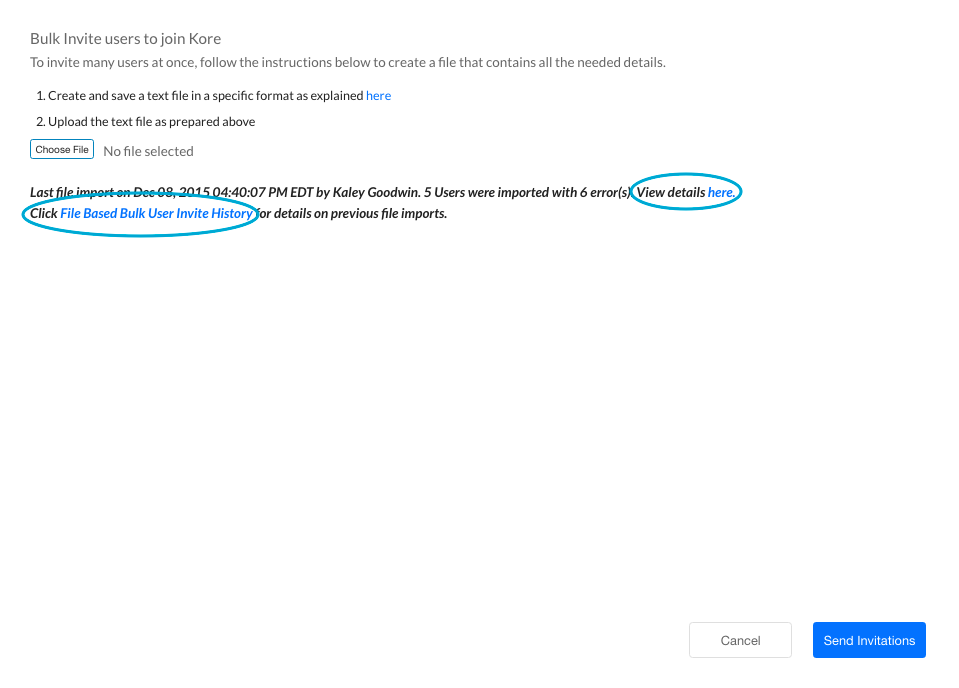
- In the Enrollment module, on the Bulk Invite page, click Choose File.
- Navigate to your bulk invite file created as mentioned in the previous section, and then click Open. The filename is displayed to the right of the Choose File button.
- Click Send Invitations. The status of the import is described immediately following the Send Invitations button.
- Click the View details here link to review the details of the import. In addition, you can click the File Based Bulk User Invite History link to review import statuses from prior bulk invite imports.
The following image shows the location of the upload details.
View the Results
You can review the bulk invite import operation results on a per-user basis if needed.
To view results of a bulk user import
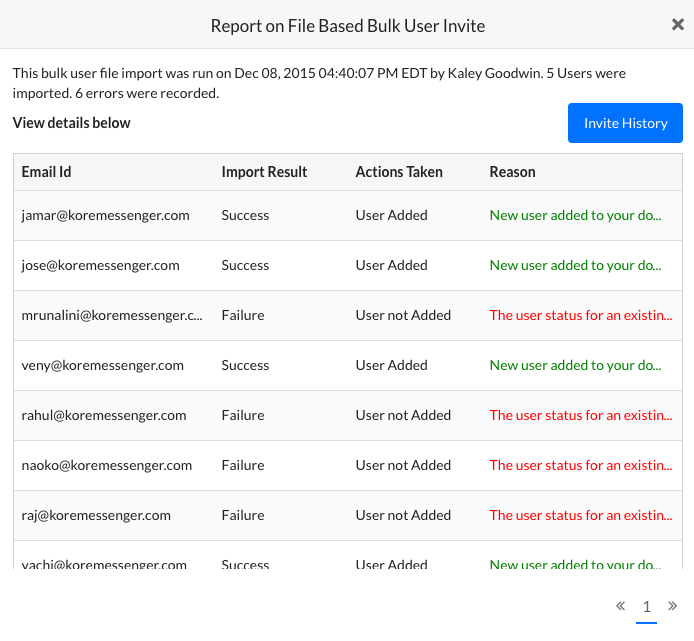
- In the Enrollment module, on the Bulk Invite page, click View details here.
- The Report on File Based Bulk User Invite dialog is displayed as shown in the following illustration.
Click Invite History to open the History of Bulk User Invite dialog to select a report from a previous date.
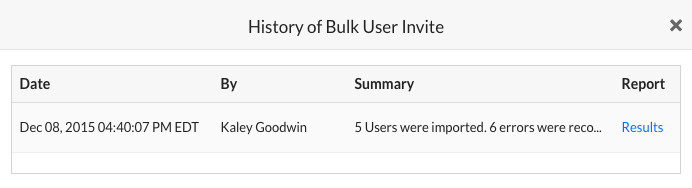
View History
You can review all historical bulk invite import operations along with the results of that import.
To view results of a bulk user invite
- On the Enrollment > Bulk Invite page, click File Based Bulk user Invite History.
- The History of Bulk User Invite dialog is displayed as shown in the following illustration.
- To view the results of an import, in the Report column for the import that you want to view, click Results.
- The Report on File Based Bulk User Invite dialog is displayed as shown in the following illustration.